6 Effective RV Storage Tips While You’re On The Road

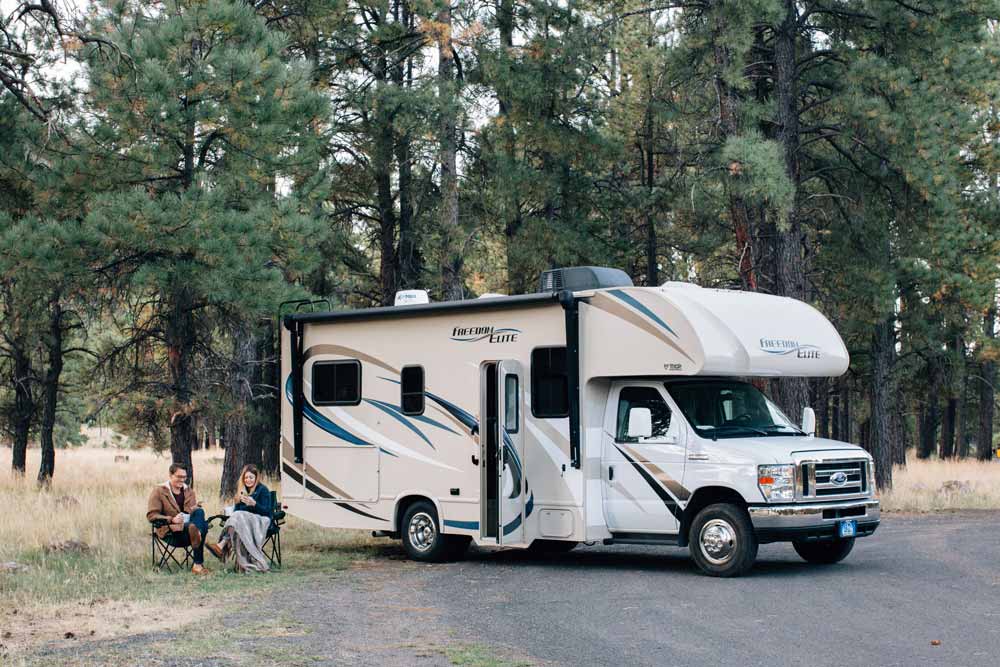
For many, a recreational vehicle is an attractive travel option for its convenience and comfort, and even as a more economic alternative to staying in a hotel, especially when travelling with family. For others, an RV also provides a full-time or temporary home.

However, space is limited when travelling in an RV. No matter the size of your RV – whether you own a pop-up camper or a luxury motorhome – you’ll want to get organized and pack efficiently to make the most of your travel time! Here are six storage tips to make the most out of your RV space and get organized before hitting the road.

1.  Baskets Are An RV Must-have

Before going basket shopping, make sure to measure all your shelf space, cubbies and any empty space in your RV. Baskets come in many sizes, shapes and materials, so knowing the space you have will make it easier to choose the best baskets for your RV.

Sort your supplies into categorized baskets. For example, you can place your dishes and bowls into one basket, your cups, mugs and straws in another and your cutlery in yet another basket. Besides keeping your place tidy, you’ll be able to bring these items to the table in one trip.

You can make the most of your space by fitting baskets in tight or underused spaces, such as the space above your cupboards. Here you can place items that you don’t need every day, such as toys, board games and other outdoor tools and supplies.

2.  Line Your Drawers and Shelves

When getting ready for your trip, we recommend you place liners on all your storage surfaces, including shelves and drawers. This will not only give your surfaces a fresh, clean look, but they will also help prevent spills and will make your life easier during clean-up.

Liners provide an extra anti-slip layer to your surfaces to avoid items sliding and falling while the vehicle is moving. If something falls or breaks, cleaning will be as easy as removing the liner carefully and replacing it with a fresh one. Liners come in many patterns and colours, so you’ll surely find the ones that fit your style!

3.  Make The Most of Your Pantry Space

Get your grocery list ready for a shopping trip before your travels. Stock up on staples such as canned goods, dry goods such as nuts and cereal, and, of course, yummy camping snacks!

To maximize your pantry space, place the taller items at the back of your pantry and smaller items in the front. Wired baskets or clear bins are great to store smaller items and bagged items to prevent them from moving around while the RV is in motion. Boxed goods like crackers and snack bars can be stored at the top of your pantry, while heavier items like cans and bottles of water should be placed at the bottom.

4.  Customize The Space to Your Needs

When travelling, you won’t have fantastic services like Wi-Fi or cable everywhere, so it’s essential to bring movies for entertainment on a rainy day – especially for the kids! However, bringing DVDs in their cases can quickly stack up and use up valuable space. Instead, you can store your DVDs in a wallet case which can be stored nicely along with some books and magazines.

Having a command centre for the family can help during your trips! You can set it up on the fridge if it’s magnetic. Otherwise, you can use Command strips on a pantry door or wall. Using a whiteboard with magnets or a cork board with thumbtacks will help you keep important information, such as phone numbers, itinerary, addresses and other notes about your trip, while adding a bit of homey décor.

5.  Maximize Your Bedroom Space with Labeled Containers

Storage bins and tubs work wonders for the space under your bed. Here, you can store your bedding, linens and blankets, cleaning and bathroom supplies, outdoor tools and gear, and even extra shoes and clothing.

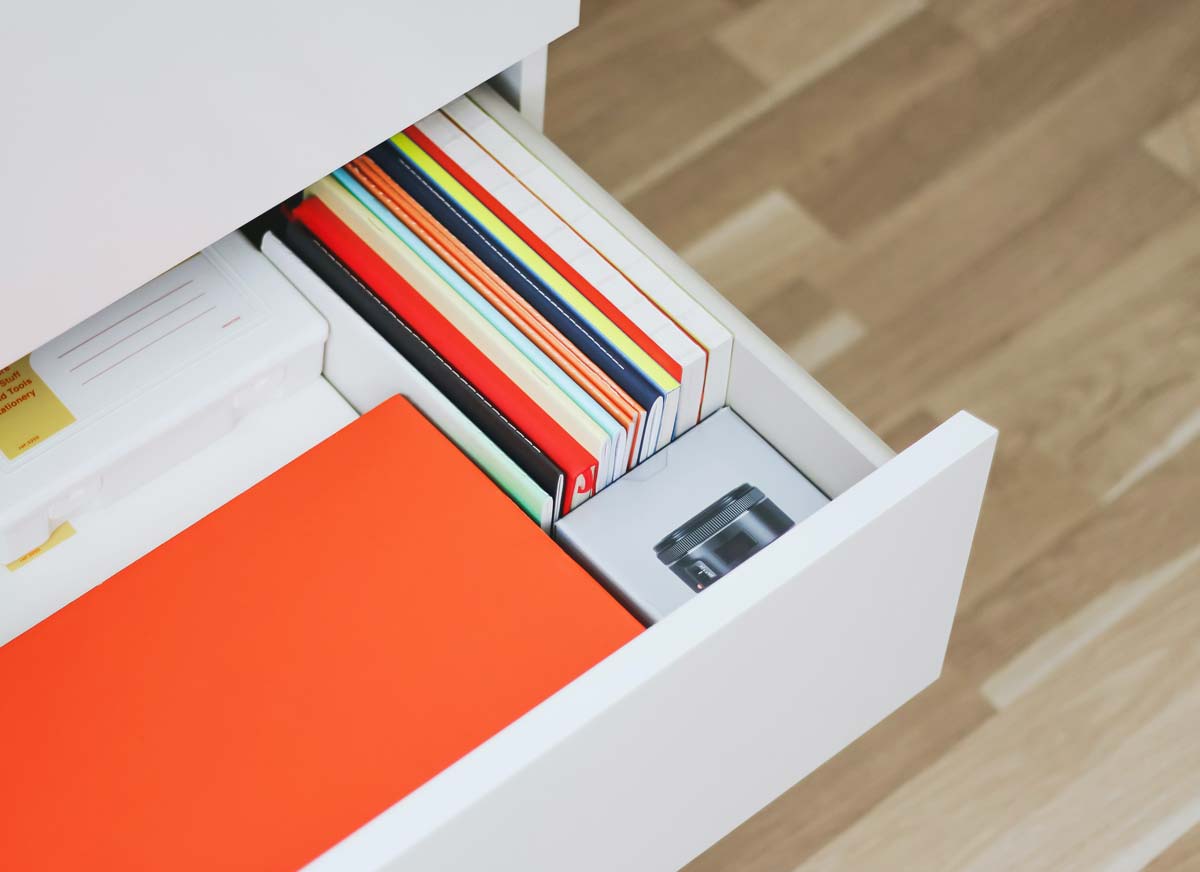
Taking the extra step to label and tag your bins, tubs and baskets will be a time saver. Doing this will help you identify the contents of each storage container and quickly find what you’re looking for. This is especially helpful for clothing if you don’t have a dresser, or if you want some extra space in your closet. Labeling your containers will also make cleanup easier – you won’t have to spend hours figuring out what goes where!

6.  Use Self-storage to Organize Your New RV Home

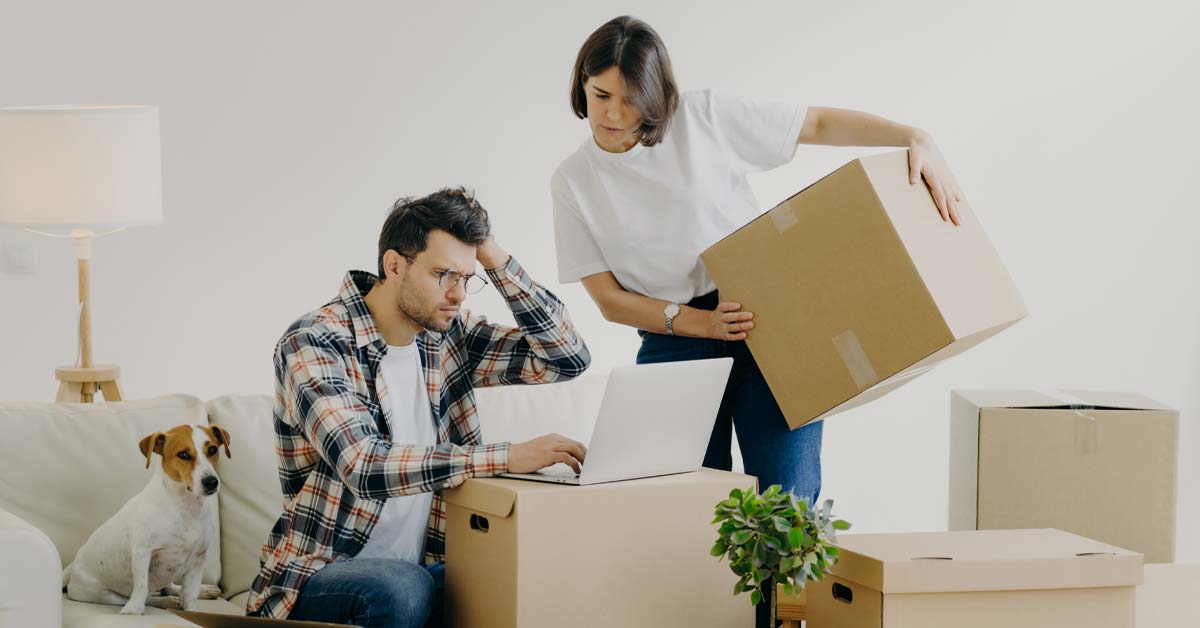
Making the most of your new RV home space can take some time and practice, especially considering the volume and weight limitations. When you’re planning your first few trips, it might be overwhelming to sort out what you need and what you don’t, and sometimes, you’ll need to leave some of your possessions behind. Using self-storage units will ensure your items are safe, while making it easier for you to organize and decide what to take on your next trip.

At U-Lock Mini Storage, we have storage facilities across Greater Vancouver and Vancouver Island. Our facilities include self storage Victoria, self storage Parksville, self storage Nanaimo, self storage Burnaby, self storage White Rock and Surrey, and self storage Chilliwack. Contact us if you have any questions!

Whether you are planning a long-term trip, or a quick getaway, organizing your RV home and maximizing your limited space can be a challenge, but these simple tips will get you off to a good start!

4 Tips for Organizing Your Garage Before Winter

As winter is only a few months away (yikes!), it is a good time to get your garage organized before it finally arrives. Here are five tips you can use to organize your garage before winter:

Consider what you actually want to store in your garage

For many homeowners, a garage is the perfect storage for a car, along with assorted yard and sporting equipment. But we don’t all have to use a garage in the same way. What is it that you actually need in your garage?

If there are items in your garage that you don’t need, consider donating them or storing them in a self-storage unit. If you have old family photos, clothes that you rarely wear or items that have sentimental value, you can keep them in a secure storage unit for a long term.

At U-Lock Mini Storage, we have storage facilities across Greater Vancouver and Vancouver Island. Our facilities include self storage Victoria, self storage Parksville, self storage Nanaimo, self storage Burnaby, self storage White Rock and Surrey, and self storage Chilliwack. Contact us if you have any questions!

Do a pre-winter cleanup

Once you have cleared up your garage, it’s time to do a thorough cleanup before winter comes! In many cases, garages can get out of control and disorganized during the winter months because when it is cold or rainy out, we may be less likely to spend enough time in the garage to keep things tidy or organized. Use the last weeks of summer or the cooler dry days of fall to clear the clutter from your garage and give it more purpose. This way, your garage can remain clean and useful all winter long.

Use all the available space

Many times, our garage floors are full; yet the walls and ceilings are not utilized to their fullest potential. Walls and ceilings can offer an abundance of additional storage that is otherwise wasted.

Pegboards, lattice with “s” hooks, wall hooks and wall-mounted or free-standing shelving can maximize the space you have, and still leave you floor space for the car, craft tables or whatever you would like to use the middle of your garage for. There are customized garage organizing systems you can buy, but you can certainly find plenty of DIY options to help you organize every available inch, for less.

You can also use shelf standards, which hang from a single track affixed to wall studs. These systems can bear the weight of heavier objects; standards, hooks, shelves and organizers can be relocated easily.

Use jars, bins and cabinets

Invest in a few jars, bins and cabinets to help store items in your garage while minimizing the amount of space used to store these items. Once you place items such as old clothes or document files in a bin or cabinet, you can store these containers vertically, which significantly limits the amount of used space in your garage.

5 Tips for New Parents to Organize Baby Clothes

There are a million things on a new parent’s mind when the time finally comes to bring their baby home. As organized as you may think you were before the big day, there are so many unexpected challenges and changes that come up once you get into a routine at home. For example, maybe keeping your home clean and organized while caring for a newborn is more challenging than you had expected. Moreover, folding and organizing clothes may take up a longer time than anticipated. To help you keep your home organized, here are four tips you can use.

Keep daily used items close to the changing table

In the first few weeks, your baby grows so much. You may feel like they are constantly growing out of their clothes and onto the next size up. If your changing table is on your dresser, or close to it, keep those current sizes in the top drawer. If you change your baby in another room like the living room or your bedroom, keep a basket close by with all their current clothing and accessories for easy access. This way you won’t struggle to search for something that fits.

Use size organizers in the closet

Adding size labels to your closet is super helpful when organizing your baby’s clothing, especially after your baby shower, when you are overwhelmed with the amount of clothing your little one received. Additionally, hanging items are easier to see and grab rather than folded ones.

Most baby clothes already come on plastic hangers that are marked with their sizes, so all you need to do is hang them right up in the closet with the corresponding size organizer. Unfortunately, a lot of those cute clothes you got as gifts will end up unworn, with the tags still attached, if the size or season was wrong. Organizing clothing this way allows you to pinpoint which items they didn’t end up wearing so that you can make some returns if necessary. A trick for easy returns is to keep all of the gift receipts in the pockets or attached to the hanger.

These little plastic discs may not seem like much but can make a huge difference. They are inexpensive, fit most standard closet racks and can be found on most shopping websites.

Organize by item type

Keep socks with socks. Dedicate a section of the baby’s dresser to short-sleeve clothing and another to long-sleeve clothing. This way, If it’s a warm day, you’ll know exactly where to grab something with short sleeves; if it’s chilly out, you’ll easily be able to reach for the long-sleeve onesies. With a child that needs your attention, every second counts.

Keep a hamper close to your changing table

With a hamper within range, you can take the dirty clothes off the baby and toss them directly into it easily. As a new parent, your hands are always full – literally. You’ll realize it’s amazing what  you can accomplish with one hand while the other holds the baby. Keeping everything you need close by makes navigating through the day that much easier.

Use a storage unit

To keep your home organized and clean, you can first declutter and remove all the unnecessary items from your home and move them into a storage unit. You can rent a storage unit for the long-term and access items in the storage unit whenever you need them.

If you have a lot of stuff that needs to be stored, you can choose a storage unit size that’s a bit bigger, such as a 5×10 storage unit. If you only have a few items to store, go with a closet-sized storage unit, such as a 5×5 storage unit.
At U-Lock Mini Storage, we have storage facilities across Greater Vancouver and Vancouver Island. Our facilities include self storage Victoria, self storage Parksville, self storage Nanaimo, self storage Burnaby, self storage White Rock and Surrey, and self storage Chilliwack. Contact us if you have any questions!

4 Tips for Cleaning and Organizing a Closet

Is your clothes closet as clean, organized and streamlined as you’d like it to be? Do you find yourself repeatedly wearing only two or three items from your overstuffed closet? If you are like most people, your closet contains things that no longer fit or items you no longer like to wear. When your closet is disorganized it makes finding what you actually like to wear a frustrating task. As seasons change, it’s a great time to learn how to clean a closet and organize your storage space from top to bottom!

So set aside a long afternoon, grab the following supplies, put on your tunes and let’s get started!

  1. Take out everything from your closet first

It might seem like a drastic measure, but the best way to do the job right and be happy with the end result is to actually remove everything from the closet. If it’s been a while since you’ve cleaned your closet, you’ll want to wear a dust mask to avoid headaches or allergies. It’s amazing how much dust accumulates in a closet!

  1. Donate your clothes

Don’t second guess yourself – remove everything you haven’t worn in the past year and take it to the car to be dropped off the next day at your favorite charity. While there is a possibility you’ll give away something you wish you had down the road, in the long run it will have been worth it. Cleaning out a closet will make future decisions much easier. Chaotic closets end up costing us money! Being more organized will help you know what you actually need to buy going forward and you’ll make less clothing mistakes.

  1. Rent a storage unit

If you have some outfits that you LOVE but only wear seldomly for special occasions, you can rent a self storage for either short-term or long-term to store these outfits. There are a variety of storage unit sizes for a person to choose from. If you’re looking to store a couple of clothing items, you can go with a 5×5 storage unit which is approximately the size of a walk-in closet.

At U-Lock Mini Storage, we offer storage units across Greater Vancouver and Greater Vancouver Island. We offer self storage Burnaby, self storage South Surrey and White Rock, self storage Chilliwack, self storage Nanaimo, self storage Parksville, and self storage Victoria. Book a storage unit today! Contact us if you have any questions.

  1. Hang up the clothes you actually wear

Only hang up clothes you wear so that your closet is occupied with outfits that you actually wear. Doing this helps you deter hoarding outfits that you rarely wear and making a huge mess in your closet! If you have some outfits that you’re on the fence about whether you’ll wear them on the regular, we’d recommend storing these items in a storage unit to avoid clustering your closet with outfits that you seldomly wear.

3 Tips and Tricks For Living in a Studio Apartment

Living in a studio apartment can be challenging since the bedroom and living room are combined. Depending on the space’s size, you have to find ways to live in a studio apartment effectively. We have come up with some valuable studio apartment living tips that will help you re-imagine small spaces.

Here are three tips and tricks for living in a studio apartment.

  1. Rent a storage unit

Since a studio apartment is minimal in space, it’s ideal to keep as few items in the apartment as possible. To do so, we recommend renting a storage unit. By renting a storage unit, you can store items that you seldom use or use them seasonally such as snowboarding equipment or camping gear and access these items whenever you need them.

At U-Lock Mini Storage, we offer storage units across Greater Vancouver and Greater Vancouver Island. We offer self storage Burnaby, self storage South Surrey and White Rock, self storage Chilliwack, self storage Nanaimo, self storage Parksville, and self storage Victoria. Book a storage unit today! Contact us if you have any questions.

  1. Buy multi-purpose furniture according to your lifestyle

Create a space where you can hang out with friends, watch TV, and work on your laptop. To do this, think multipurpose. Instead of buying a desk, a TV stand, and a bookshelf, install wall shelving that you can use for all three. Instead of buying a huge, bulky couch, get a couple of smaller armchairs. But before you buy anything, think of how you’re going to live in space.

Here are some questions to ask yourself:

  • Do I need to work in this space? If so, how can I fit in a desk or use another area (like a dining table) to serve this purpose?
  • Realistically, how many people will I have over for get-togethers? Make sure you have space for everyone to sit. If you only have one or two people over, a larger scale two-seater sofa should suffice. If you have more, think about a smaller couch in addition to floor poufs and accent chairs.
  • Am I making the space do too much? Is there some functionality you could give up to make your apartment seem more streamlined? Perhaps you don’t need to have a gym studio in the corner. Maybe you can do your work at a coffee shop instead of in the apartment. Sometimes, a compromise can help your home base feel more serene.
  1. Declutter kitchen utensils and clean your kitchen often

In a studio apartment, your kitchen is probably going to be one of two things: a strip of cabinets against one wall of the living room, or a room so small there’s hardly enough space to open the refrigerator door all the way. How can you make it work? Consider doing the following.

  • Only buy essential kitchen utensils.

Remember that you don’t really need a tofu press, and twelve different knives aren’t necessary. Don’t let your cabinets fill up with boxes of pasta and cans of vegetables that you’re never going to use.

  • Clean your kitchen routinely

Whatever you do, do not let kitchen messes build up. Wash the dishes as you use them, throw out expired food right away and wipe down all your surfaces after cooking.

4 Tips for Cleaning Your Home

When we want to purchase other items for our homes, it’s usually because we think we need those items to make our lives better. That said, If we take an honest look, these extra items end up being the cause of additional clutter and stress in our lives. It’s become almost second nature in our culture to think we are going to enhance our life with something new when inadvertently we have made it more complicated.

If you are looking for ways to clean your home, here are four simple tips you can use.

  1. Avoid impulse purchases

When you can, don’t go to places that will cause you to buy more stuff to deal with or tempt you with more decisions to make. Try consolidating shopping lists and trips so you don’t make multiple visits in a week. It’s amazing how much less you buy and how much easier your subsequent decisions are when you spend less time going into stores.

  1. Rent a storage unit

If you have some items or belonging laying around your home and occupying space, consider booking a storage unit to store these items for short-term or long-term. For example, if you have some outdoor sports gear or outfits that  you use or wear once in a while, you can store them in a storage unit (e.g. 5×5 storage unit or 5×6 storage unit), and gain access and use them when you need these outfits or sports gear. There are a variety of storage unit sizes you can choose from. If you’re looking to store clothing items, you can go with a 5×5 storage unit which is approximately the size of a walk-in closet.

At U-Lock Mini Storage, we offer storage units across Greater Vancouver and Greater Vancouver Island. We offer self storage Burnaby, self storage South Surrey and White Rock, self storage Chilliwack, self storage Nanaimo, self storage Parksville, and self storage Victoria. Book a storage unit today! Contact us if you have any questions.

  1. Clean your home on a weekly basis

It’s easy to keep you home tidy if you clean it on a weekly basis. Every week, you can clean up your home by assuring that laundry is done, all your belongings are in the right places (e.g. clean cups are in the cabinet and your clothes are hanging in the closet). Doing this weekly limits the amount of cleaning you have to do each week and helps keeping your home clean and organized at all times!

  1. When in doubt, donate it

If you have random belongings laying around your home and you aren’t sure if you want to keep them or not, you can donate to local charities. For example, if you have some older electronic devices or clothing that you most likely won’t use again, you can contact your local charities and ask if they would find these useful. If these charities find these items of us, donate these items to the charities! Doing this helps you achieve an excellent good deed as well as declutter your home!

4 Steps for Organizing Your Drawers

Drawers are a fantastic way to compartmentalize one’s belongings. But, it can also get real messy, real fast… Especially if you clean with the “out of sight, out of mind” approach. From office desk drawers to “junk” drawers, let us teach you how to reverse the entropy in those pesky little compartments in 4 easy steps. 

1: Emptying and Dusting the Drawers

Emptying out the drawer is a great idea to understand what exactly has been packing inside. Although you can still attempt to organize the drawer with all your belongings inside, it won’t be as effective to declutter for step 2, and be especially difficult for cleaning the dust out of the drawer itself.

Next, use a handheld vacuum or hose attachment to remove the dust that has accumulated inside. After all the dust has been removed, you can move onto using a cleaning spray on the drawer and subsequently wiping it clean with a microfiber cloth. If you spot any stubborn stains, baking soda and a wet brush works as a gentle exfoliant.

2: Sorting & Decluttering

Now, turn your attention to your pile of belongings you’ve removed from the drawer and categorize the items on utility. This is a great way to determine if you should actually keep the items. As you’re doing this, keep an eye out for items that are damaged and sort those into items that you would fix, recycle, or throw away. 

Although it can be tough to say goodbye to your possessions, here are 4 helpful questions to help you decide if you should keep your possessions. 

  1. Have you used the item within the last six months? 
  2. Do you foresee yourself using this item in the near future? Some seasonal items are exceptions to rule 1, as they can be cycled between storage and drawers as necessary. 
  3. Would you purchase this item again? If not, and you’ve said no to rules 1 and 2, it’s time to let it go.
  4. Would you keep the item if you were movin? If not, it’s time to say goodbye. 

Finally, consider the size of your drawer. If it’s a small drawer, don’t expect to keep more items than what you are able to fit within it. As for the no-pile, they can be sold at a garage sale or donated to a local charity shop. 

3: Designating space for the organized items

Similar to the previous tip, it is important to organize the drawers to make sure you have enough space for everything you’re choosing to keep, and that you’re able to categorize these items efficiently. 

For example, if you have a drawer full of power tools, screws, and mail, consider removing the mail into another safe place in your office drawer. Similarly, instead of folding hoodings and placing it into a dresser, the most efficient use of space would be hanging it up. The bottom line is that you’re keeping only the essentials in your home, and you’re doing so in a way that maximizes the space you have. 

4: Getting creative in categorizing your belongings

You’re all set in organizing your drawers and deciding what to keep. For items that are small and may require further sorting, the next step may be to think about getting dividers to keep things neat. Drawer liners are a great choice in dividing the space into usable sections, and they are also great in helping to minimize dust. A liner without holes is great for preventing any dust accumulation on the drawer underneath, and it is also easier to clean than going back to step 1. 

However, if you are on a tight budget, shoe boxes and cereal boxes are great make-shift containers for organizing dresser drawers. The bottom of cereal boxes are great too for storing silverware and utensils. Egg cartons and ice-cube trays are also a good method for storing smaller items, such as jewelry, on a budget.

And finally…

There you have it! Four steps to cleaning and organizing your drawer. However, if you’re someone who has gone through these four steps and still aren’t able to part with their belongings, it may be time to look into a self-storage unit to tidy your belongings. And conveniently – these 4 steps are great for organizing your drawers in the storage unit too!

At U-Lock Mini Storage, we have storage facilities across Greater Vancouver and Vancouver Island. Our facilities include self storage Victoria, self storage Parksville, self storage Nanaimo, self storage Burnaby, self storage White Rock and Surrey, and self storage Chilliwack. Contact us if you have any questions!

6 Things You Should Consider When Choosing a Long Term Storage Unit

Life is unpredictable and you never know when you might need  a long term storage. Maybe you’re relocating for a new job and need to put your items away, or maybe you are a store owner who needs a place to store the seasonal merchandise (afterall, there isn’t much demand for skiing equipment in the summer months). Or, some people prefer to store large items such as cars, boats, and RV’s in a long term storage because it takes up a lot of space in their home. 

Regardless of the reason for why you need a long term storage, it can be dizzying to choose from so many options of long term storage, but not all of the choices will suit your needs. Read on to find out 6 important factors you should consider to make sure you chose the best long term storage unit for your needs! 

1.The location of the facility & its accessibility

The distance of the long term storage should be carefully considered because it determines how accessible your trips will be. Unlike short-term storage, you can expect to travel back and forth a lot to retrieve your items in long term storage. How important is it to have a storage close to you? Are you willing to go for a more distant, but storage plan that is of better value? These are important questions to answer so you make the best choice for both your gas and storage budget. At U-Lock Mini Storage, we have storage facilities across Greater Vancouver and Vancouver Island. Our facilities include self storage Victoria, self storage Parksville, self storage Nanaimo, self storage Burnaby, self storage White Rock and Surrey, and self storage Chilliwack.

2.The Hours of operation & your personal schedule

Factoring in the facility’s hour of operation allows you to determine if you can access the storage unit at a time that is convenient for you. For example, if you are someone who works long hours during the day and the storage unit follows a strict 9 to 5 work day, it will make it very difficult for you to find the time to retrieve your belongings without sacrificing work hours. Ideally, we would recommend a storage unit that offers access on weekends or past work hours. 

3. The Finances & The “Fine-Print”

There is often flexibility in paying by the month or by the week, and sometimes there may even be “freebie” storage months if you are a long term client. On the other hand, if you’re not sure how long you’d want to keep your items in storage, make sure to find out if you’re able to terminate the contract anytime without penalty. It is always in your best interest to pay attention to these details so you are storing your items on your terms, and not the other way around.

3. The Safety & Security of the Unit

While all storage units offer some level of protection, not all security measures were made equal and you should consider what levels of protection you are comfortable with for your belongings. The security can range from a simple lock on the unit, to ones that include additional 24-hour digital surveillance in a brightly lit environment. It is never a bad idea to double check with the security measures before signing a contract with your chosen facility.

4. Insurance Options for the Storage Unit 

If you have insured your items through a third-party insurance policy, you may need to check if those items are still protected when they are placed in a storage unit. If not, you may need to opt for a storage facility that offers additional insurance policies to protect your belongings. These policies usually cover losses such as water damages, theft, and will properly compensate you if the unfortunate events do happen. Plus, it can offer your great peace of mind to know that your items have an additional layer of protection in the storage unit.

5. Past Reviews and Ratings 

Last but not least, past review ratings paint an honest picture of what you can expect when you trust the long term storage with your belongings. Even if you are signing with an established storage facility, it is still important to double check with your specific location. 

Websites like Yelp or Facebook can give you an idea of the storage unit’s services from the customer’s point of view, or even asking for friends’ and neighbours’ recommendations are a good way to gauge whether or not you should go with a certain storage unit.

And there you have it – 6 important things to consider when choosing a long term storage unit. You are now all set to find an option that works the best for you!

6 Tips for Storing Your Student Dorm Room

Student life isn’t easy, but at least you can say goodbye to a few months of stress by moving off-campus at the end of the semester! But before you go, don’t forget to safely put your belongings in a storage unit so they are just the way you left them by the time you return. 

Not sure where to start? Here are six essential tips for storing and safekeeping various belongings in a storage unit

1. Books 

You spent a pretty penny on those textbooks, and they should be packed, transported, and stored with care. Books should stay upright or flat on their sides, or their spines may be damaged from improper storage. 

In terms of protecting the books during transport and storage, plastic sleeves are ideal for those rare, prized first editions, and plastic bins are also great for protecting against the elements. 

Moreover, always make sure to store books separately in a smaller box. Otherwise, these books can be too heavy to lift.

2. Bedsheets and towels

Moisture is your number one enemy when it comes to storing bed sheets and towels. As a first step, make sure everything is completely dry before it’s packed away for the summer. 

Similar to protecting the books, plastic bins provide a sealed barrier against the elements and keeps your dry fabrics mildew-free in storage. 

As a final touch, mothballs are great for protecting your fibers against cloth-eating insects during the summer months that you are gone.

3. Laundry hamper 

Laundry hampers are a delicate essentials to any dorm dorm, so it’s important to place your collapsible laundry hamper on top of your belongings so they won’t get crushed. If it isn’t collapsible, you can stack them on top of eachother to save some room.

4. Electronics

Before storing your electronics, make sure all batteries are removed. Batteries can leak if they are not used for a long time, which can damage the appliance in the long run. Next, pack all appliances in the original packaging if possible. If not, packing peanuts offer great protection, especially during transport. Taking the time to cover your screens with a cloth will protect them from the elements during storage as well. Plus, as a bonus, it will protect your gaps and vents from being clogged with dust. 

During moving, make sure to keep them at the top of the moving pile due to the electronics’ fragile nature. As well, keeping the electronics on top keeps them from getting damaged by moisture during storage.

Finally, temperature and humidity will play a huge role in the longevity of your gadgets, so it’s worthwhile to make sure it’s stored somewhere shady and cool.

5. Pictures frames and mirrors 

Picture frames can be scratched during transport and can be damaged by moisture during storage, so packing it in bubble wrap offers great protection for both problems.

During transport, avoid placing anything heavy on top of your picture frames or mirrors. No matter how light, the weight is still capable of damaging your fragile belongings.

When sorting in a storage unit, avoid placing glass frames or mirrors directly on the ground. Old blankets or thick cardboard are a good way to protect the glass from scratching or shattering. Otherwise, cold or rough surfaces from the concentrate may also cause the glass to crack. 

6. Dishes

Much like picture frames, dishes are delicate and need proper protection. Make sure to wrap everything in paper when packing – plenty of paper. Packing bowls and plates on their sides in boxes provides adequate protection from chipping and shattering during transport and storage. 

Still paranoid about your dishes’ integrity during transport? Specialty dish boxes with individual compartments for glassware give protection while in transport and storage. Finally, not all glassware and ceramics were made equally, so make sure to store your most fragile utensils at the top of the pile. 

With the six essential moving tips above, all that’s left to do is to book a van and set a date to temporarily move your well-packed belongings into a storage unit. Unofficially, we think it’s the most fun to do with your best buds – though they might take a little bit of convincing with a large pizza and fizzy drinks on a hot summer day. After that, it’s time to kick your feet up and let the summer adventures begin!

At U-Lock Mini Storage, we have storage facilities across Greater Vancouver and Vancouver Island. Our facilities include self storage Victoria, self storage Parksville, self storage Nanaimo, self storage Burnaby, self storage White Rock and Surrey, and self storage Chilliwack. Contact us if you have any questions!

5 Ways to Keep Your Kids’ Washroom Clean

We all know how a kid’s bathroom can go from neat-as-a-pin to a complete disaster in less time than it takes to fold a stack of towels. When you have children in the bathroom, some innovative organizing and design tips can help save you time when it comes to keeping things tidy. Here are 6 organizing tips to try out in your child’s bathroom.

We all know how a kid’s bathroom can go from neat-as-a-pin to a complete disaster in less time than it takes to fold a stack of towels. When you have children in the bathroom, some innovative organizing and design tips can help save you time when it comes to keeping things tidy. Here are 6 organizing tips to try out in your child’s bathroom.

1. Labeled hooks for towels

Wet towels on the floor are the bane of many parents’ existence. This can be exacerbated  when the bathroom is used by multiple kids.

Ginger Bowie of Ginger Snap Crafts suggests replacing door hooks or towel bars with a hat rack; choose an oversized rack with six or more hooks for more versatility.

If you’d prefer to go with classic hooks, consider painting the name of each child – or better yet – place a picture of them, above their hook. This will prevent arguments (”Who used my towel!?”) and help you keep track of them for laundry day. Plus, how cute would it be to have photos of your favorite littles all in a row?

2. Corral dirty clothes with a bathroom hamper or bin

If you don’t have a laundry chute, you probably keep hampers in each family members’ bedroom. But dirty clothes are likely to accumulate in the bathroom as well. Placing a hamper in the bathroom will give your kids an easy dump zone for soiled clothing.

Plastic hamper bins are perfect for wet clothes after an afternoon at the pool or muddy clothing from playing in the rain. Even better, you can easily carry the bin to the laundry room or even rinse it out in the tub.

3. Keep cleaning supplies close

Your children’s bathroom probably needs cleaning about twice as often as your own. Save yourself some time by making space for your cleaning supplies right in the bathroom. A small caddy works perfectly and often fits under the sink.

And if your kids are old enough to be a part of the clean-up crew, consider including a checklist with the cleaning supplies. That way, they have no excuse for forgetting to clean the toilet bowl or the mirror.

4. Come up with a code or system for toiletries used daily

According to Becky Mansfield of Your Modern Family, one of the most effective things you can do to help the kids keep their own bathroom organized is to set up daily use kits  for each child. Fill the kits with each child’s toiletries—deodorant, makeup, hair supplies, or whatever else they might need. This is particularly helpful as the kids get older.

Store the kits out of sight in a linen closet or drawer. If you don’t have the space to hide them, a shelf works just as well. And when it comes time for a move or remodel, your children’s belongings will be ready to go! Just throw the kits together to keep them easily accessible during the transition.

For an added degree of organization, you can color code everything. Each child gets a color. Their  kit, toothbrush, hairbrush—even towels—can be the same color, making it easy to find the owner of any item in the bathroom. Color coding also makes packing a snap, whether you are packing for one night or for a move.

5. Add storage to a small bathroom with corner shelving units

Very small bathrooms can benefit from corner shelving units. Many of these are quite narrow, providing just enough space to store extra toiletries or linens. This is a great solution for houses with kids of multiple ages—the lower shelves are perfect for the youngest kids while the older ones can easily access the higher shelves. You can also rent a storage unit to store your bathroom belongings.