How to Organize Your Laundry Room

Let’s face it: most of us dread doing the laundry. Whether it’s because of the time it takes, the interruption of your day or you just don’t enjoy the mundane task of sorting, washing, folding and ironing, you’re not alone! For many homeowners, the issue isn’t so much the act of doing the laundry, but rather that their laundry room is small, cramped or just uninviting.

While it might seem like an afterthought, learning how to organize a laundry room is a crucial step in keeping your house clean. In most homes, the laundry room is a cramped space for shoes, towels and piles of clothes — but it’s time to streamline. Here’s how you can transform your laundry room into a welcoming, organized and functional space.

Minimize Your Wardrobe

You can’t expect to organize a laundry room when you have far too much laundry to work with. That’s why the first step is to reduce the clutter taking up space in your closet and dresser. Minimal clothes means minimal laundry, which means minimal hassle for you!

Here’s what you can do to eliminate wardrobe clutter:

  • Toss or donate old clothes. We all have outfits taking up space in the closet that never see the light of day. If you have clothes you no longer wear, toss or donate them to create more space in your bedroom and laundry room.
  • Swap out seasonal gear. If the bulk of your organization problem is off-season clothing, it’s time to clean out those closets and make room for the essentials. Store summer or winter clothes in bins or storage units until it’s time to wear them for the appropriate season.
  • Simplify your laundry. Instead of waiting to do laundry until your hampers are full to the brim , create a system (and schedule) to wash different types of clothing. For example whites on Monday, lights on Wednesday, darks on Friday, towels on Saturday, etc. Minimizing your loads will help you learn how to organize a laundry room and keep it that way for years to come.
  • Rent a storage unit. If you don’t have enough space at home to reduce clutter, rent a storage unit. If you have a few items you want to store in a storage unit, go with a 5×5 feet storage unit. If you have quite a bit of items to store, you can go with a large storage unit such as 5×8 feet, 5×10 feet, or bigger. At U-Lock Mini Storage, we have storage facilities across Greater Vancouver and Vancouver Island. Our facilities include storage units Victoria, storage units Parksville, storage units Nanaimo, storage units Burnaby, storage units White Rock and Surrey and storage units Chilliwack. Contact us if you have any questions!

Create Laundry Stations

Where do you keep your hampers? Do you have a dedicated place to fold and sort your laundry? How often do you find yourself carrying piles of clothes up and down the stairs because you have nowhere to put them?

That’s where organized laundry stations come in. Before you start organizing, come up with a system that allows you and your family to keep the room clean, spacious and clutter-free.

Consider the following items you’ll need when it comes to creating your functional laundry room space:

  • Counter space. Make your life easy by having access to counter space or folding tables. With available counter space close by, you’ll be more likely to hang, fold and put away your clothes as soon as you take them out of the washer or dryer.
  • Drying rack. Whether you prefer drying your clothes on hangers or placing them on a drying rack, make one (or both) of these areas available in your laundry room. Tension rods are a great way to save space while drying your clothes.
  • Laundry baskets. Keep a hamper or laundry basket in the laundry room so you can quickly load and unload during the laundry process. Ideally, these can find a home underneath counters or in a nearby closet.
  • Ironing board. Instead of putting away wrinkled clothes and ironing outfits right before you wear them, keep an ironing board in the laundry room so you can unwrinkle your clothes right away. This will save you time, space and hassle in the long run.

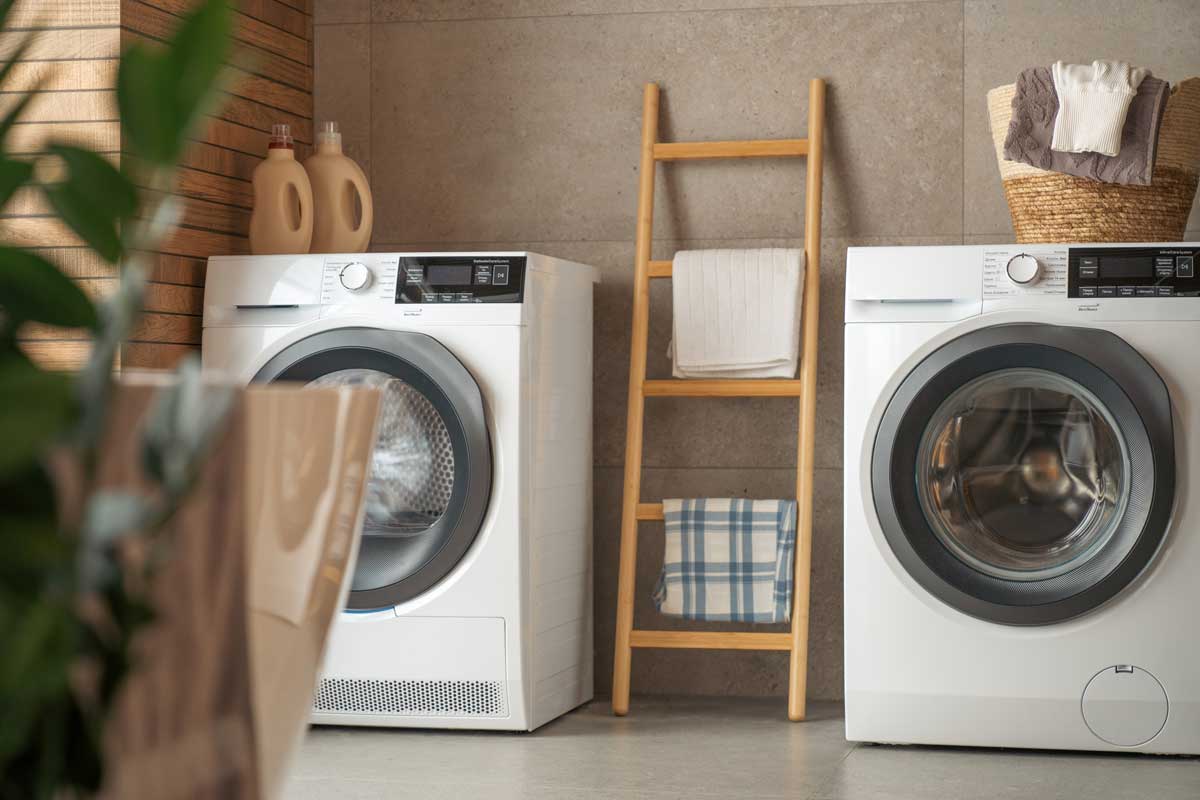
Purchase Space-saving Appliances

Just because washers and dryers are huge space-takers doesn’t mean we should let them conquer our laundry rooms. If you’re looking to purchase a new washer and dryer (or simply looking to downgrade to smaller, more efficient appliances), keep in mind that less is more. A smaller washer or dryer would give you more square footage in your home, more space in your laundry room and it would create a more functional area for you and your family, too.

There are several benefits of an all-in-one laundry unit:

  • Stacking your appliances allows them to fit into closets, smaller spaces and studios or apartments.
  • Smaller washers and dryers tend to come with pedestal drawers underneath, allowing for extra hidden storage space.
  • Space-saving washers and dryers save more than just space. These smaller appliances are often high-efficiency—helping you reduce your footprint and utility bills, too.

4 Tips for Organizing Your Kitchen

Your kitchen is one of the most important rooms in your home. It is also one of the most used rooms, so if you notice your cabinets are full of crumbs, the drawers are sticky, or you can’t find room for your everyday necessities because every cabinet is filled to the brim, it’s time to organize your kitchen. Here are four tips for organizing your kitchen.

Rent a Storage Unit

Renting a storage unit to store extra belongings in your kitchen is one of the best ways to clear space in your kitchen. If you only need to store a few items, you can rent a 5 by 5 feet storage unit. If you need more space, you can rent a 5 by 10 feet storage unit or bigger.

At U-Lock Mini Storage, we have storage facilities across Greater Vancouver and Vancouver Island. Our facilities include storage units Victoria, storage units Parksville, storage units Nanaimo, storage units Burnaby, storage units White Rock and Surrey and storage units Chilliwack. Contact us if you have any questions!

Create Zones

Divide your kitchen into several efficient work zones according to how your space needs to function. Are your most frequently-used cooking utensils, pots and pans located conveniently near the stove? Are your baking supplies organized in a drawer or cabinet near your mixer? Do you keep coffee supplies handy near your coffeemaker? What do you store under your sink and could it be more effectively organized?

Choosing appropriate locations to store your kitchen items according to designated zones will make all the difference in your organization and efficiency while working in your kitchen.

Donate or Give Away

We all have kitchenware that we have received as gifts or that we have purchased a long time ago that we barely use. To declutter and organize your kitchen, it’s best to donate these kitchen items or give them away to those who may find them useful. Doing this will help you clear space in your kitchen while helping others!

Add More Storage Options in the Kitchen

If you feel like you don’t have enough drawer or cabinet space, one trick you can use is to add storage options on counters or wall spaces. For instance, instead of using an entire drawer for towels, you can use a wire basket next to the sink.

Moreover, you can use open shelves on your walls for storing dishes and other serveware. The key to open storage is to only keep out what is used regularly so it stays clean. For example, everyday dishes, hand towels and wood and metal utensils can be kept out in the open, freeing up drawer space while keeping your kitchen organized.

5 Tips for Organizing Your Shed

Figuring out how to organize the inside of a shed requires a bit of forethought. Picture what the inside of your shed looks like right now. Are you able to walk from the front to the back without a problem? Storage and garden sheds can quickly fill to the brim with outdoor clutter that’s hard to find or access — lawnmowers, tools, rakes, shovels, etc. 

With an open, clean and organized shed, you can store items more efficiently to find what you need when you need it. Here’s a list of shed organization tips, hacks and ideas to help you organize your shed.

Use a Magnetic Bar for Tools

When it comes to storage shed organization, one of the first questions you’ll want to tackle is: How do you keep your tools organized? 

A great way to organize tools in any type of shed is by making use of a magnetic bar. This storage shed organization hack has long been used to store standard tools, and it’s ideal for storing gardening tools, too. Make sure to choose a magnetic bar that is strong enough to hold the tools you’re looking to organize.

Use Open Shelving

When you’re left with limited space in a storage shed, it’s important to figure out how to make the most out of every inch. By modifying your shed’s walls by installing shelves, you can utilize more space to free up your floor and make your shed feel more spacious than it is. 

Want DIY shelves for your storage shed? To build sturdy shelves, cut plywood to fit the surface area. To store more items, make the shelves deeper or construct shelves from floor to ceiling.

Use Hanging Jar Organizers

Nails, screws, tacks and bolts are essential items every tool shed needs, but those tiny pieces of hardware can easily get lost in the shuffle and sometimes end up on the floor, where you could potentially step on them. To keep them organized, in place and out of the way, install a hanging jar system. 

We’ve all heard the hype surrounding Mason jars, but any jar with a screw top lid should work for this shed organization DIY project. To create this system, fill each jar with your small pieces and attach the lid to the bottom of a shelf. To access the nails and screws, unscrew the jar and lower it carefully.

Rent a Storage Unit

Renting a storage unit to store extra belongings in your kitchen is one of the best ways to clear space in your shed and organize your tools. If you only need to store a few items, you can rent a 5 by 5 feet storage unit. If you need more space, you can rent a 5 by 10 feet storage unit, or bigger.

At U-Lock Mini Storage, we have storage facilities across Greater Vancouver and Vancouver Island. Our facilities include storage units Victoria, storage units Parksville, storage units Nanaimo, storage units Burnaby, storage units White Rock and Surrey and storage units Chilliwack. Contact us if you have any questions!

Use Wire Shelving

Still looking for different shed organization ideas? Consider wire shelving for your garden shed instead of wooden shelves. Wire shelves let the light through, making it easier to find items in spaces where you might not have enough light. You’ll likely have some level of moisture if your storage area is located outside, so wire shelving might be a great option as it stands up to water better than wooden shelves.

How to Maximize the Space In Your Attic

How often have you looked upward and had that cringing feeling of guilt and overwhelm, thinking of that attic mess you’ve never quite managed to get around to? Does it incite dread in you? Do you wish it would all just go away?

Well, fear no longer, because we’ve got good news. Your attic can provide storage serenity when first moving in, when downsizing your home or as part of a house-wide overhaul — as long as you know how to organize it right.

To that end, here are several small attic ideas to whip your unsightly upstairs into a bright, accessible repository for holiday decorations, heirlooms, costumes, clothes and more.

Donate or Get Rid of Unused Items

It’s helpful to set up a four-pile sorting system, which includes:

  • Giveaways: Anything you think a family member or friend will want.
  • Donations: For items you don’t want but that still have a lot of useful life left in them.
  • Trash pickup or dump: Some items just don’t have any more life in them.
  • Sale items: If you’re up for the challenge.

Create an Organizational Structure

Once you have a basic layout for what goes where, create an organizational structure. If you have a lot of costumes or clothes, for instance, that might mean setting up a closet bar. If you’re a decorating nut with seasonal items for every month of the year, buy organizational bins to manage the mess.

It’s also helpful to plan for future clean-outs. How and when will you revisit your attic? What signs will you look for when deciding to do another overhaul? Keep a list of any small attic ideas you’d like to try later, and make a commitment to yourself to help you avoid the distress that comes with leaving a space unaddressed for too long.

Book a Storage Unit

Renting a storage unit to store extra belongings is one of the best ways to clear space in your attic and help keep it organized. If you only need to store a few items, you can rent a 5 by 5 feet storage unit. If you need more space, you can rent a 5 by 10 feet storage unit or bigger.
At U-Lock Mini Storage, we have storage facilities across Greater Vancouver and Vancouver Island. Our facilities include storage units Victoria, storage units Parksville, storage units Nanaimo, storage units Burnaby, storage units White Rock and Surrey and storage units Chilliwack. Contact us if you have any questions!

5 Tips for Keeping Your Kid’s Room Organized

Picture this: a room with clothes and shoes strewn about, clippings of your kid’s last craft project, piles of school supplies and what seems to be an endless collection of toys. Sound familiar? How many times have we walked into this scene, spent what feels like ages tidying up, only to find the exact same scene a few minutes later? Between chores, school and bedtime activities, keeping our kids’ rooms organized can be a challenge.

Instead of spending your next weekend stacking toys and other belongings for the umpteenth time, check out these 5 tips to keep your kid’s room organized year round!

Use Your Wall Space

With most of the mess in your kid’s room taking up the floor, using the wall space can be a big help. Extra tip: consider using the wall behind the door!

To do so, you can install bookshelves that will be useful to store reading and colouring books, notebooks and other materials your kid might need for homework assignments. Organizing the bookshelves with your child at the start of the school year can help create a good habit to keep their materials tidy.

To install your bookshelves, you’ll need baseboard or moulding pieces, aluminum track and wall anchors, saw, drill, hammer and screws.

  • Measure and cut the aluminum track and baseboard to fit your wall space.
  • Insert the wall anchors and mount the track on the wall with screws.
  • Secure the baseboard pieces onto the aluminum track. You can use screws or construction glue for this.
  • Fill up with your child’s favourite books. Place those materials your kid uses the most at a height where they can easily be reached; place those books seldom used higher up.

Designate and Set Up a Workstation

One of the keys to keep the mess away is to establish spaces for different activities and supplies. For example, setting up a workspace for your kid to do homework, colour or do crafts can help keep all the necessary supplies in one place.

You can set up a desk or worktable for your kid to have a surface of their own for their activities. If you have limited space, consider using a folding table or fold-up desk that can be attached to the wall and put away when not in use.

At this workstation, you can also set up a DIY organizer for all your kid’s supplies. You can keep it simple and use containers found in your own home. Here are a few storage solutions and ideas to consider:

  • Use muffin trays for smaller supplies like paper clips, sharpeners and erasers.
  • Clean and remove the label of soup or veggie cans. Glue Velcro or magnets to attach the cans to a board where they can be attached when not in use. These are perfect for supplies like pencils, scissors and crayons.
  • Install a magnetic bar and use metal tins you can detach.
  • For older kids, try repurposing glass jars where they can clearly see their supplies.
  • Find inexpensive baskets or caddies to store larger supplies like glue, scrap paper and ribbon.

Whichever DIY idea you use, make sure to clearly label each container to keep everything organized. Painting containers and labelling them with your kid can be a very fun activity!

Use Mobile Storage for Toys

Once playtime is over, you might find your kid’s room looking like a toy tornado just came right through. For a quick (and, honestly, kind of fun) way to clean up, you can create your own mobile containers that can fit under the bed or at the bottom of your closet, where your kid can easily reach them. You can have your kid roll the containers around and placing toys in them before bedtime!

To create your own mobile storage, you’ll need some containers (drawers, shallow bins, crates or even baskets), glue or a drill and screws, and some casters (wheels) to attach to the bottom.

  • Flip your container upside down and mark the 4 corners of your container where you’ll attach the casters.
  • If you’re using wooden containers, attach the casters using the drill and screws. If you’re using plastic bins or baskets, you can simply use glue to attach them to the bottom.
  • For a personalized look, you can paint your containers to match your kid’s room décor!

Set Up A Grab-and-go Station

Your kid’s backpack, jacket and lunchbox need a home within your home. To avoid finding a trail of belongings when returning home or running around in the morning in search of a lunchbox, set up a station where these can be stored.

You can create your own station using hanging hooks:

  • For lighter items, you can use contact glue hooks on a strip of corkboard.
  • For a sturdier station, you can use a wooden board and attach it to the wall, using a drill and screws. Then, attach hanging hooks onto the board using short screws.
  • Make sure to install these hooks at a height your child can easily reach.

For heavier items, you can add a few cubbies to store loaded backpacks, rainboots or any sports gear your kids need.

Rent A Storage Unit

Sometimes you might simply run out of space to store all your kid’s belongings, even after tidying up. In this case, you can rent a storage unit to get the necessary additional space for those extra items you might not need right away, but which you can still easily access whenever you need them. Many storage facilities, such as U-Lock Mini Storage offer a variety of size options and month-to-month rental so you can get the storage unit that best fits your needs, for however long you need it.

At U-Lock Mini Storage, we have storage facilities across Greater Vancouver and Vancouver Island. Our facilities include storage units Victoria, storage units Parksville, storage units Nanaimo, storage units Burnaby,storage units White Rock and Surrey, and storage units Chilliwack. Contact us if you have any questions!

Children love playtime, but they can easily lose interest when it’s clean-up time. Have fun! Turning cleaning into a game by using a timer or playing find & fetch games will make the job enjoyable.

By using these tips, you can be off to a good start to help your children keep their spaces tidy for longer and build good habits and organization skills that can last a lifetime.

How to Declutter and Keep Your Home Organized During the Holiday Season

When it comes to decluttering and organizing our homes, we might sometimes set the bar too high and end up ditching the task soon after. Between work, school, family duties and daily errands, the reality is that most of us don’t have the dedicated time to spend organizing and decluttering. This means we simply have to learn to organize on the go!

Decluttering doesn’t have to be the difficult and unachievable task we sometimes make it out to be. Instead of trying to tackle it in one go, taking a few conscious steps on your day-to-day will simplify organizing in the long run. As you prepare for the coming holiday season and start decorating your home, focus on making some conscious planning to save your time and energy – you’ll thank yourself in the seasons ahead!

Here are five tips to start decluttering and keep your home organized during the holiday season.

Organize While Packing and Unpacking Christmas Decorations

We all have found that broken bauble or an elf with a missing leg that have stayed around creating clutter. When you’re getting ready to decorate your home for Christmas and have taken out boxes with decorations, start by sorting out what you need and what you don’t as you go. Keep a bin nearby and fill it with things you don’t need or use anymore as you unpack, and either donate or throw it out right away.

When it’s time to put away your decorations, make sure to label each bin and box and note what items you’re putting in it. You can even number each container to identify it or label it with the room where you usually set up those decorations. Keep a list of containers and their contents in the garage or closet where you store them; that way you’ll know where everything is next year!

Clear up as You Wrap Christmas Presents

As you’re wrapping all your gifts, avoid keeping those bits and pieces you won’t use again. Immediately toss out old, wrinkled wrapping paper, short or mangled pieces of ribbon and damaged tags and cards.

Simplify your wrapping game by using an over-the-door organizer or a DIY wrapping station. You can streamline your wrapping by getting neutral wrapping paper like brown or white that you can use all year with seasonal or themed ribbon.

Declutter When You Entertain Guests

When you invite guests over for holiday get-togethers, make note of what you no longer need to prepare for entertaining. Donate any utensils or dishes you haven’t used in a while to cook or serve and get rid of broken items or sets with missing pieces you can’t use anymore.

Conversely, if you noticed you were missing a utensil or platter that would have made preparation easier for you, or if you need to replace a broken item, take note. Then, look out for end-of-year sales or new-year deals to find these missing items to be ready next year.

Reorganize Your Holiday Baking Supplies

Christmas cooking and baking often require special ingredients and utensils that you might not use the rest of the year; this can result in cabinets full of old spices, unused or expired baking ingredients and burnt or sticky items that were used once and forgotten after. As you start planning your baked goods for the season, throw out any items you don’t need or can’t use anymore, and make a list of what you’ll need for this year’s special meals.

As you shop for new ingredients and start your seasonal baking, plan ahead and store your fresh ingredients in air-tight glass or plastic containers to preserve them longer and keep them organized in your pantry or cabinet. When you are done with your holiday cooking and baking, throw out any ingredients you know will go stale before next year’s holiday season. 

Rent a Storage Unit

Sometimes you might run out of space for all those holiday items you only need once a year, especially if you live in a smaller space where every inch counts. Other times, it might be hard to let go of decorations and items with sentimental value. In these cases, you can rent a storage unit to safely store all your seasonal belongings until next year, with the ability to easily access them in case you need them before. Many storage facilities, such as U-Lock Mini Storage offer a variety of storage unit sizes to choose from for your storage needs. A month-to-month rental mode allows you to store your belongings for however long you need.

At U-Lock Mini Storage, we have storage facilities across Greater

Vancouver and Vancouver Island. Our facilities include storage units Victoria,storage units Parksville, storage units Nanaimo, storage units Burnaby, storage units White Rock and Surrey, and storage units Chilliwack. Contact us if you have any questions!

Above all, make reorganizing and decluttering an enjoyable activity that won’t take hours of your time; you can even get your family involved and make it a seasonal tradition! Taking these small steps as you go through the holidays will make a big difference in the long run.

How to Keep Your Dorm Organized

Whether you’re planning for your first term in college or looking for a better way to organize your current dorm room, it’s important to maximize your living space.

Any available space in a student’s dorm room gets quickly cut in half when boarding with a roommate. This means it is crucial to make the most of every inch and effectively use the space available. For this, check out these tips to organize your dorm and keep it that way!

Reclaim Your Floor Space

It’s simple – use bed risers. It’s surprising how much floor space can be made available under dorm room beds. Bed risers might only lift your bed a few inches, but this provides plenty of extra space for flat or smaller items that might not fit elsewhere. You can also use this space to store seasonal items or items you only need every so often.

Need more space? Use a loft bed. This solution provides way more under-the-bed space that can be used for a desk or work table, a couch or more storage like a tall boy dresser. For this, you’ll need to remove the bottom bunk to free up the space. You can choose to go for a DIY project and personalize this space for your needs.

However, if you’re looking for something simpler, a futon is a great, versatile option. It can help you save space during the day and transform into a full-sized bed at night.

Use Your Wall Space

When trying to maximize your dorm room space, making use of your walls is essential. You can choose from a variety of removable attachments to keep your desk and countertops clear. Here are a few options for your wall:

Magnetic board or strips. You can keep items organized above your desk by attaching a magnetic strip to the wall where you can attach metal containers for your supplies and other small items – you can even use it to keep your keys in a handy place. Alternatively, you can hang a magnetic white board on your wall where you can both make notes with erasable markers and use magnets to attach notes. Some boards even have a cork section attached where you can use thumbtacks to pin papers and notes.

Removable pods. Small things can quickly stack up and become a messy pile. For these trinkets, you can use stick-on pods or containers that you can attach to your wall or on the side of your desk,

Adhesive hooks. You might not be able to nail or drill anything to your dorm room walls, but you can still use adhesive hooks that you can remove when it’s time to leave. Adhesive hooks are a great temporary solution that can easily be installed. You can attach these to your walls, door, cabinets or the side of your desk to hold anything from your headphones next to your bed to your jacket behind the door.

Make The Most Out of Your Closet Space

You can maximize your closet space using your hangers and other attachments in effective ways. Check out a few tips to make the most out of your closet:

Stack your hangers with pop can tabs. You can collect a few pop tabs to slip through the hanger hook and you’ll be able to hang another hanger onto the tab. You can use two or three tabs as the height of your closet allows. That way, you will use more vertical space and save space on your rod.

Use a pocket organizer. You can use the inside of your closet door to hang a pocket organizer where you can store shoes, socks, totes and any other belongings that you can’t hang elsewhere.

Use tension rods. You can get extra hanging space at the bottom of your closet by attaching a tension rod below for shorter items. You can also use tension rods to create some shelving below for your shoes without having to nail anything! 

Use multi-purpose storage

There are additional multi-functional solutions that can add storage space within your limited dorm room space. Here are a few pieces to consider:

Storage tables or ottomans. In a reduced space, it’s beneficial to choose items that have more than one function. Ottomans and tables with storage are a perfect example that you can use to store extra accessories and stash blankets, shoes or clothing you don’t need immediately.

Organize with caddies. Not only are shower caddies a great item to repurpose anywhere in your room for extra wall storage, but they are also easy to find and easy to install and remove. You can also use some bed caddies to store your charger, books and phone instead of using a nightstand to save some space by your bed.

Door-handing organizers. Just like the closet pocket organizer, you can use door-hanging organizers behind your dorm room door. Here, you can keep your items ready to go out of the dorm room in the morning. Keep a few pairs of shoes, bags and other items that you’ll need for the day.

Use Dividers to Avoid Messy Drawers

Keeping your drawers tidy will save you tons of time in the long run. Instead of spending half your morning looking for a matching pair of socks, use drawer divider inserts to keep your clothes organized. This will also help you keep your drawers organized for longer, as you’ll know exactly where everything goes when it’s time to put the laundry away.

While you can purchase these divider inserts in your nearest hardware or homeware store, you can also create your own using cardboard or foam core to create your own compartments.

Rent A Storage Unit

Sometimes the space available to you in your dorm room might just not be enough for all your belongings. For those extra items and even furniture, you can rent a storage unit to safely store them. You can use the storage unit to store all your seasonal belongings, your sports gear while not in use and even use it to temporary store your things while you rearrange your dorm room Many storage facilities, such as U-Lock Mini Storage offer a variety of storage unit sizes and a month-to-month rental so you can find exactly what you need.

At U-Lock Mini Storage, we have storage facilities across Greater Vancouver and Vancouver Island. Our facilities include storage units Victoria, storage units Parksville, storage units Nanaimo, storage units Burnaby, storage units White Rock and Surrey, and storage units Chilliwack. Contact us if you have any questions!

Making the most of your dorm room space is important, especially since you will be spending

your time here for the next few years. As you go through college, you might make changes and upgrades to adapt to your different academic activities and needs. With these few tips, you can take some steps that will help you keep your space organized during your stay!

5 Tips for a Clutter-Free Kid Zone

It’s back-to-school season and many families are getting their children ready to return to their fall schedules and routines.

It’s back-to-school season and many families are getting their children ready to return to their fall schedules and routines. This is also a great time to start thinking about cleaning and decluttering kid zones at home. An organized playroom and effective clean-up routines can help children feel prepared to return to their school activities while relieving stress off parents.

To keep a clutter-free kid zone at home, we have put together five tips for you. 

Think Twice Before Buying More Items

One of the main reasons why children’s areas become cluttered and messy is an excess of toys and other belongings. To combat and prevent this, make a conscious effort to buy less and encourage creative and recreational activities more. Of course, new toys are always exciting, but too many too often might cause children to lose interest quickly and they might not value their toys as much. Instead, encourage your children to use what they have and use their imagination to come up with different ways of playing with what’s around. Buying less can help children be satisfied and more creative with less, rather than always wanting and expecting the newest and latest toys.

Encourage Good Habits

Make a habit of having a clean-up session every day with your kids. A great and easy goal would be to have them put away their toys every night before bed, or after playtime. Doing this consistently every day will help your kids develop organization habits that they can use at different stages of their lives. Having daily clean-up time also helps to keep clutter under control, rather than letting the clutter build up for weeks until it becomes a stressful factor at home.

Regift And Donate

Getting new toys also provides the perfect opportunity to donate to others. Include your children in this process by getting them excited about donating toys to children who need them, or regifting to someone who can give their toys a second round of love. Besides helping keep their space decluttered, this is a great way to teach kids about generosity and selflessness.

Designate Zones 

Whenever possible, divide and assign spaces in children’s rooms for different purposes. They can have a zone to play with costumes, a zone for all building block sets, a zone for arts and crafts supplies and a zone to keep all their sports gear, for example. Having clearly designated zones can help children know where to find their toys when it’s playtime and where to put them away at clean-up time.

Rent A Storage Unit

Sometimes there simply isn’t enough space to store all your children’s belongings. When this happens, you can rent a storage unit. With a storage unit you will get the additional space you need for those extra items while having ease of access whenever you need them. Many storage facilities, such as U-Lock Mini Storage, offer month-to-month rental so you can rent a storage unit for however long you need it! 

At U-Lock Mini Storage, we have storage facilities across Greater Vancouver and Vancouver Island. Our facilities include self storage Victoria, self storage Parksville, self storage Nanaimo, self storage Burnaby, self storage White Rock and Surrey, and self storage Chilliwack. Contact us if you have any questions!

6 Nursery Room Organization Tips to Save Space at Home

To help you make the most of your nursery space and stay organized, here are six organization tips for you!

A nursery can be the coziest, most charming room in the house, but it can also be the smallest. If you live in a smaller place, you might even be sharing some of the master bedroom space with the new baby, so effective storage solutions are essential.

You will want to have the perfect nursery ready to welcome the new family member. However, it’s no surprise that babies come with a lot of stuff and need a lot of supplies and, before you know it, your nursery may be full to the brim with items. 

To help you make the most of your nursery space and stay organized, here are six organization tips for you!

Store Excess Items in Bins under the Crib

When you are tight on space, it’s crucial to make the most of every square foot you have. The space beneath the crib is a great spot to store extra items that you might not need right away. Use bins to store extra diapers, wipes, out-of-season clothes and formula. Choosing clear plastic bins allows you to easily find what is stored in each bin. 

If these plastic bins are throwing the look of your nursery off, you can use a crib skirt to hide them underneath. Alternatively, you can use nice woven baskets or decorative cloth bins. 

Keep Supplies in A Shower Caddy

Diapers are an everyday essential and they need to be kept handy. If your changing station is lacking diaper storage, or additional space for other supplies, try using a shower caddy. You can hang the caddy on a wall nearby where you can easily reach for a fresh diaper or wipe when your baby needs a change. This way, you’ll add useful vertical storage to your space. You can even give the caddy a coat of paint to make it match your nursery’s colour scheme and decor!

Use A Tension Rod to Hang Baby Shoes

Baby shoes might well be the second cutest thing in your nursery, after your baby. However, the tiny shoes might get easily mixed up or lost if you have them stashed in a corner or drawer. To keep them organized, you can install a tension rod in the room (the closet is an ideal place) and add curtain clips to hold the shoes. Hang each pair with the clips and make it easier for you to choose a pair for your baby’s outfit.

Sort Baby Clothes by Size And Season

Babies grow fast! This means going through several items in their wardrobe as they outgrow smaller clothing. To keep up with their pace, sort clothes by size and place them in plastic bins or drawers in your closet. It’s best to keep clothes upright to easily see and reach for each outfit. This way, you can rotate through each size as your baby grows and move the smaller items into self storage. 

Use Bins Or Baskets for Accessible Toy Storage

Before your baby is even born, you’re going to deal with a growing toy collection. It’s important to keep them tidy and in one place to avoid hazards and clutter. To do so, you can use baskets, tubs or bins. 

Placing these containers on or near the ground will allow your baby to easily access them at the crawling and walking stages. Not only will your baby be able to reach these containers, but you can also use them to build good habits to put toys away and tidy up after playtime.

Rent A Storage Unit

Another great option for you to free up space in your nursery and home, is to rent a storage unit. If you have items sitting around that you don’t often need or use, you can store them in a storage unit for a short or long term, and access these items whenever you need to.

At U-Lock Mini Storage, we offer storage units across Greater Vancouver and Greater Vancouver Island. We offer self storage Burnaby, self storage South Surrey and White Rock, self storage Chilliwack, self storage Nanaimo, self storage Parksville, and self storage Victoria. Book a storage unit today! Contact us if you have any questions.

5 Basement Organization and Storage Tips

If you find yourself in the middle of a cluttered, dusty basement, you’re not alone. Messy basements are more common than we’d like to admit. We often dump unnecessary belongings into the basement with the idea that we’ll get to organizing later.

If you find yourself in the middle of a cluttered, dusty basement, you’re not alone. Messy basements are more common than we’d like to admit. We often dump unnecessary belongings into the basement with the idea that we’ll get to organizing later. However, between work and other activities in our lives, we often neglect this space in our house. 

To help you bring your basement back to life for your family to enjoy a space for entertainment and other activities, we have five basement organization tips for you.

Get Rid of Items You Don’t Need

The first step to organize your basement is purging and cleaning. It’s important to take note of what you have, what you need and what you don’t.

Spend a couple of days doing a thorough inventory of everything in your basement. As you go through your belongings, evaluate each item and decide whether to keep it and find a spot for it, or to get rid of it by donating, recycling or throwing it in the trash.

Making these decisions might be hard, so here are a few things to consider that might help you through the process:

Have you used it recently? Is it valuable to you? If not, it’s time to donate, recycle or chuck it.

Is this an item you seldom use and can borrow from someone should you need it? Give it to someone who might use it more often and lend it to you now and then.

Do you need a whole set, or can you keep just the essential? Pick what you need and get rid of the rest.

As you go, clean the areas that have cleared out after getting rid of items. This will make the cleaning process less challenging 

Create a Storage Layout

Now that your basement is clean, dry and hopefully smelling better, it’s time to create a storage plan. Think of all the things you decided to keep after the decluttering phase and create categories you can sort them into. Then, designate zones where you will store certain types of items. These zones can be split into seasons (spring, summer, fall, winter) or types (toys, Christmas, vacationing, etc.). Mark each zone with clear labels and start sorting your items into each of these zones.

Having these zones will help keep the clutter under control by making it easier to know where to find items you need, and where to put them away once you don’t need them. 

Install Sturdy Shelving and Use Air-tight Containers

Once you have sorted your items into their corresponding zones, you can decide the size and amount of containers you will need for each zone. It’s best to use clear plastic containers so you can see what’s stored inside. Additionally, containers should be air-tight to keep out pests like silverfish and other bugs. Add a few desiccant packets to control moisture and fill the containers with your items. 

Now that you know how many zones and containers you have, it’s time to get some sturdy and durable shelving and hardware. Open shelving is a great choice because it allows air circulation while providing ease of access to your items. You can also install a few hooks to hang bags and other lighter items. 

Do Yearly Inventory Checks

You have invested time and effort to clean up and organize your basement; now, keep it that way. Set a reminder to review the stored inventory once a year, and continue to get rid of items that you no longer need. Get into the habit of going through what you already have before adding new items to your basement. 

Rent A Storage Unit

If you have too many items in your basement or in your home that you want to keep, or if you want to free up more space for other activities, you can rent a storage unit to store your belongings. You can rent a storage unit size according to your needs. For example, if you only have a few items to store, you can choose a 5 x 5 feet storage unit. If you have more or bigger items to store, you can rent a 5 x 8 feet storage unit, or bigger. 

At U-Lock Mini Storage, we have storage facilities across Greater Vancouver and Vancouver Island. Our facilities include self storage Victoria, self storage Parksville, self storage Nanaimo, self storage Burnaby, self storage White Rock and Surrey, and self storage Chilliwack. Contact us if you have any questions!