11 Tips for Spring Cleaning 2022

his an annual ritual or you’re attempting to tackle the process of spring cleaning for the first time, we hope these tips inspire you to create a home you love.

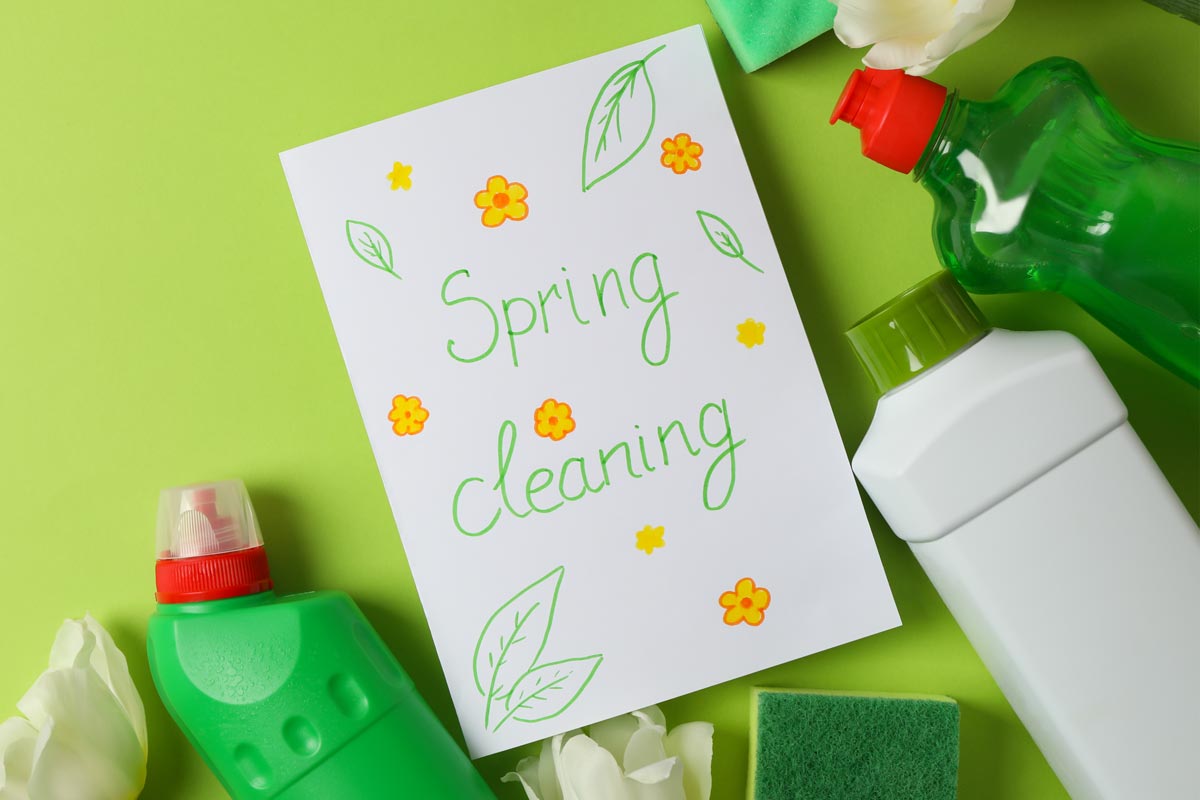
When life gives you lemons, make lemonade. If you’ve been forced indoors by Coronavirus, you’ve been given the gift of time. Pair it with these spring cleaning tips, and you have what it takes to make home a place you’ll never want to leave, even after shelter-in-place orders have been lifted!

We’ve rounded up our favorite spring cleaning tips, plus a tried and true process to get you started. Whether you’re part of the 75% of people that make this an annual ritual or you’re attempting to tackle the process of spring cleaning for the first time, we hope these tips inspire you to create a home you love.

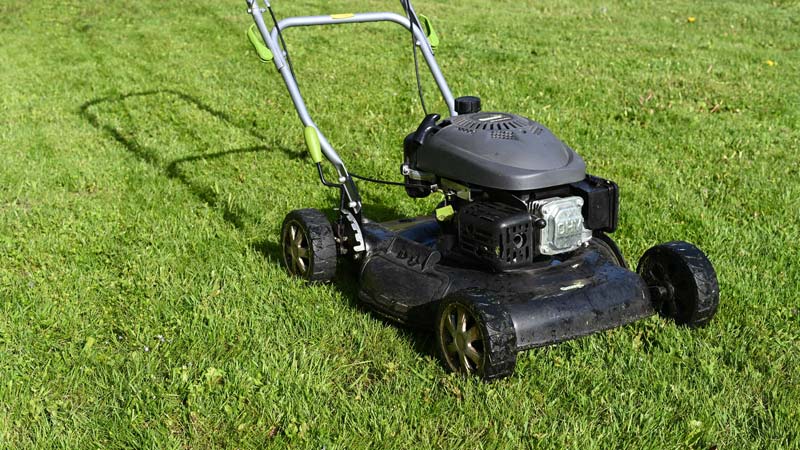
1. Start by breaking out the warm weather equipment

Isn’t it exciting to pull out these reminders of the fun to come this summer? Pull them out and hose them down.

  • Grills
  • Lawnmowers
  • Sports equipment
  • Patio furniture

2. Put away winter

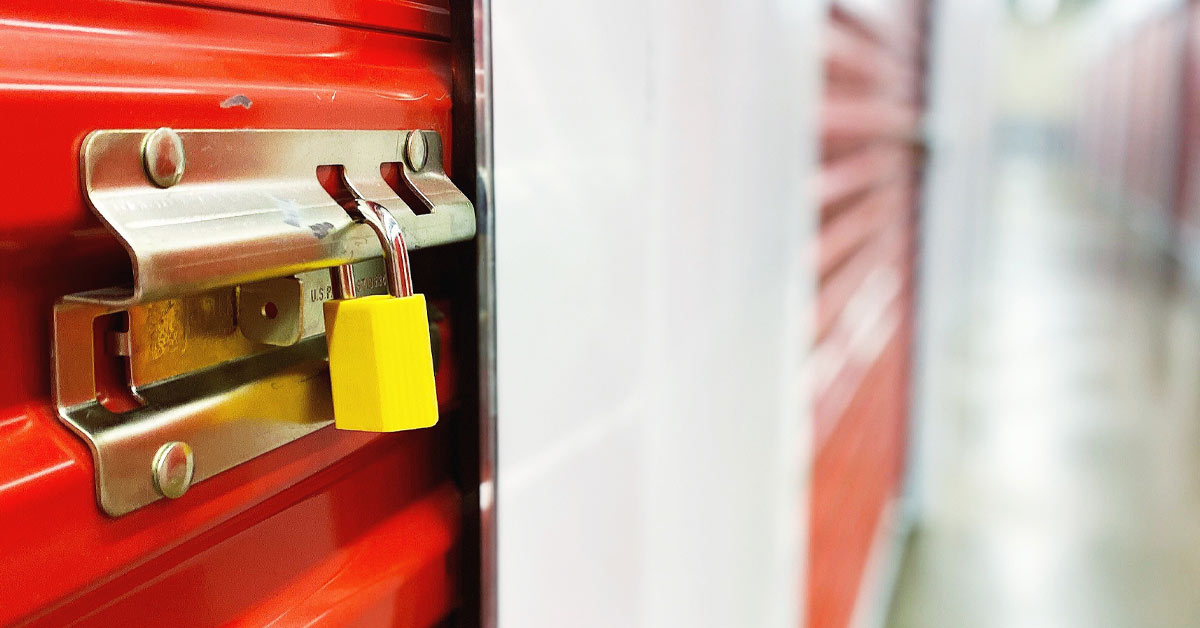
Now that you’ve pulled out your warm weather equipment, you’ve made room to stow away cold weather items. Here are some things you can happily store away in a basement, attic or storage unit until next fall:

  • Heavy outerwear
  • Winter boots
  • Snowblowers
  • Shovels
  • Winter sports gear

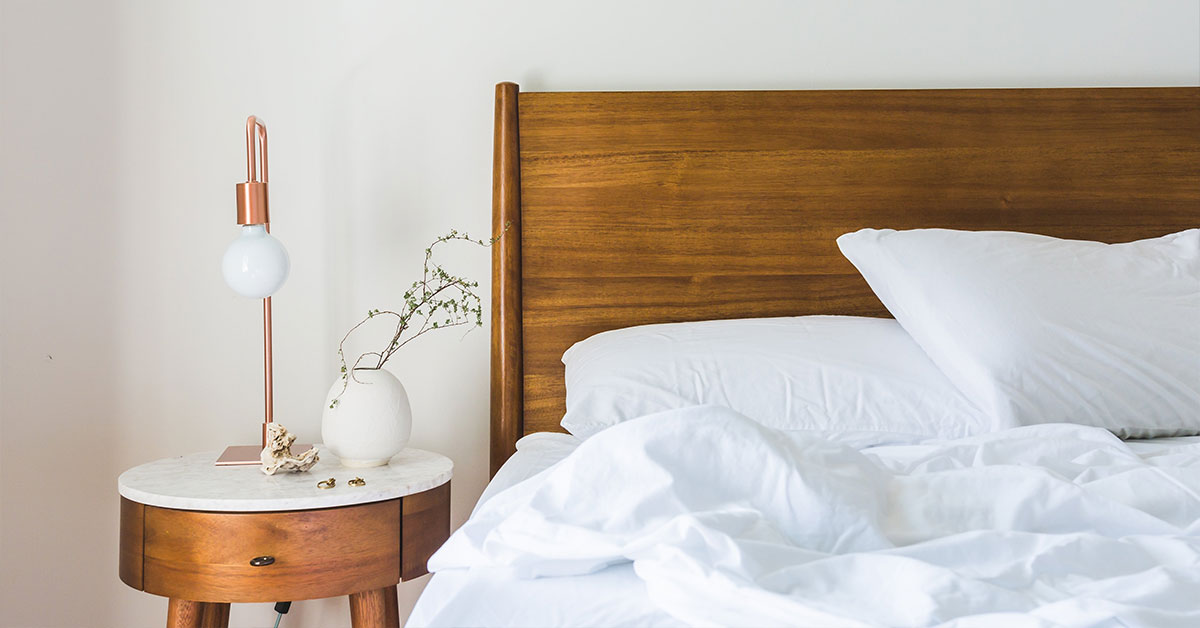
3. Switch out linens with lighter fabrics and colors

Say hello to spring indoors, too. Put away the heavy bedding, fuzzy throws and velvet pillows to help rid your home of the winter feel. Change up your curtains in favor of a lighter, sheer material to let in more light. Add some plants, mirrors and lighter wall decor to create an open, airy feel for your family and your guests. You’ll immediately feel less cluttered.

4. Switch out your wardrobe

Did you know the average person only wears 20% of the clothes in their closet on a regular basis? If you come across clothing that you haven’t worn in the last 6-12 months, it’s time to get rid of it! Consider donating these clothes to a local Goodwill.

Besides downsizing your wardrobe to make outfit decisions easier, you can take this time to pack up your fuzzy sweaters and bring out the shorts. Here’s a guide to storing winter clothing in the warmer months.

5. Skip the sentimentals

If time is limited for your spring cleaning process, we recommend skipping sentimental items until you can dedicate time to really go through them. After surveying 2,000 Americans on the stuff they store and why, we learned that sentimental connections to our belongings make the decluttering process much more difficult.

6. Dust before vacuuming

In case your mother never taught you this nugget of wisdom, we thought we’d include it in here. You stir up dust as you try to remove it and it will most likely settle on the ground. You can take care of it after dusting by vacuuming (or sweeping).

Baseboards and ceiling fans are two areas that often get neglected when it comes to dusting. They are also areas that collect a disturbing amount of dust. So don’t forget to add them to your spring cleaning list!

7. Don’t forget the windows

Over the long winter months, debris like pollen, dirt and dust can build up along your window sills. Cleaning the interior and exterior on a routine basis will not only let more light into your home but ensure that your windows easily open and close. Fresh air will also reduce allergens and germs in mattresses, even if you can’t haul them outside.

8. Even furniture can use a spring refresh

Just because you don’t see stains doesn’t mean your couch is free of dust, crumbs, dirt, animal fur or allergens. Many hardware stores, including major chains like Lowe’s and Home Depot, rent upholstery cleaning machines, which can help clean your favorite room in a matter of minutes. At the very least, be sure to vacuum upholstered surfaces.

9. Extend the lifetime of your mattress by cleaning and flipping it

Despite linens and mattress pads, mattresses are still popular places for dead skin cells, sweat and dust. First, take a vacuum over both sides of your mattress to collect any dust or debris. If it’s nice enough outside, the best remedy for your mattress is some fresh air and sunlight.

To spot clean a mattress, mix the following ingredients in a spray bottle:

  • 16 oz. hydrogen peroxide
  • 2 tablespoons baking soda
  • 2 drops of dish soap
  • Soak the stained area with the mixture, and let it sit for 30-60 minutes before pressing it off with a clean towel. This solution has been magical for my children’s mattresses!

While you’re flipping your mattress, do yourself a favor and leave it on the opposite side. Over time, pressure leads to irregular wear. Flipping it twice a year can help keep it in tip-top shape while also making sure it’s clean.

10. Wipe down lightbulbs

It may seem like overkill, but it’s really so simple to do. Dirty light bulbs emit 20 percent less light than clean ones. Brighten up your home by giving your lightbulbs a wipe with a damp microfiber cloth. I bet it will take you only five minutes to wipe each bulb in your home. Need to keep a kid busy during quarantine? This is an easy job for any kid elementary-age and up!

11. Use salt and grapefruit to remove grime from showers and tubs

The grit of the salt plus the acid of the grapefruit cut down on elbow grease needed. It’ll also give your bathroom that extra boost of freshness that is usually only obtained with heavily scented candles and not-so-friendly cleaning products.

9 Tips for Organizing Your Kitchen To Maximize Space

Here are our top nine kitchen organization tips to try today.

“Everything in its place and a place for everything” isn’t just a saying Grandma cross-stitched on a pillow. It’s also the best of the kitchen organization tips you can apply. For most people, though, an organized kitchen is a dream to be achieved someday after retirement when the kids have moved out and life is less hectic. Reversing years of bad organization habits seems like too daunting a task to ever really tackle.

But it is possible to keep the heart of your home clear of clutter without spending weeks on boring cleaning projects. It’s time to stop procrastinating, be honest about what you really need, and reclaim the space you use to cook meals and enjoy time with family and friends. Here are our top nine kitchen organization tips to try today.

1. Start by reflecting on how your family uses the kitchen

Today’s kitchen isn’t just for food storage and cooking. It’s often part of your living area and is a multi-purpose space.

Consider all the functions your space serves. You might have a sitting area off the kitchen that comes in handy for entertaining. Does part of your kitchen end up being used as a workspace? Write down the ways that you use the area to ensure that your kitchen organization accommodates the needs of your family.

Here are some common uses for kitchens to think about:

  • Create a place to store items used when entertaining. From a bottle opener and wine glasses to coasters and serving trays, select an accessible spot for your things so it’s easy to welcome friends and family.
  • If your dining area is combined with your kitchen, keep placemats and napkins in an easy to reach spot so little hands can help set the table while you cook.
  • If your kitchen island is often turned into a game area or homework zone, keep favorite games in a nearby cabinet or have a bin with pencils, pens, and notebooks easy to grab.

2. Think like a minimalist

Your first step toward kitchen freedom is to give the whole space an objective assessment. Forget about any sentimentality attached to the items you’ve kept all these years, and give serious thought to what you actually use on a regular basis.

Take a cue from minimalists, people who do their best not to acquire more than they need and to get rid of anything lacking a clear purpose. Apply this logic to your kitchen by:

  • Setting aside your most-used tools and appliances.
  • Identifying duplicates.
  • Determining which single-function items can be replaced or tossed.
  • Throwing out old, broken, rusty, or hopelessly dirty items.
  • This gives you a starting point to work from as you create a plan of attack to organize your kitchen space.

3. Emphasize ease of use

Every kitchen has a few key items used to prepare and eat meals on a regular basis. Put the items you use most in easy-to-reach places to keep from tossing everything out of the way to get to that one bowl you need. Remember the old rule: “Like goes with like,” a key philosophy when it comes to storage units.

Make it as easy as possible to find your favorite items by storing dishes in one place and cups in another, and putting similar preparation tools together. This not only speeds up meal prep and table setting but also streamlines the appearance of your kitchen.

4. De-Clutter drawer space

As you’re rearranging the items you use most to keep the kitchen organized, you’ll inevitably run across clutter in drawers, including the ubiquitous “junk drawer.” Take the opportunity to clear out the messes you find as part of your overall cleaning strategy.

If you need to pop out to the store to grab some inexpensive drawer organizers, do it. These simple plastic or wooden inserts can turn even the messiest drawer into a neat and tidy space. Get one for silverware and another for everyday items such as tape, twist ties, and rubber bands.

Some utensils take up too much space when stored in drawers. Big items such as ladles and potato mashers are better kept on a mounted wall rack or simple suction hangers stuck to the side of a cabinet.

5. Categorize cabinets for better kitchen organization

Keeping with the “like goes with like” rule, move on from the drawers to the cabinets. Pick logical spots for plates, glasses, and mugs, and place all the similar items together. Organizing in this way will unearth some things you haven’t seen in years. If you find something you have little or no memory of using, ask yourself these questions:

  • Do you really need or even want promotional items from companies you rarely do business with?
  • Will you ever use “kiddie” dishes and cups again?
  • Is there any reason to keep lids with no matching pots?
  • Which items can be donated or given away to clear out more cabinet space?

This keeps you in the minimalist mindset and allows you to let go of items you have no reason to keep without the nagging feeling that you might use them at some unforeseeable time in the future.

6. Power up your shelving

Now that you’ve sorted through most of the overwhelming volume of stuff in the kitchen, you should have a good idea of what items you’re going to keep. It’s time to turn your attention to the shelves and see how best to organize this space in your kitchen.

Open shelving creates a sense of light and space and gives you a place to showcase your everyday dishes when not in use. Mix in decorative, functional items like cookbooks, gourmet olive oils, and flowers for an attractive display. Make sure you give these shelves a good wipe-down at least once a month to address dust, grease, and grime.

If you don’t have the space for an open shelf unit, make an effort to empty space on the shelves you do have. Use decorative plates, potted plants, or small appliances to break up larger groups of items and improve the appearance.

7. Make the most of your storage

If your kitchen has deep storage drawers, roll-out shelves, or a swing-out pantry, organizing your kitchen will be a breeze. But don’t panic if your kitchen is not outfitted with these great storage hacks. You can easily find perfect kitchen organization solutions that will help make life easier.

Shelf inserts can be used to create additional storage space, cookware organizers make it easy to grab the pan you need, and a tiered organizer helps keep things visible and organized.

8. Consider the countertops

Your countertop can make a big difference in the way you feel about your kitchen. Clutter-free counters make preparing food and cooking meals easier, and they reduce the possibility of accidents. They also improve the visual appeal of the space.

These kitchen organization tips can help you tidy your counter space:

  • Clean up the sink and counter as soon as possible after preparing food.
  • Store containers of flour, sugar, and other dry goods in cabinets or the pantry.
  • Consider moving knives out of large wooden blocks and into drawers.
  • Put away small appliances, such as the toaster, when not in use.
  • If you don’t have the option of putting everything out of sight, consider mounting as many things off the counter as you can. By mounting things off the counter, the area still appears less cluttered and gives you more space to work when cooking.

9. Make a seasonal storage plan

You don’t need the cookie jar you only use for one month around Christmas cluttering your in-home storage space all year long. Get it out of the kitchen along with those holiday dish towels and fancy serving platters and into a shed or self-storage unit. Keep an eye out for other holiday-specific items, such as cookie presses or candy molds, and store them somewhere else until you actually need them.

When the holidays roll around, get what you need out of storage and wash it thoroughly. Find a good temporary spot for it in the kitchen, and put it back into storage as soon as you no longer need it. Leaving seasonal items out for too long can start the cycle of clutter all over again.

4 Tips for Storing a Mattress

Proper mattress storage decreases the chances of funky odors. Storing a mattress with care will prevent it from soaking in odors from your home.

Mattresses are an investment, both in cost and in the time it takes to find the right one. In fact, a quality mattress can last anywhere from 10 to 15 years if properly maintained.

Because the right mattress is expensive, it makes sense to want to store it when it’s not currently being used. However, a few months or years in storage can damage a mattress beyond repair if the proper care isn’t taken.

Maybe you’re getting married and you need to upgrade from a twin to a queen, or your kids are moving out, and you want to repurpose their rooms. Whatever the case — proper mattress storage will significantly expand the longevity of your bed. Keep reading to find out how to store a mattress correctly.

The Importance of a Proper Mattress Storage

Proper mattress storage decreases the chances of funky odors. Storing a mattress with care will prevent it from soaking in odors from your home. Insufficient air circulation between the layers can also result in a stale odor.

You definitely don’t want any mold or mildew in  your mattress. Proper humidity is as important as proper aeration, and if your mattress is just lying on the basement floor, it could become an easy target for colonies of mold or mildew that thrive in humid environments.

Proper storage will help your mattress retain its shape and structure and protect the construction.This is especially important for firm and ultra-firm mattresses that typically have fewer layers, making them more susceptible to outside impact.

Finally, let’s run through a list of things you need to do before you place your mattress into a storage vault or a dark room.

Clean The Mattress

Your mattress has probably collected some dust and debris during use. The dust buildup, along with insufficient cleaning, creates a perfect environment for dust mites, which are the most common allergens in U.S. homes.

To prevent them from hosting a party inside your mattress, give it a thorough cleaning session before you put it into storage:

  • Remove all the bedding and mattress protectors from the  mattress and vacuum it from all sides. If your mattress has a tufted top, use a small brush for hard-to-reach places to clean every crevice.
  • If your mattress has some stains, treat them. Make a mixture of lukewarm water, dish soap, and baking soda and pour it into a spray bottle. Generously spray the mixture on a stained area and a few inches around it. Let sit for 10-15 minutes and blot the stain with a cloth. Allow the mattress to dry before storage or use .
  • Disinfect the surface. To make sure that your mattress has a minimal amount of microorganisms, you can disinfect the surface by spraying it with a Lysol spray and allowing it to dry out.

Invest in a Mattress Storage Bag

You should store your mattress in wrapping to prevent any unwanted critters from using it as their home.

The easiest way to do it is to use perforated plastic wrap, but if you’re about to get fancy, we recommend that you purchase a mattress storage bag. Dedicated mattress storage bags a layereds design with waterproof linings which can keep your mattress secure while protecting it from any unpleasant accidents.

Store a Mattress on a Flat Surface

Mattresses have a structure: they consist of top layers, comfort layers, transitional layers, and the base. The best way to maintain your structure, and therefore the comfort of your mattress, is by laying it on the floor or another flat surface. 

Placing a mattress on the side, folding, or rolling it may cause the structural elements to shift or bend under their weight, which will result in lumps or broken coils. That’s why your storage room should have enough space to place your mattress as you’d typically put it on the bed.

How to Store a Mattress Depending on Its Type

Generally speaking, the way you store your mattress is the same regardless of its type: don’t place it on an uneven surface or right on the ground, and make sure it’s protected from mold and dust mites.

Each  mattress type has its unique features, which may require special care: 

  • Memory foam mattress. Memory foam mattresses don’t have coils inside and can adjust to your body curves pretty easily. However, the softness of memory foam can work against you if you place a mattress on an uneven surface. Plus, memory foam is especially susceptible to mildew growth, so be sure to wrap the mattress into a plastic or place it in a storage bag.
  • Latex mattress. Natural latex is dense and heavy, so it has a higher chance of bending under its own weight. Place a latex mattress on a flat, supportive surface. Avoid storing it on the side or in an upright position.
  • Hybrid mattress. Hybrid mattresses are among the heaviest, and they also have a rigid coil layer for a core. However, the coils inside a hybrid mattress typically are individually wrapped, making them  more likely to shift if you place the  mattress on its side.
  • Spring mattress. Unlike hybrid mattresses, spring mattresses have a reinforced coil unit with a wired perimeter, which maintains shape better. But they are still prone to bending and breaking, so be sure to store it in a flat position.
  • For big sizes, such as King, California King, high-profile, or bulky RV mattresses (check the best ones on this page), the main concern is their weight. If you place these mattresses on a lumpy surface or  store them on the side, they might bend under their weight and lose all supportive properties.

Store your mattress in a storage unit

You can rent a storage unit and store your mattress for long-term or short-term. At U-Lock Mini Storage, we have a wide selection of storage unit sizes for you to choose from.
We offer storage solutions to our clients across Greater Vancouver, Vancouver Island and the Fraser Valley with storage units in Chilliwack (Chilliwack U-Lock Mini Storage), South Surrey and White Rock (White Rock U-Lock Mini Storage), Burnaby and Vancouver (Burnaby U-Lock Mini Storage), Victoria (Victoria U-Lock Mini Storage), Nanaimo (Nanaimo U-Lock Mini Storage) and Parksville (Parksville U-Lock Mini Storage).

Rug Storage Tips: 6 Tips for Storing Rugs and Carpet

Stored area rugs can lose their shape, attract pests and accumulate odors if they’re not put away correctly. To keep your rug safe and protected, follow these steps to prepare it for storage.

Stored area rugs can lose their shape, attract pests and accumulate odors if they’re not put away correctly. 

To keep your rug safe and protected, follow these steps to prepare it for storage.

1. Clean the rug thoroughly

To start the rug storage process, give the rug a good vacuuming. Use a good-quality vacuum to ensure you lift as much dander, dust and other microscopic particles as possible. For some valuable area rugs, you’ll need to be much more careful with the vacuum so you don’t ruin the delicate weaving.

Once you’re done vacuuming, clean the rug based on the manufacturer’s specifications. Different cleaning methods may apply depending on the material and make of the rug. First, check the label, then proceed with any of the following methods.

  • Woven or braided rugs.

If small braided rugs are washable, place them in a zippered mesh laundry bag and wash them on the gentle cycle and tumble dry on a low setting.

  • For large braided rugs, place them on a concrete or vinyl floor. Sponge clean the rug with carpet cleaning foam, rubbing it in according to the directions. Finishby rinsing or vacuuming.
  • Handmade, hand-knotted, antique and oriental rugs

Protect your delicate vintage or antique rugs by placing a piece of nylon screen over the rug, and then vacuuming over the screen.

  • Coir, sisal, rush and grass rugs.

These natural fiber rugs allow a lot of dirt to sift through to the floor, so be sure to vacuum them regularly.

To clean the rug, scrub any stains with a soft brush and soapy water. Place a plastic cloth beneath it to protect the floor. Blot dry, and use a fan or dryer to speed up the drying process, since water will weaken the fibers.

Some of these rugs are made in squares and are then sewn together. By buying a few extra squares, you can hand-stitch new swatches into the rug if a spot gets ruined.

  • Fur, sheepskin and hair-on hides.

To clean these rugs, shake unscented talcum powder on them and then leave it alone for a few hours.

Then, brush the powder through the hair and shake it out, repeating the process several times.

2. Protect the rug from moths and other insects

If you need to store an area rug in a basement, attic or garage, make sure you take extra care to protect it from moths and insects. Apply an insect and moth repellent that is specially designed for fabrics.

3. Tightly roll the rug for storage

Never fold a rug or carpet! Folding can lead to creases, cracks and other damage. Instead, roll the carpet into an even cylinder.

To determine which way to roll your rug, decide which is more fragile: the back of the rug or the pile where the fibers are. In general, the pile is more delicate, meaning you should roll your rug with the pile facing inward.

4. Wrap the rug in a protective fabric

Wrapping a rug is especially helpful if you need to transport or ship it. This extra layer of protection will help keep out bugs, dirt and other elements that can damage the delicate fibers.

How to wrap a rug in a breathable fabric:

  • Finish rolling your rug by wrapping a cotton sheet or muslin around the rug at least one and a half times around to keep it protected. Secure the sheet with cotton or polyester twill tape.
  • If you want expert-level protection, consider wrapping your rug in a polyurethane rug wrap. These rug wraps are designed to provide a superior barrier against dampness and insects and will be more effective than muslin.

Note: Do not use plastic to wrap your rug, since it will keep it from breathing.

5. Store the rug off the ground in a cool, dry environment

When storing your rug, it’s important to keep it in a location off the ground, safe from any harmful elements.

You’ll also want to make sure nothing else lays on top of it. Boxes and other supplies can cause cracks and destroy the rug’s shape. It is vitally important to store your rug in a cool, dry environment without exposure to natural night.

Keep these rug storage tips in mind:

  • Use a fan or dehumidifier to avoid mildew problems.
  • Block light from windows with shades or blinds.
  • Consistently implement a housekeeping plan (vacuuming, dusting, etc.)
  • Store your rug on an elevated surface, since carpet beetles like to reside between the floor and the back of your rug.

6. Unroll and check the rug for signs of damage every few months

To be safe, we also suggest unrolling your rug once a month to make sure there is no evidence of bug infestation. Also, vacuum the area and the rug itself to eliminate any insect-attracting dust.
We offer storage solutions to our clients across Greater Vancouver, Vancouver Island and the Fraser Valley with storage units in Chilliwack (Chilliwack U-Lock Mini Storage), South Surrey and White Rock (White Rock U-Lock Mini Storage), Burnaby and Vancouver (Burnaby U-Lock Mini Storage), Victoria (Victoria U-Lock Mini Storage), Nanaimo (Nanaimo U-Lock Mini Storage) and Parksville (Parksville U-Lock Mini Storage).

6 Reasons Why You Shouldn’t Live in a Storage Unit

Have you ever wondered if living in a storage unit was legal or not? If you found yourself suddenly without a home due to financial hardship or natural disaster, where would you go? For some, that could mean living with family or friends. For others, that could be living in a storage unit where they keep their belongings. While a storage unit might seem like a viable option, it’s not sustainable or safe.

Have you ever wondered if living in a storage unit was legal or not? If you found yourself suddenly without a home due to financial hardship or natural disaster, where would you go? For some, that could mean living with family or friends. For others, that could be living in a storage unit where they keep their belongings. While a storage unit might seem like a viable option, it’s not sustainable or safe.

It’s illegal

Living in a storage unit is prohibited by various local and federal housing laws. Storage facilities must evict any person they find living on the premises to comply with the law and most insurance policies.

There are good reasons why this restriction is in place. For starters, living in a storage unit is unsafe.

The doors lock from the outside

Most storage unit doors are garage-style roll-up doors that lock from the outside. Also, in many storage facilities, management is tasked with doing multiple walkthroughs throughout their shift to ensure all the doors are closed and locked. This task is performed for the safety of renters’ belongings, but if you’re living inside a unit, there’s a chance you could get locked inside. At best, this could mean you feel slightly claustrophobic for the night. At worst, this could result in fatality.

There are no windows or natural light

Natural light is an essential component of psychological well-being. People living in a storage unit could find themselves depressed, lethargic, and claustrophobic due to their living conditions. This lack of space and light can be especially detrimental to children.

Storage units don’t have running water

If you opt to live in a storage unit, you’ll have to spend most of your day outside the unit or sit inside it quietly and discreetly since doing so is illegal. Either way, you’ll be limited on options for bathing and using the bathroom. Your personal hygiene and health can suffer  without access to fresh, running water.

Cooking inside a unit is a fire hazard

There are a variety of activities that could cause a fire inside a storage unit. One of the most probable is people attempting to use stoves or grills without proper ventilation. Unfortunately, people living in a storage unit are commonly to blame for fires breaking out.

You will get caught

The viral Youtube video above talks about the need to be invisible to be able to live in a storage unit. Most storage facilities are well equipped with cameras and security protocols, so it’s unlikely a person will get away with hiding out in a storage unit for long. Once caught, you can face civil charges and could lose access to your unit and your belongings.
We offer storage solutions to our clients across Greater Vancouver, Vancouver Island and the Fraser Valley with storage units in Chilliwack (Chilliwack U-Lock Mini Storage), South Surrey and White Rock (White Rock U-Lock Mini Storage), Burnaby and Vancouver (Burnaby U-Lock Mini Storage), Victoria (Victoria U-Lock Mini Storage), Nanaimo (Nanaimo U-Lock Mini Storage) and Parksville (Parksville U-Lock Mini Storage).

How to Store a Car in a Storage Unit: Top Questions Answered

long will it be in storage? What is the climate like where you live? The answers to these and more questions will help you maintain the integrity of your vehicle when it is not being driven.

How you store a car depends on a handful of factors. How old is the car? How long will it be in storage? What is the climate like where you live? The answers to these and more questions will help you maintain the integrity of your vehicle when it is not being driven.

If you need to store a vehicle for the short term, using a storage unit to do so might be an ideal solution. To help you with this process, we answer your car storage questions and provide you with expert advice if you plan to store a car for a year or less.

  1. Where Should I Store My Car?

If you only need to store a car without driving it for a month or two during a warm season, keeping your car outside with a car cover won’t do much harm. However, if you are looking to put a car away for three months or more, the best option is to store it someplace indoors and away from the elements, such as our Vancouver and Burnaby car storage or White Rock and South Surrey car storage facility.

  1. Do I Need Climate Control for Vehicle Self-storage?

The majority of cars are stored in a non-climate controlled environment. We do not have extreme weather in general in Greater Vancouver so the need to store a vehicle in a climate-controlled car storage is very low.

  1. How Much Does It Cost to Store a Car?

For information about the fees of storing your vehicle at our Vancouver and Burnaby car storage or White Rock and South Surrey car storage facility, please contact us for rates.

  1. How Safe Is Car Storage?

Keep in mind that you are responsible for the contents of your self-storage unit, and you will need to lock it up tight to be certain that you will be the only person with access. You can rest assured, though, that our Vancouver and Burnaby car storage or White Rock and South Surrey car storage facilities are secure and well-maintained. We take the security of our customers’ property very seriously.

  1. Is Working on a Car in a Storage Unit Allowed?

No; unfortunately working on a car in a storage unit is prohibited. Working on cars on site creates issues with oil and fluid spills. Besides the lack of electric power, noise, smoke, and odors are all factors that affect other customers. You should get all engine maintenance done off-site before storing your vehicle in a storage unit.

  1. How Do I Prepare a Car for Storage?

There are a few things you should do before storing your car in a storage unit. For storage under a year in length, review our recommended steps to prepare your vehicle below.

  1. Perform Basic Car Storage Maintenance

Before you put your vehicle into storage, do some basic maintenance to protect your investment.

  • Fill the tank with premium high-octane gasoline to help prevent condensation. With a full tank of gas, the chances of moisture forming in the tank or lines are greatly reduced.
  • Add a fuel stabilizer to increase the longevity of the fuel in your tank for up to 12 months. Be sure to read any manufacturer specifications before adding.
  • Remove the vehicle’s battery to prevent acids from escaping and damaging the car. Most batteries do not store well during the winter and all batteries discharge over time.
  • Change or top off the oil, brake fluid and antifreeze before storing.
  1. Protect Your Car’s Finish and Avoid Pests

Many people underestimate the importance of this next step. Placing a dirty, unkempt car into storage is risky in that you could damage the car’s finish or attract unwanted critters. Take the time to do the following to your car before storage.

  • Wash and wax your vehicle. Do not forget door jambs and under the hood.
  • Vacuum and dust the interior and apply a conditioner to any vinyl surfaces. This will not only protect your vinyl from drying out, but it can also help prevent any foul odors from developing and thus deter rodents and pests from taking up residence. If you plan on steam cleaning, do so far enough in advance for the interior to completely dry.
  • Give the car’s exterior a final wipe down once it reaches its storage location. This step eliminates any final traces of dust, debris or salt.
  • Use a car cover to further protect the car’s exterior finish while in storage.
  1. Prevent Tires From Flat Spotting

Tires can be the first thing to cause issues when storing a car for an extended period. Flat spotting occurs when a tire flattens over time due to contact with the ground. If you plan to store a car for more than a month, consider resting the vehicle on blocks or jack stands.

If you are looking for a Vancouver and Burnaby car storage or White Rock and South Surrey car storage facility, please call or visit U-Lock Mini Storage and inquire about our car storage facilities and rates!

Lawn Mower Storage Tips: 7 Things You Must Know

When storing a lawn mower for the winter, there is a wide range of recommendations. Some people go through every step meticulously while others leave their mowers outside in the snow and hope for the best.

When storing a lawn mower for the winter, there is a wide range of recommendations. Some people go through every step meticulously while others leave their mowers outside in the snow and hope for the best. However, one thing is for sure: the most important thing you can do when storing a lawn mower is to tend to the fuel system. Taking this step will dramatically reduce your chances of problems come the warm season.

Now that you’re at it, don’t stop there. No one wants to have to tinker with a broken mower or buy a new one at the start of every season. It is worth it to prepare your lawn mower for winter like you would a car or boat, especially if you have an expensive riding mower.

These lawn mower storage steps will help maintain your equipment and increase its longevity. Cover as many steps as you can, and make sure you take all the proper precautions when winterizing your mower.

1. Drain Gas or Add a Fuel Stabilizer

There are two methods for lawn mower storage when it comes to gasoline. You can either leave the gas in the tank and stabilize it, or remove it completely. It is never a good idea to just leave fuel in the tank without any intervention. Fuel can start to degrade in a month or two and can wreak havoc on the carburetor and fuel tank.

How to Remove Gas from a Lawn Mower

In some circumstances, it is essential to remove all the gas from a mower when storing it for the winter. If you are keeping your lawnmower in your basement or inside a storage unit, remove all fuel. Not doing so creates a fire hazard.

To drain gas from a lawn mower, do your best to let the tank run dry toward the end of the season. To accomplish this, run the mower until it stops and won’t restart again. Any remaining fuel can be siphoned out with a turkey baster.

How to Add Fuel Stabilizer to a Lawn Mower

If you are storing the lawn mower in a detached garage or shed, leave a full tank of gas and top it off with a fuel stabilizer. Once the stabilizer is added, run the mower for a couple minutes to be sure the stabilizer gets into the system.

2. Prevent Mower From Kick-Starting

Before you clean your lawn mower and prep it for storage, make sure you remove the spark plug; this will prevent the mower from being turned on accidentally. The importance of this step cannot be underestimated.

3. Drain or Change Oil

It is important to change a lawn mower’s oil at the end of every season, if necessary. The first step is to figure out if you have a two-cylinder or four-cylinder lawn mower. Two cylinder motors have the oil and fuel in the same tank, in which case you can drain the oil along with the fuel. On four-cylinder motors, the oil will need to be changed similarly to how you would on a car. Refer to the lawn mower’s owner manual for specific instructions on how best to do this.

In general, you can follow these steps on most four-cylinder mowers:

  • Check the level of the oil by removing the dipstick.
  • Make sure the oil is warm by running the mower after adding fuel stabilizer or when draining the tank. If you waited for this step and the engine is cold, connect the spark plug temporarily and run the mower for 10-15 minutes.
  • Remove the spark plug again if you reconnected it to warm up the engine. If your mower has a battery, disconnect it.
  • Pull the oil plug and drain the oil into an oil-safe drain pan.
  • Properly discard used oil by bringing it to a recycling facility that can properly dispose of it.
  • Add new oil to the tank according to the manufacturer’s recommendation.

Lawn Mower Storage Pro Tip: If you have inconveniently positioned drain plugs, consider purchasing an oil extractor to help with this process.

4. Clean Deck and Undercarriage

A garden hose or a pressure washer on a low setting will work well to clean the lawn mower’s deck. In theory, grass should be cleaned off after every mow. However, if bits of grass have dried and crusted onto the metal, make sure to remove it before storage. If necessary, take a wire brush, putty knife or a flat head screwdriver to scrape off anything that the hose did not clean.

Be careful of the mower blades and make sure to wear thick, durable gloves during this process. Once the undercarriage is clean and dry, use a silicone spray to prevent future build-up and better preserve the lawn mower.

5. Remove and Sharpen Blade

To remove the blade, lean your mower on its side with the carburetor facing up. Find a long-handled wrench that matches the bolt holding the blade in place. If the bolt is stuck in place and corroded, spray some oil or lubricant on it and let it sit for a few minutes.

Once removed, sharpen each blade evenly. You do not want to make the mistake of sharpening only one section because this could lead to an uneven lawn. To do this, clamp the blade in a vise and use a mill bastard file to file down the blade until it is as sharp as a butter knife.

Lawn Mower Storage Pro Tip: Once you remove the blade, mark it with a paint pen, so you know which is the top and which is the bottom. One common mistake people make is to reinstall the blades upside down.

6. Replace Spark Plug and Air Filter

At this point, the spark plug should already be disconnected. Use a wrench or pliers to completely remove the plug. Take the plug with you to the store to make sure you purchase the correct replacement. Next, screw in the new plug and either reconnect the wire or leave it disconnected for storage.

Before storing a lawn mower for the winter, you will want to either clean or replace the air filter. Some lawn mower filters are made of paper and should always be replaced when they look dirty. Other filters like foam or plastic filters can be cleaned, dried and then coated with a few tablespoons of oil before being reinstalled. While you are at it, use a spray lubricant to coat any exposed lawn mower components.

7. Keep Mower Covered In Storage

To protect the exterior and interior components, consider investing in a lawn mower cover. If you don’t have a cover readily accessible, you can use a tarp.

We hope this article puts you off to a good start so you know what to expect when you store your lawn mower. Whenever possible, make sure to reference the owner’s manual. If you don’t have a copy, most times the manufacturer will have a copy online that you can download.

We offer storage solutions to our clients across Greater Vancouver,Vancouver Island and the Fraser Valley with storage units in Chilliwack (Chilliwack U-Lock Mini Storage), South Surrey and White Rock (White Rock U-Lock Mini Storage), Burnaby and Vancouver (Burnaby U-Lock Mini Storage), Victoria (Victoria U-Lock Mini Storage), Nanaimo (Nanaimo U-Lock Mini Storage) and Parksville (Parksville U-Lock Mini Storage). 
Please contact a U-Lock Mini Storage self-storage facility near you to inquire about our storage units and our team members will be delighted to answer any questions you have!

10 Things You Shouldn’t Store In a Garage

want to store items in your garage that you don’t have room for in your house, you could be in for a surprise later. Moisture, heat and pests can damage or destroy your belongings. In fact, some of those items could even become dangerous when stored improperly.

If you want to store items in your garage that you don’t have room for in your house, you could be in for a surprise later. Moisture, heat and pests can damage or destroy your belongings. In fact, some of those items could even become dangerous when stored improperly.

Before you stash another box or unused item in your garage, make sure it’s safe to do so. We compiled this list of 10 things that should never be stored in a garage.

These items should never be stored in your garage:

Food

You should never store food of any kind in your garage. Fresh food attracts rats and other pests, which can easily break into bags and cardboard boxes. Canned goods don’t fare much better. Temperature fluctuations can cause bacteria to grow inside cans, and humidity can cause the cans’ metal and the metal lids on glass jars to rust. In turn, the rust can cause a chemical reaction in the food that makes it unfit for consumption.

Alcohol

Beer, wine and other alcoholic beverages shouldn’t be stored in the garage either. Light and heat can alter their taste and even turn wine into vinegar. Instead, make room for them in a dark, cool place inside your home.

Paint cans

You’re not alone if you store leftover paint in your garage. However, the extreme temperatures of your garage, basement or attic can ruin your paint, rendering it useless. To keep your paint at its best, store it in a utility closet or laundry room.

Propane

Since propane tanks can leak, they’re a potential hazard when kept in your garage. Just one spark can start a fire when a leaking propane tank is present. Store propane tanks in a well-ventilated area a safe distance from your home.

Firewood

Pests like spiders and termites make their home in piles of stacked wood. If that wood is stored your garage, those pests can easily infiltrate your living space. Avoid an infestation by storing firewood at least 20 feet away from your home.

Pet food

Like human food, pet food shouldn be kept anywhere but in your garage. Although temperature won’t affect pet food the same way it does your food, rats and other pests can easily chew through pet food bags. If you must store it in the garage, keep it in a tightly sealed plastic or metal container.

Plywood

Who doesn’t store wood scraps in their garage? For an immediate project, it’s usually not a problem. But over the long term, wood can warp thanks to fluctuating temperatures and humidity. If you have nowhere else to store your scraps, the garage works. Just realize the wood may warp and become unusable by the time you need it.

Wooden furniture

It’s not just plywood that suffers in the garage. Pretty much any wood is susceptible to its harsh conditions. As a result, if you store wood furniture in your garage, expect some damage to it over time. For example, changes in the humidity will cause the wood to swell and contract, leading to cracks that you may not be able to repair.

Collectibles

Valuables don’t belong in the garage. Moisture can cause coins to tarnish, Hot Wheels to rust and trading cards to mold. Heat can cause vinyl records to warp, and dirt can mar autographed posters. Not to mention, it’s easier to steal these items from your garage than a secure place inside your home.

Electronics

Old electronics like computers, laptops, DVD players, game consoles and TVs can easily be damaged by extreme temperatures, with moisture posing the greatest risk. Any condensation or moisture can cause electrocution. Either keep these items inside or donate them.

We recommend renting a storage unit for your storage needs. Storage units at self storage facilities such as U-Lock Mini Storage offer secure, climate-friendly, and pest-free storage solutions. Our storage units are suitable for storing goods both for the short and the long-term.

We offer storage solutions to our clients across Greater Vancouver, Vancouver Island and the Fraser Valley, with storage units in Chilliwack (Chilliwack U-Lock Mini Storage), South Surrey and White Rock (White Rock U-Lock Mini Storage), Burnaby and Vancouver (Burnaby U-Lock Mini Storage), Victoria (Victoria U-Lock Mini Storage), Nanaimo (Nanaimo U-Lock Mini Storage) and Parksville (Parksville U-Lock Mini Storage). 
Please contact a U-Lock Mini Storage self-storage facility near you to inquire about our storage units and our team members will be delighted to answer any questions you have!

8 Important Tips for Packing to Study Abroad

​You’ve been invited to study abroad for a semester, or even a full year. So, what do you need to bring? What don’t you need? And, how do you get it all there?

​You’ve been invited to study abroad for a semester, or even a full year. So, what do you need to bring? What don’t you need? And, how do you get it all there?

We’ve compiled these eight tips to help you prepare for studying abroad.

Bring the Right Documents

To get into the country where you’ll be studying, you need a passport. If you don’t already have one, give yourself at least eight weeks to get one (you can expedite your passport for a fee). Your passport will remain valid for 10 years and come in handy if you intend to visit neighbouring countries during your time overseas. 

Some countries also require a visa: a document allowing you to stay in that country for a specified amount of time. Check to see if your destination country requires one, and apply early.

You will also want to bring your International Student Card (ISC), which entitles you to discounts at restaurants, shops and more overseas, and carries medical and emergency benefits. The ISC card can also serve as an additional form of identification when you study abroad. If you don’t get one, consider applying for a proof of age card instead. 

Additionally, you will likely need an International Certificate of Vaccination (ICV). Some countries required these even before COVID to prove you had received vaccinations for diseases like polio, malaria, meningitis or yellow fever. Today, you may have to present one proving you’ve been vaccinated for COVID as well.

Always bring your documents with you on the plane – not packed in your luggage. Never ship them. Make several copies to have on hand.

Know the Country

Weather plays a big factor in what you pack, too. Depending on when you go and where you go, you may experience one season or several. Winter usually means bulky jackets, gloves, scarves, hats and boots, which can take up a lot of room in your suitcases. Some airlines will allow you to ship boxes as checked luggage, so you could theoretically pack a box of winter clothes.

Before you start packing for your move to study abroad, study the country you’ll call home. Its climate, culture, geography and recreational opportunities can inform what you pack. For example, the tank top you can wear in London would offend people in Dubai. Also, consider how convenient amenities at your destination will be. Will you be able to buy toiletries at a nearby store, or will you have to commute via public transportation for several hours to reach the closest grocery store to purchase toiletries?

Pack the Right Clothes to Study Abroad

Based on what you learn about the country, pack clothes suitable for your time studying and your time exploring the country. As a starting point, you’ll want to bring:

  • Shirts, pants, dresses, skirts and everyday clothes
  • Underwear, socks and undergarments
  • At least one nice, dressier outfit
  • Pajamas and comfy clothes
  • Bathing suit
  • Exercise clothes for working out, hiking and adventures
  • Light jacket

Bring Suitable Footwear

Your destination may have different terrains than where you live now so make sure to bring suitable footwear. Keep your selections simple and stick to these tried-and-true options:

  • Comfortable shoes for walking
  • Athletic shoes or trail shoes for hiking and outdoor adventures
  • One pair of nice shoes (choose wedges over stilettos)
  • Flip flops for hostel showers or the beach
  • Slippers (or gripper socks) for colder climates

Add Toiletries and Other Necessities

Once you’ve decided on your clothes and footwear, finish your packing by adding toiletries to your luggage:

  • Shampoo, conditioner and soap
  • Toothbrush, toothpaste and floss
  • Contact lenses, solution and eyewear
  • Deodorant
  • Cosmetics
  • Sunscreen
  • Feminine products
  • Contraceptives

The whole point of studying abroad is to learn, in the classroom and beyond. Pack for both. You will also want to bring:

  • Laptop, charger and supplies
  • Mobile device (cell phone) and tablet
  • Pen, pencils and school supplies
  • Camera, if you enjoy photography
  • Journal to record your experiences
  • Paper map, in case you can’t rely on cell service
  • Small backpack for day trips
  • Padlock for hostel lockers

Don’t Overpack to Study Abroad

Most international flights allow at least one, sometimes two checked bags. Depending on the airline and destination, you may be able to check additional bags (or boxes) for a fee. However, keep in mind that whatever bags you bring, you have to get them to and from the airport.

Try to keep your luggage limited to two large, checked suitcases for your clothes, toiletries, favorite products and other necessities. In your carry-on, bring your electronics (laptops, tablets, etc.), chargers, essential gear and any prescriptions. You may also want to pack a fresh t-shirt and a toothbrush for long flights.

After you arrive, if you find you need more clothes or left things at home, your parents can send you a care package through a carrier.

Rent a storage unit

If you do end up bringing more than you need and you don’t have enough storage space at the place that you live, you can rent a storage unit to store excess items. For example, you can store shoes or coats that you won’t wear regularly in a self storage unit.

Bring Your Favorite Products

If you can’t survive without your favorite products, like a snack or brand of soap, then by all means pack a few packages in your luggage. One or two items that remind you of home may help you cope as you adjust to a new country. Don’t get carried away, though: your parents and friends can always send these items in a care package later.

We offer storage solutions to our clients across Greater Vancouver,Vancouver Island and the Fraser Valley with storage units in Chilliwack (Chilliwack U-Lock Mini Storage), South Surrey and White Rock (White Rock U-Lock Mini Storage), Burnaby and Vancouver (Burnaby U-Lock Mini Storage), Victoria (Victoria U-Lock Mini Storage), Nanaimo (Nanaimo U-Lock Mini Storage) and Parksville (Parksville U-Lock Mini Storage). 
Please contact a U-Lock Mini Storage self-storage facility near you to inquire about our storage units and our team members will be delighted to answer any questions you have!

4 Creative Tips to Add Storage Space to Your Bathroom

A bathroom without storage space can really cramp your style. If you find yourself constantly knocking over toiletries and bathing supplies, some extra storage space might just be the solution to your problem.

A bathroom without storage space can really cramp your style. If you find yourself constantly knocking over toiletries and bathing supplies, some extra storage space might just be the solution to your problem. Without too much effort, you could optimize the space that is already there, or you could get creative with your space-creating solutions.

Use a Door-Hanging Shoe Caddy for Added Storage

If the back of your bathroom door is available, a door-hanging shoe caddy can contribute plenty of storage space. These can be bought at most general retailers and they simply hang from a door.

Fill the pockets of your hanging shoe caddy with toiletry bottles, bathing supplies and more.

Create a Towel Holder from a Wine Rack

The shape of many wall hanging wine racks is perfect for holding rolled towels. In addition to providing a classy look, these are usually generally easy to install. In most cases, all you will need to do is screw the rack into the wall to create a wall holder for towels.

Before you screw in the wine rack to the wall, be sure to check that it is level. To do this most efficiently, you may want to ask a friend to help.

You should be able to find suitable wine racks at big box stores, general retailers and hardware stores.

Once the wine rack is mounted on the wall, roll up your towels and place them in the slots where the wine bottles would normally go.

Store Spare Toilet Paper in Oatmeal Canisters

Toilet paper stacked precariously in your cabinets can be easily knocked over and can contribute to clutter. Large oatmeal canisters can store up to three rolls of toilet paper — depending on the kind of toilet paper — giving you a nifty spot to stash your TP.

You can add some flair to your oatmeal canister by covering its outer surfaces with a wrapping paper that matches the decor of your bathroom.

Using oatmeal canisters is one option — any kind of large, colorful kitchen canister will work.

Consolidate Magazine Storage with Hangers

Stacks of magazines can rob your bathroom of valuable floor and counter space. To avoid this, you can place hangers on door knobs and towel racks in your bathroom. Hang the magazines by opening the magazines to their middle pages and draping them from the hangers.

For standard-sized magazines, you can expect to be able to drape quite a few from your hanger before it becomes too heavy. For larger or special edition magazines, you may only be able to hang two or three.

You can also place a magazine rack behind the toilet to store your magazines.

Alternatively, you can rent a storage unit to store all your bathroom needs. At U-Lock Mini Storage, we offer a wide selection of storage unit sizes for you to choose from. We offer storage solutions to our clients across Greater Vancouver,Vancouver Island and the Fraser Valley with storage units in Chilliwack (Chilliwack U-Lock Mini Storage), South Surrey and White Rock (White Rock U-Lock Mini Storage), Burnaby and Vancouver (Burnaby U-Lock Mini Storage), Victoria (Victoria U-Lock Mini Storage), Nanaimo (Nanaimo U-Lock Mini Storage) and Parksville (Parksville U-Lock Mini Storage). 
Please contact a U-Lock Mini Storage self-storage facility near you to inquire about our storage units and our team members will be delighted to answer any questions you have!