How to Add Storage Space to a Playroom

Finding ways to add storage space to a playroom can feel like an impossible task, especially if you have more than one child.

Finding ways to add storage space to a playroom can feel like an impossible task, especially if you have more than one child. Trying to find spots for their dolls, Lego bricks, cars, action figures and other oddly shaped toys requires a little ingenuity. However, making use of available wall space and purchasing multi-use furniture can help aid in the process.

Set Up a Pegboard

Find or buy a pegboard from a home improvement store. You can get it cut to the size you need and it should only require a few wood screws and drywall anchors to set it up. Paint the pegboard whichever way you like.

Try bright colors like red or orange or a design with stars and stripes. Once painted, attach hooks and hang things like baskets, toys, and clothes to get items off the ground and add space to the room.

This is an easily customizable item and can be changed regularly as you need.

Convert a Shoe Organizer into Toy Storage

Buy a cloth or plastic see-through over-the-door shoe organizer for toys like Barbies, stuffed animals or cars. Simply follow the shoe organizer instructions to hang it over a door and then fill every cubby as needed. You can even divide the shoe organizer in half with different types of toys. For example, Barbies and their clothes can go in the top half and action figures like G.I. Joes can go in the bottom.

Using a see-through organizer makes it easy for kids to see what is in each pocket, which helps make clean-up easier.

Install some Magnetic Tape Strips

Measure out a few strips of magnetic tape to add to a playroom wall. The amount you use will depend on the number of toys you plan to attach. For example, if your child has a large collection of race cars, then you may want 3-5 strips of tape. However, if you have the wall space for it, you can also just do one long line of magnetic tape. Once you have attached it to the wall, simply place the cars or other metal toys along the strip.

Make sure this strip is low enough for children to access easily.

Once you want to remove it, the tape should peel off easily. However, if you are having issues, try using a mixture or warm water and dishwasher soap to remove the tape.

Buy a Wall-Mounted Desk or Table

A hideaway table or desk is a great way to free up space in a playroom. You can find wall-mounted desks on Amazon or Ikea for under $50. Everything you need for the set-up is included, outside of a screwdriver. Just make sure to check the durability of the desk before you buy it, as children can be rough in their usage of household furniture.

You will first need to decide where you want the desk. Then, use a level and pencil to mark a straight and even line on the wall. Most fold-away desks only require screws and hinges, so once you have made the marks, you should only have to screw the hinges into the desk, and then screw the other half of the hinges into the wall.

Turn Storage Bins into Seating

Take a couple of wooden, plastic, or wicker storage bins and attach seat cushions to their tops. These storage bins are the perfect size for young children and are a great way to get toys, books, and clothing out of the way without sacrificing space. You can even attach wheels to their bottoms to make them easy for kids to move around as needed.

Try different colors and patterns for the fabric tops to add character to a playroom.

Use Chests as Tables

Repurpose a wooden or wicker chest to double as a table. Most chests are already at the perfect height for children; however, you can always add table legs to elevate the chest and make it appear more like a table. Try purchasing wooden table legs from Lowes or Home Depot, which are only $1-$3 each. You can also paint or stain these trunks to match the decor of the room.

If you do not have a chest, try searching in thrift stores or at Goodwill for a cheaper item on which you won’t mind the kids getting paint and other things.

Line a Wall or Below a Window with Benches

Benches are a great way to get both storage and seating space. Look for benches that have cubbies for you to put things away in. You can even get a number of baskets or colored storage containers to enliven the room’s decor. Use these cubbies to pack away stuffed animals, clothes or shoes.

If you have a window, try installing a bench with storage directly under it to create a reading area. You can then fill the cubbies with your child’s favorite books.
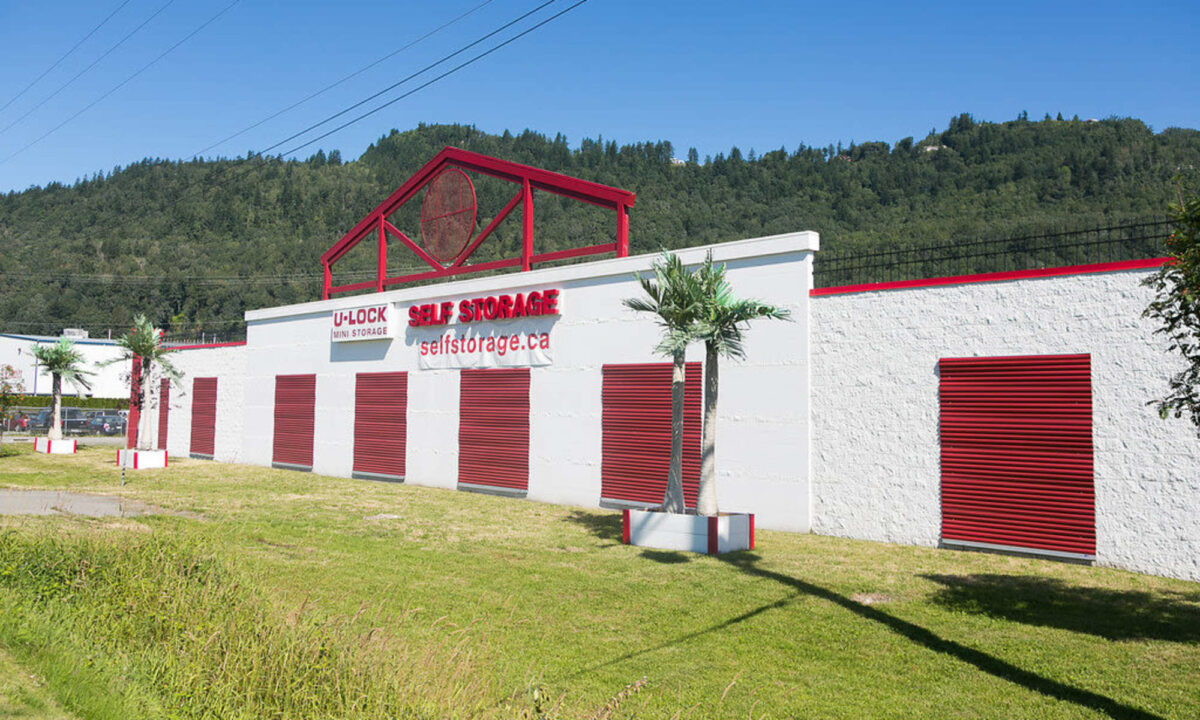
Rent a Storage Unit

Renting a storage unit lets you store your child’s belongings in a safe, secure area while freeing up more room in your home! At U-Lock Mini Storage, we offer a variety of storage unit sizes for you to choose from. You can rent a storage unit that is as big as a walk-in closet or as large as a garage – you can select a storage unit size that best fits your needs!

We offer storage solutions to our clients across Greater Vancouver,Vancouver Island and the Fraser Valley with storage units in Chilliwack (Chilliwack U-Lock Mini Storage), South Surrey and White Rock (White Rock U-Lock Mini Storage), Burnaby and Vancouver (Burnaby U-Lock Mini Storage), Victoria (Victoria U-Lock Mini Storage), Nanaimo (Nanaimo U-Lock Mini Storage) and Parksville (Parksville U-Lock Mini Storage). 
Please contact a U-Lock Mini Storage self-storage facility near you to inquire about our storage units and our team members will be delighted to answer any questions you have!

How to Add Storage Space to Your Garage (Part 2)

Adding storage space to a garage is a great way to organize your garage and create more room.

Adding storage space to a garage is a great way to organize your garage and create more room. Before you begin adding anything new to your garage, you will first need to organize it by sorting your things and drafting a floor plan. Once your garage is organized, you can build some shelving and install other vertical organization systems. You can also free up some space by hanging things from the ceiling or placing them in cabinets and plastic bins.

Build Shelving

One simple way to maximize the space in your garage is by adding some shelves. You can build some floating shelves on your walls or install premade shelving. Shelves are a good choice because they are inexpensive, easier to access, and they let you take stock of your items.

  • If you buy ready-made shelves, make sure that they are raised so that you can easily clean underneath them.
  • If you want to be thrifty, consider installing second-hand kitchen cabinets in your garage.
  • If you have the space, consider installing some hooks on the underside of your shelves to hang lighter items.

Buy a Pegboard

A pegboard is easy to install and relatively inexpensive. The flat piece of particleboard with evenly spaced holes can be attached to most walls. You can also paint it whatever color you want and alter it to fit a wall space of any size. A pegboard is perfect for storing lightweight things like hand tools or sports equipment.

  • You should be able to find pegboard and hooks at your local hardware store.

Install a Panel-based Vertical Organizing System

This high-end system allows you to maximize your wall space. Each wall in your garage is finished with slotted plastic panels that hold and lock in hooks, shelves and cabinets. However, the system is expensive and, in most cases, it has to be installed by professionals.

This system is a great option for those who want to get the most out of every inch of wall space in their garage. It can handle lightweight and heavy items.

You can go online to find local professionals to install the panels in your garage.

Put Together a Track-based Vertical Organizing System

In this system, shelves, hooks, cabinets and other organizers hang from tracks that are affixed to the garage walls studs. This system is relatively cheap, extremely versatile and capable of handling large and heavy loads. However, it can be difficult to install. You will need to make sure that each track is level with the ones next to it so that the shelving hangs straight.

  • You can find tracks and shelves at most hardware stores.
  • If your garage is not plumb, you may have a difficult time getting your tracks and shelves level. Using a level, you should check the level of your garage before you install the tracks.

How to Stage a Kitchen when Selling a Home

Kitchens are at the heart of any home, so when it comes to selling, presenting a kitchen beautifully is a must. Whether you are tweaking a few features or considering a full-blown renovation, make sure you know your market and what features attract positive attention.

Kitchens are at the heart of any home, so when it comes to selling, presenting a kitchen beautifully is a must. Whether you are tweaking a few features or considering a full-blown renovation, make sure you know your market and what features attract positive attention.

1. Deep Clean Your Kitchen

Clean your kitchen from top to bottom when you are preparing to show it. This means cleaning countertops, floors, stovetop, inside the fridge and inside cabinets. Work top to bottom, and then left to right—this will help you make sure you do not miss a spot.

Be sure to use the right cleaning product for each of the different surfaces. The labels on most cleaning products will specify on which types of surfaces they should be used.

2. Put Away or Store Personal Items

Avoid leaving personal things out on the counters, or even inside the drawers. Things like paperwork, mail, photos and even magnets on the fridge should all be taken out of the kitchen and packed up or stored elsewhere. Potential buyers want to see a clean slate so that they can imagine their own lives in the space, rather than feeling like they have walked into someone else’s.

Keeping the counters as clear as possible will help showcase the spaciousness of the kitchen to potential buyers. If you have a lot of small appliances covering the countertops, store those elsewhere when showing the home. Consider boxing and storing things you do not really need out, or that might be cluttering your countertops, like coffee mugs or spice racks.

3. Remove Extra Furniture

If you have large furniture items in your kitchen, like hutches or unattached islands, consider getting rid of these when staging your kitchen. They can make your space feel confined and appear smaller. By removing these items, your kitchen will look larger to potential buyers, who will then be able to imagine putting their own imprint on what they see.

If you have bar stools at the kitchen counter or chairs around the dining table, remove any extra seats you may have added. Use as few of these items as possible to let the room feel open.

4. Stay on top of Kitchen Odors

Since you will likely still be living in your home while trying to sell it, chances are you will still be using the kitchen to cook and have meals. When showing the home, avoid cooking meals that leave residual odors. Air out the kitchen and take the trash out daily to keep any odors from lingering in the kitchen.

  • Keep pet food dishes and other pet items out of the kitchen when showing the home. These can create smells you might not notice yourself, as you are used to them.
  • Drop a piece of citrus into your garbage disposal. A chopped lemon works well. This will defeat odors in your sink and leave a lasting, pleasant aroma in the room.

5. Clean Up Messes as You Make Them

Rather than spending a large amount of time cleaning the kitchen prior to showing it each time, just do one deep clean, and then clean up smaller messes as you make them. Wipe counters, and wash and put away dishes after cooking and serving meals. Put away items that may have gathered on your countertops throughout the day.

When you start to cook, fill the sink with hot water and dish soap. This way, you can drop dishes in it to soak while you eat, and cleaning up will be much easier and faster as the dishes will be easier to wash after soaking.

6. Organize Items in Your Pantry and Cabinets

Potential buyers will likely open the cabinets and pantry doors to take a look inside and get a better feel for the storage space in the kitchen; you do not want them to find cluttered messes. Keep dishes and food items organized and neat.At U-Lock Mini Storage, we offer storage units our clients across Greater Vancouver and Greater Vancouver Island by offering storage units in Chilliwack (Chilliwack U-Lock Mini Storage), South Surrey and White Rock (White Rock U-Lock Mini Storage), Burnaby and Vancouver (Burnaby U-Lock Mini Storage), Victoria (Victoria U-Lock Mini Storage), Nanaimo (Nanaimo U-Lock Mini Storage) and Parksville (Parksville U-Lock Mini Storage). Please contact a U-Lock Mini Storage self-storage facility near you to inquire about our storage units and our team members will be delighted to answer any questions you have!

How to Rent Furniture for Staging

To stage your home, it is ideal to rent elegant, posh furniture. Here are step-by-step instructions you can follow to rent furniture for staging!

Staging a home involves adding beautiful and attractive furniture and accessories in order to accentuate the beauty and size of your home and thus attract potential buyers. To stage your home, it is ideal to rent elegant, posh furniture. Here are step-by-step instructions you can follow to rent furniture for staging!

1. Look Up Furniture Rental Companies in Your Area

Run a search for “furniture rentals” plus the name of your town, city or province. Furniture rental businesses are more common than you might expect, as they cater to businesses, realtors, individual homeowners and even members of the entertainment industry. This means that you are likely to find one near you. For example, you can search for “Burnaby furniture rentals” or “Vancouver furniture rentals”.

2. Visit a Company’s Website for More Information

Pick a rental company from your search results to take a closer look at what they have to offer. Viewing a company’s website will give you a better idea of the exact services they provide, as well as their signature decorating style and general price range. Additionally, look at their Google Reviews or Yelp reviews to gain a better understanding of their reputation and reliability. Finally, compare several different rental companies (assuming you have more than a couple to choose from) to find one that best suits your sensibilities and budget.

3. Call the Company to Enquire about the Furniture

If you like what you see on a furniture rental company’s website, call them and discuss the details of the rental process. A quick chat will give you a chance to learn about the company’s products and policies and ask whatever questions you might have. Some good questions to ask include “Where do you source your furniture?”, “Is it possible to pick out pieces individually?” and “How long does a standard rental agreement last?”

4. Assess How much Furniture You Need

If you are staging your whole house for walkthroughs, you will want to have enough pieces on display to tie each room together. This will call for large, coordinated items like beds, tables and seating areas. If you are only planning on listing 1 or 2 rooms, you can probably get away with renting a single set of furnishings in your preferred theme.

5. Pick out Furniture by Style

The pieces leased by furniture rental companies are typically grouped together as packages based on popular decorating themes such as modern, rustic, urban and townhouse. Browsing by style is probably the easiest way to find furniture that compliments your living space without having to select each item individually. When you shop by style, you will receive a complete set of furnishings that have been curated based on a common look.

Furniture packages are often categorized by room, which makes it possible to mix-and-match different styles between rooms. For example, you might fill your living room with contemporary minimalist pieces and select a rustic French chateau motif for the master bedroom.

6. Compare Items from the Company’s Inventory Individually

Online catalogues, showrooms and stores make it easy to shop for furniture one piece at a time. There, you will find items separated by type, such as beds, sofas, tables, chairs and lighting fixtures. Some companies even stock functional appliances and other accessories like wall art and miscellaneous decorations. Be sure to write down the name or item number of each piece along with its price to keep track of how much you can expect to spend. Picking out furniture individually can be useful when you are sprucing up a room that does not fall into one of the usual categories, or if you want to put your own personal touch on your living space. In some cases, it may be possible to add individual items to a pre-curated package for an additional charge.

7. Shop for Accessories to Provide the Finishing Touches

Before you check out, take a look at some of the decorative items the company has available, like rugs, mirrors, throw pillows, potted plants and eye-catching knickknacks. These items are perfect for giving homes a lived-in quality, especially in cozy, intimate quarters like bedrooms and bathrooms.

Consider spending a little extra on a few wall hangings, sculptures, and other pieces of artwork. The right selections can make any home feel more cultured.

Depending on how extensive a company’s inventory is, you might even be able to find small accessories like woven baskets, candles and flower arrangements for as little as a few dollars apiece.

8. Rent a Storage Unit to Store Existing Furniture

To make room for rental furniture, you can store your existing furniture in a storage unit. You can select a storage unit that suits the number of pieces of furniture you have. Our large storage units start from 8 feet by 13 feet to meet your space needs. If you want even more space, you can opt for our extra large storage units, which start from 10 feet by 21 feet. We are proud to serve clients across Greater Vancouver and Greater Vancouver Island by establishing self-storage facilities in the following areas:

  1. Chilliwack U-Lock Mini Storage
  2. Vancouver/Burnaby U-Lock Mini Storage
  3. South Surrey/White Rock U-Lock Mini Storage
  4. Parksville U-Lock Mini Storage
  5. Nanaimo U-Lock Mini Storage
  6. Victoria U-Lock Mini Storage

How to Prepare Your Car for Long Term Storage: 8 Tips You Should Know

There is quite a difference between not using your car for a couple of days and not using it for six months.

There is quite a difference between not using your car for a couple of days and not using it for six months. Understanding how to prepare your car for long-term storage by following simple maintenance and service is integral in keeping your vehicle in top condition. Here are eight tips for preparing your vehicle for long-term storage.

Check Your Paperwork

Renew your registration beforehand if it is set to expire while your vehicle is in storage, or set a reminder to do so when it is due. Additionally, contact your insurance company to inform them that you will be storing your car and confirm that your car is fully covered by your existing insurance policy.

Service Your Car

It is important that your engine and fluids are in good shape before you store your vehicle for a long period. Otherwise, your car might not start when you are ready to use it again.

  • Change or top off fluids, which may contain sediments, as appropriate. This includes oil (synthetic oil breaks down more slowly over time, which makes it a preferred option for storage), coolant, transmission fluid and brake fluid.
  • Empty out windshield washer fluid in regions susceptible to freezing to protect spray hoses from freeze-thaw cracks.
  • Fill your car with gasoline, as it leaves less airspace for moist air to enter the engine and form condensation (or ice), and add a fuel stabilizer, available at any hardware/parts store.
  • Check belts, filters, hoses and other components of your engine. Ensure that all are in working order and clean.

Lubricate the Car

Oil the hinges of the hood, doors and trunk. Use a graphite-based lubricant for locks. Coat rubber parts of the doors and tires with silicone or white lithium grease. This will help prevent them from freezing shut.

Clean the Interior

Throw away any trash. Vacuum seats and floor mats to prevent damage. Do not use chemical protectant (i.e. Armor All) on leather, vinyl and other fabrics as it may stain or cause excessive chemical damage to surfaces. Wash the inside of your windows. Getting the interior of your car in shape before storing it will prevent smells and potential damage from the sun or heat, if you are not storing your vehicle in a storage unit.

Care for the Exterior

Wash, buff, and wax your car. Have the vehicle detailed, if possible. Make sure to clean the underside of your car – anything stuck to the bottom of the car acts like a sponge, trapping moisture that could lead to the creation of rust. Remove wiper blades or lift them up so they do not become deformed or flat. Ensure all leaves, pine needles and any other debris have been removed from the engine compartment and the windshield wiper cowl.

Ensure that the Battery is Fully Charged

Electronics can quickly drain the power of your battery, so make sure it is charged before you store your vehicle. You can also consider using a trickle charger. Disconnect your battery if you are storing your vehicle for more than 6 months and take the disconnected battery someplace temperate and dry.

Deflate Your Tires

Deflate your tires to 10psi less than the manufacturer’s recommendation and place the vehicle on jack stands if you are storing your vehicle for more than 6 months. This allows the rubber to relax and prevents cracking while allowing you to still drive on them when you remove the vehicle from storage. There are accounts of “flat spots” if a vehicle is stored on the ground, but newer tires are engineered to prevent this and any flat spots will be worked out while driving within 160 km or so.

Cover Your Vehicle

Vehicle covers protect your car from sun damage, dust and minor dings. Try to find a vehicle cover designed for long-term storage – these will not trap moisture, but they will allow your vehicle to breathe.
If you have any questions about car storage, please contact U-Lock Mini Storage and our staff will be delighted to answer any questions you have!

How to Add Storage Space to Your Garage – Part 1

Adding storage space to a garage is a great way to organize and free up some room in your garage.

Adding storage space to a garage is a great way to organize and free up some room in your garage. 

Before you begin adding anything new to your garage, you will first need to organize it by sorting your things and drafting a floor plan. Once your garage is organized, you can build some shelving and install other vertical organization systems. You can also clear some space by hanging things from the ceiling or placing them in cabinets and plastic bins.

1. Sort Your Things

Go through the things in your garage and organize them according to function or utility. As you sort, you should also create three other piles for things that you want to recycle, throw away or donate. Once you have sorted everything and removed the things you want to get rid of, you should have a better idea of what your needs are going to be. If there are some items you want to keep but you do not have enough space at home to keep them, rent a storage unit to keep your items safe and sound.

Be sure to responsibly dispose of any chemicals or other hazardous materials in your garage. Do not simply throw them in the trash or pour them into the drain. Contact your local hazardous waste site about disposing of these substances.

2. Group Similar Things Together

When sorting the things in your garage, determine what items will be stored together. Keeping similar things in groups will make it easier for you to find them later. It will also help you determine what kind of storage system to invest in.

For example, put all of your gardening supplies in one group and your sports gear in another.

3. Draft a Floor Plan

Once you sort everything, make a floor plan of your garage. With a tape measure, register the measurements of the garage, paying particular attention to the windows, doors and any utilities. You should also figure out how much space you will need for your car. After you have all your measurements, plot out the dimensions of your garage on grid paper and highlight the areas where you can store things.

4. Determine Where You Want to Place Things

Using your floor plan, consider the types of storage space you will want to add and the space requirements of each item. Some shelving and vertical storage space systems will allow you to maximize your wall space without giving up too much floor room. Things like plastic bins and cabinets will take up more space, but they are useful for storing things in the long term.

  • Remember to keep garden tools, bikes, and other frequently used outdoor gear near the garage door.
  • Make sure that the trash and recycling bins are easily accessible from the door to the house.
  • Keep your seasonal items in the hardest-to-reach places, like the top of a shelf.

Lawn Mower Storage for the Winter: 7 Tips You Need To Know

Take these steps to store your lawn mower to maintain and increase the lifespan of your equipment. Make sure you take all the proper precautions when winterizing your mower.

When storing a lawn mower for the autumn or winter, there are different types of solutions. Some people rent a storage unit or store their lawn mowers in their garage, while others leave their mowers outside in the snow and hope for the best. The most vital thing you can do when storing a lawn mower is tend to the fuel system. Taking this step will significantly reduce the chance of having problems come the warm season.

No one wants to have to tinker with a broken mower or buy a new one at the start of every season. It is worth it to prepare your lawn mower for the winter like you would with a car or boat, especially if you have an expensive riding mower.

Take the following steps to store your lawn mower to maintain and increase the lifespan of your equipment. Make sure you take all the proper precautions when winterizing your mower.

1. Drain Gas or Add a Fuel Stabilizer

There are two methods for lawn mower storage when it comes to gasoline. You can either leave the gas in the tank and stabilize it, or remove it completely. It is never a good idea to just leave fuel in the tank without any intervention, as it can start to degrade in a month or two and wreak havoc on the carburetor and fuel tank.

Option 1: Remove Gas from a Lawn Mower

In certain situations, it is best to remove all the gas from a lawn mower when storing it for the winter. If you are keeping your lawn mower in your basement or inside a storage unit, remove all fuel; otherwise, it can become a fire hazard.

To drain gas from a lawn mower, do your best to let the tank run dry toward the end of the season. To achieve this, run the mower until it stops and will not restart again. Any remaining fuel can be siphoned out with a turkey baster.

Option 2: Add Fuel Stabilizer to a Lawn Mower

If you are storing the lawn mower in a detached garage or shed, leave a full tank of gas and top it off with a fuel stabilizer. Once the stabilizer is added, run the mower for a couple minutes to make sure the stabilizer gets into the system.

2. Prevent Mower From Kick-Starting

Before you clean your lawn mower and prep it for storage, make sure you remove the spark plug. This will prevent the mower from being turned on accidentally; the importance of this step cannot be stressed enough.

3. Drain or Change Oil

Change a lawn mower’s oil at the end of every season. The first step is to figure out if you have a two-cylinder or a four-cylinder lawn mower. Two-cylinder motors have the oil and fuel in the same tank, in which case you can drain the oil along with the fuel. With four-cylinder motors, the oil will need to be changed similarly to how you would do so on a car. Reference the lawn mower’s owner manual for specific instructions on how best to do this.

In general, you can follow these steps on most four-cylinder mowers:

  • Check the level of the oil by removing the dipstick
  • Make sure the oil is warm; if it is not, you can warm it up by running the mower after adding fuel stabilizer or when draining the tank. If you waited for this step and the engine is cold, connect the spark plug temporarily and run the mower for 10-15 minutes.
  • Remove the spark plug again if you had to use it to warm up the engine. If your mower has a battery, disconnect it.
  • Pull the oil plug and drain the oil into an oil-safe drain pan.
  • Properly dispose of used oil by bringing it to a recycling facility that can properly dispose of it.
  • Add new oil to the tank according to the manufacturer’s recommendation.
  • Lawn Mower Storage Pro Tip: If you have inconveniently positioned drain plugs, consider purchasing an oil extractor to help with this process.

4. Clean Deck and Undercarriage

A garden hose or a pressure washer on a low setting will work well to clean the lawn mower deck. In theory, grass should be cleaned off after every mow. However, if bits of grass have dried and crusted onto the metal, make sure to remove it before storage. If necessary, take a wire brush, putty knife or a flat head screwdriver to scrape off anything that the hose could not clean.

Be careful with the mower blades and make sure to wear thick, durable gloves during this process. Once the undercarriage is clean and dry, use a silicone spray to prevent future build-up and better preserve the lawn mower.

5. Remove and Sharpen Blade

To remove the blade, lean your mower on its side with the carburetor facing up. Find a long-handled wrench that matches the bolt holding the blade in place. If the bolt is stuck in place and corroded, spray on some oil or lubricant and let it sit for a few minutes.

Once removed, sharpen each blade evenly. You do not want to make the mistake of sharpening only one section because this could lead to an uneven lawn. To sharpen, clamp the blade in a vise and use a mill bastard file to file down the blade until it is as sharp as a butter knife.

6. Replace Spark Plug and Air Filter

At this point, the spark plug should already be disconnected. Use a wrench or pliers to completely remove the plug. Take the plug with you to the store to make sure you purchase the correct replacement. Next, screw in the new plug and either reconnect the wire or leave it disconnected for storage.

Before storing a lawn mower for the winter, you will want to either clean or replace the air filter. Some lawn mower filters are made of paper and should always be replaced when they look dirty. Other foam or plastic filters can be cleaned, dried, and then coated with a few tablespoons of oil before being reinstalled. Finally, use a spray lubricant to coat any exposed lawn mower components.

7. Rent a Storage Unit

One of the best ways to keep a lawn mower in good shape is renting a storage unit and storing it when not in use. Stowing a lawn mower in a storage unit ensures that your lawn mower is kept in a secure and clean space from which you can retrieve it whenever you need it!

Renting a Storage Unit? 6 Things You Should Consider

There are different reasons why you would need a long term storage unit to store your belongings. You could be moving abroad or you might need extra space to store seasonal items around your home, such as skis or bicycles. You may also need extra space for larger items such as your car, boat or RV.

There are different reasons why you would need a long term storage unit to store your belongings. You could be moving abroad or you might need extra space to store seasonal items around your home, such as skis or bicycles. You may also need extra space for larger items such as your car, boat or RV.

Whatever your reason is, choosing to rent a storage unit to safely store and protect your belongings is a good decision. To help you select a store unit that best suits your needs, we have listed six factors to consider and evaluate before renting a storage unit.

The Amount and Types of Items You Want to Store

What items are you planning to store? How many items do you want to store in a storage unit? Answering these questions is critical in selecting a storage unit that fits your needs. 

If you only have a few small items to store, you can go with a more compact storage unit size such as the 5 x 5 feet which is approximately the same size as a regular closet. This storage unit size is suitable for holding items such as personal items, clothes, boxes, skis, children’s toys, small furniture items, business records and sales rep materials. If you are looking for something bigger, go with the 5 x 15 feet, which is equivalent to a large closet. This storage unit holds items such as small amounts of furniture, sofas, chairs, chest of drawers, boxspring and mattress, business supplies and records, plus other small items and boxes.

Safety and Security Features

A storage facility should have robust security and safety measures in place to ensure the protection of your belongings. At U-Lock Mini Storage, all of our self-storage facilities are fully fenced and gated: both exceptional measures to prevent burglary or theft of any sort. 

In addition to a fully fenced with gated facility, we have installed individual alarms for most of our storage facilities. The alarm is triggered when a burglar attempts to forcefully and illicitly enter a storage unit; our security and local law enforcement will be notified of the attempted break-in and attend the respective facility to remedy the issue. We have also installed 4-hour video recording with HD video to monitor and address any suspicious activities 24 hours a day and document all activities near our facilities with our HD video surveillance system. 

This surveillance system further strengthens the security of our facilities and prevents malicious activities from occurring.

Monthly Payment Plan

Determine whether the storage facility requires annual payment or offers a flexible month-to-month payment option. We offer a month-to-month payment option with no long term contract so you are not committed to our storage facility: you have the autonomy to rent a storage unit for as long as you need it. Additionally, we do not require a deposit.

Hours of Operation

What are the storage facility’s opening hours? Is the storage facility open during hours that work for you and your busy schedule? These are important questions to answer before renting a storage unit at a storage facility. If the storage facility’s hours of operation do not meet your schedule, renting a storage unit at the storage facility would be incredibly inconvenient for you.

To learn about our hours of operation, contact our storage facility and our team members will be more than happy to provide this information!

  1. Self storage Burnaby or Vancouver
  2. Self storage Chilliwack
  3. Self storage South Surrey or White Rock
  4. Self storage Parksville
  5. Self storage Nanaimo
  6. Self storage Victoria

The Location of the Facility and Proximity to Your Home

As you begin looking at storage facilities in an area, carefully consider each one’s location and proximity to your home. How important is it to you that the storage unit is located near your house? Are you willing to travel farther for a better or less expensive storage facility? 

While the location of a storage unit may not be an important factor when storing items for a short period of time, it is important when storing belongings long-term. This is particularly true if you plan to travel back and forth between the storage unit and your home to retrieve items regularly.

U-Lock Mini Storage has six facilities in BC. Three in Greater Vancouver and three on Vancouver Island. Check out the storage facility nearest to you!

  1. Self storage Burnaby or Vancouver
  2. Self storage Chilliwack
  3. Self storage South Surrey or White Rock
  4. Self storage Parksville
  5. Self storage Nanaimo
  6. Self storage Victoria

The Storage Facility’s Google Reviews and Ratings

Have you checked the storage facility’s Google reviews and ratings? These reviews and ratings are excellent indicators of the storage facility’s quality.

At U-Lock Mini Storage, we pride ourselves in delivering exceptional storage solutions and customer service to our customers and our Google reviews and ratings reflect the unmatched service.

For example, our U-Lock Mini Storage Burnaby location has a rating of 4.8 out of 5 from 215 Google reviews. The Victoria storage facility also has a 4.8/5 rating from 151 Google reviews.

Questions? Feel free to call us at 1.866.647.8673 or submit a contact form at https://www.selfstorage.ca/contact-us and our staff will be more than happy to answer any questions you may have!

Want to reserve a unit at a storage unit rental facility near you? Check out our self storage facilities:

  1. Self storage Burnaby or Vancouver
  2. Self storage Chilliwack
  3. Self storage South Surrey or White Rock
  4. Self storage Parksville
  5. Self storage Nanaimo
  6. Self storage Victoria

Downsizing? Use these Storage Solutions!

Although downsizing means living a more simplified life, the actual process of moving to a smaller home can be quite cumbersome and complex.

Although downsizing means living a more simplified life, the actual process of moving to a smaller home can be quite cumbersome and complex. This process often involves a good deal of preparation: from deciding what to bring and what to toss to planning out the actual move itself, downsizing to a smaller home involves a variety of factors you have to take into consideration when planning it out. 

Here are 7 easy tips for storing your belongings when moving to a smaller home.

Use Wall Racks Behind Doors

From your pantries and closets to your bedrooms and bathrooms, you can create extra space in your home by using behind-the-door storage. Installing hanging wall racks behind doors will prevent clutter in your closets, pantries and drawers. Additionally, hanging wall racks will make it much easier to find your spices, sauces, and cleaning supplies when you need them. Many hanging wall racks even come with adjustable shelves, which you can add and remove as needed.

Shelving Above Toilets

You can also use wall racks in your washrooms. Nothing’s worse than a tiny bathroom overrun with towels on the floor and toiletries under the vanity. To keep your bathroom and powder rooms clutter-free, you can shelve above the toilets. If you are renting and thus unable to install free-floating shelves on the walls, try using a stand-alone shelf unit that fits over the toilet. This extra storage frees up floor space in the bathroom, as well as shelf space inside your vanity.

Use Storage Beds

Do not waste precious bedroom space with armoires and dressers. Instead, use a storage bed when downsizing to smaller rooms. Storage beds typically come with four or more drawers below the mattress and attached to the bed frame. This feature allows you to store clothes and necessities under the bed instead of inside a bulky, space-hogging chest of drawers. This is a perfect way to utilize and maximize space in your bedroom.

Use Bins and Baskets

Storing belongings inside bins and baskets is one of the most affordable and most aesthetically pleasing ways to save space when downsizing. They can be placed almost anywhere, including entryways, kitchens, closets, bedrooms, bathrooms and pantries. Decorative bins and baskets are easy to come by and help make the home both stylish and organized. When using bins or baskets, we recommend adding labels to them as well. You can find an example of bins and baskets here.

Use Hanging Bike Racks

If you own a bike, then you know that they take up quite a bit of room. To save space, you can go vertical with your bicycle. Whether you store your bike inside the home or in the garage, you will benefit from using a hanging bike rack to hold your bicycle upright. From simple wall mounts to free standing bike racks, there are plenty of ways to hang the bike rack in your home and, consequently, open up floor space for other items.

Use Drawer Organizers

One easy way to help contain the mess in your various drawers is to simply add drawer organizers. These will save you space by allowing you to more easily and efficiently store everything from makeup and toiletries to office supplies and kitchen utensils inside your drawers. These organizational trays can be used in kitchens, pantries, bathroom vanities and desks.

Rent a Storage Unit

Renting a storage unit is a fantastic way to create more space in your new home. You can store belongings such as old CDs or clothes in the storage unit and retrieve your items when you need them.
If you have only a few items to store, you can rent a 5 x 5 feet storage unit, which is roughly the same size as a regular closet. This storage unit size is ideal for storing personal items, clothes, boxes, skis, children’s toys, small furniture items and some documents. If you have a few more items to store, you can go with a 5 x 10 feet storage unit. This storage unit is approximately the same size as a walk-in closet and it is perfect for holding a few pieces of furniture, sofas, chairs, a chest of drawers, box spring and mattress, business supplies and records, plus other small items and boxes.

Sharing is not always Caring: Why You Shouldn’t Shared Storage Units

While growing up did your parents constantly remind you that “sharing is caring”. For the most part that is absolutely the case. But for a storage unit, that might not be the right answer.

While growing up did your parents constantly remind you that “sharing is caring”. For the most part that is absolutely the case. But for a storage unit, that might not be the right answer. Sharing a storage unit can save you money, however, there are various problems with sharing a storage unit with others. Here are the top four reasons why you shouldn’t share a storage unit.

Security

When you sign up for a storage locker there is only ONE person who has signing authority.

That person can grant access to whomever they see fit. If you have your belongings in there and you are not the signing authority, there is a possibility of people you aren’t comfortable with accessing your space.

Organization

Isn’t it annoying when you can’t find what you are looking for? Now imagine looking when your stuff is mixed in with someone else’s. Having your stuff together may make it more difficult to locate the item you are looking for, and things might get mixed up when you eventually vacate the locker.

Convenience

Lost your key? Want to transfer to a different unit? Only the person with signing authority can request a lock cut, or transfer units. If they are not available, then you will have to wait until they are.

What if?

What happens if you have a falling out with your locker partner, and you are not the one with signing authority?

Whoever’s name is on the lease can change locks and deny entry to anyone. Without their OK there is nothing storage staff can do to ensure your belongings are returned to you.

If you have any questions about booking a storage unit in one of our mini storage facilities, please get in touch and one of our team members will be more than happy to help!

Our self storage facilities are:

  1. Self storage Burnaby or Vancouver
  2. Self storage Chilliwack
  3. Self storage South Surrey or White Rock
  4. Self storage Parksville
  5. Self storage Nanaimo
  6. Self storage Victoria