4 Tips for Packing for a Move

When you are considering how to pack for a move, start by prepping as far in advance as possible. Packing tends to be the most time-consuming part of the whole process. With careful planning, patience and an honest assessment of your physical capabilities, budget and just how much you need to move (and what you can let go of), packing for a move can be stress-free. Here are our expert tips on how to pack for a move.

Gather your moving supplies

We recommend that you use our packing calculator before you buy or source any supplies to get a good idea of what you’ll need in terms of packing supplies.

Set up a surface for your packing station. It could be a folding table or a spare bedroom. This is where all your packing supplies will live and where you’ll be taping and labeling boxes.

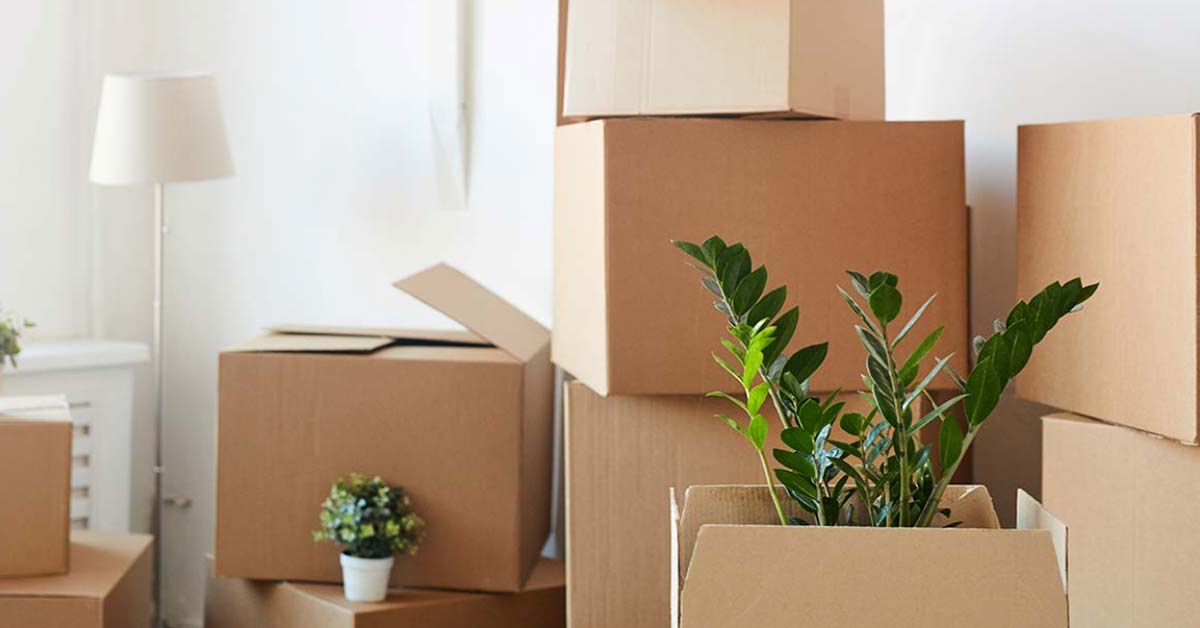
When you buy boxes, remember that you’ll need different sizes plus a few specialty boxes. Professional moving cartons come in a variety of shapes and sizes that are specifically suited to fit a variety of household goods. Consider wardrobe boxes for clothes on hangers, bankers boxes for the home office, mirror and wall art boxes; and the original boxes for your TV, electronics and appliances (if you’ve kept them).

Donate, get rid of, or store items that you don’t want to move with you

  • Go through your belongings room by room. Closets, cabinets, drawers – look at everything and note which items can go. Think honestly about what furniture isn’t worth moving.
  • Toss, donate or sell? Organize the belongings you’re letting go of in these three categories. You can do this either by making mental notes or writing them down on sticky notes.
  • Do a closet purge. Look at all your closets and pull out anything that is soiled or damaged, doesn’t fit, is out of style, or you haven’t worn in a year.
  • Get rid of items you wouldn’t buy again. Ask yourself if you’d spend money on the item in question if you didn’t already have it. If you wouldn’t, you likely don’t need it.
  • Hold a garage sale. If you have the time and the energy, consider hosting a garage sale. Let people know with signs, flyers and on social media, invite the neighbors, set fair prices, and put out all the good stuff you no longer need. Make an attractive display of your wares, provide refreshments, and be open to haggling.
  • Sell what you can. Your gently used clothing, electronics, furniture and other household items could be sold at a number of places. ThreadUp, Poshmark or your local consignment store will take your clothes. Sell your electronics online at places like eBay, or trade them in on Amazon in exchange for a gift card. Household items, including furniture, could be sold locally through different websites.
  • Make donation pickup arrangements. If you’re donating any large items like furniture and rugs, schedule a pickup with an organization ahead of time. See this list of charities that will pick up your donation. And keep any donation receipts as you may be eligible to claim this donation next time you file your taxes.
  • Consider short-term storage. If you can’t commit to getting rid of some items yet, but you’re not sure if you need them, you may want to put them in a short-term storage unit and then evaluate later. If you have any questions about self storage, please feel free to contact us and we’ll be more than happy to help. Our self-storage facilities include storage units Victoria, storage units Parksville, storage units Nanaimo, storage units Burnaby, storage units White Rock and Surrey and storage units Chilliwack.

Pack as early as possible

Think realistically about how much you’ll need to get all of your packing done, and add some extra for unexpected delays or obstacles. Create and use a moving checklist to assure that you move all the items you need.

Five weeks before moving day, strategize your packing process. That means figuring out a timeline for the packing process and what you consider the non-essentials. Those usually include books, home decor items, electronics, seasonal sports gear and clothing, and seasonal decorations. They will be packed first. Expect to pack kitchen items, dinnerware, clothing and toiletries last.

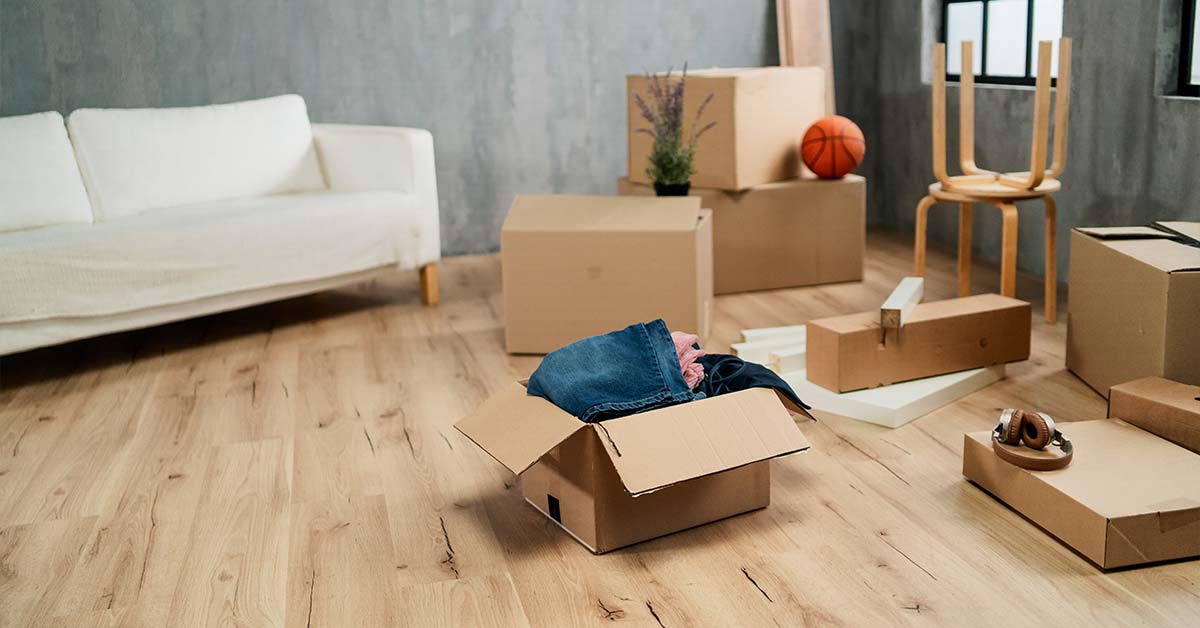
Start packing items room by room, and clearly label everything

Focus on one area of a room at a time and don’t mix items from different rooms in one box. To prevent miniature knick knacks and small items from being lost or mistakenly thrown out with the packing paper, wrap them in brightly-colored tissue paper and/or label each wrapped item.

You can also color-code your boxes using a sticker of one color for each room. Assign a color to each room and stick to it. (This tip goes along with our recommendation not to mix items from different rooms.)

Clearly mark your moving boxes with the destination room, the contents of the box, and whether they’re fragile. For example: “Living room. Picture frames. Fragile.” Mark both the top and the sides of each box for easy visibility. Marking the boxes fragile is especially important if you’ve hired movers as they won’t know to be extra careful.

5 Things You Should Do Before Putting Your Property On The Market

There are many actions that can be taken to increase your chances of receiving an ideal offer from a buyer. From cleaning and staging to repainting, here are 5 things you can do before putting your property on the market!

Research your local housing market

First and foremost, do your homework on the value of your home. Start by researching the local housing market. Take a look at comparable sales in your neighborhood to figure out your appropriate listing price. Pay attention to the various comps’ square footage, features and location, and think about how they compare to your home. For example, your neighbor’s home may have sold for $1 million, but if your home is considerably smaller, you’ll most likely need to list your house for less. Of course, a reputable realtor should be able to assist with finding comps and determining a listing price for your home.

Give your house a deep clean

First impressions mean a lot. So, don’t let foul smells, dirty floors or dusty surfaces make a bad one on a potential buyer. Before listing your home (and throughout the selling process), give your home a deep clean. This means cleaning toilets, wiping surfaces, mopping floors, cleaning rugs and scrubbing bathrooms. Consider calling in the professionals (think: Stanley Steamer and a housekeeper) to ensure that your place is in pristine condition.

Declutter the home

Decluttering and organizing your space will go a long way in appealing to potential buyers. When a home is clutter-free, buyers can focus on the actual home instead of the excess junk, accessories and overflowing closets.

Stage your home

Staging a home really can help it sell faster and for more money. Fortunately, staging your home’s interior can be easy and affordable. Don’t forget to also spruce up your home’s curb appeal when staging the home. After all, the outside of the home is the first thing potential buyers will see when they arrive for a showing. So, make sure that the grass is cut, the yard is landscaped, and the knick-knacks are gone (think gnomes and children’s toys). If your home looks a bit rundown, you should also consider adding a fresh coat of paint to the exterior walls. If you have items in your home that you don’t have to display during open house, consider renting a storage unit. For example, You can rent a storage unit to store belongings such as old CDs, photos, or kitchenware. To see which storage unit size best serves your needs, feel free to contact us and we’ll be more than happy to help. Our self storage facilities include storage units Victoria, storage units Parksville, storage units Nanaimo, storage units Burnaby, storage units White Rock and Surrey and storage units Chilliwack.

Paint the walls

Now’s the time to repaint your home. Start by painting over those bright orange and green walls with neutral colors. Stick to whites, light grays, light beiges and “greige” wall colors. These shades will make your home appear bigger, brighter and more welcoming. Adding a fresh coat of paint to your home will also help cover the wall’s imperfections and convey a blank slate to potential buyers.

4 Moving Tips You Should Use

Although moving is a very exciting and life-changing event, the process of a move can be incredibly stressful and tiring. Oftentimes, we do not realize how much planning and work are required for a move until we are actually going through the motions of one.

To help you remain stress-free during moving, here are 5 self-care tips while moving you can use.

Create a moving checklist

Nothing says moving self-care tips like a checklist! By creating one for your move, you can more easily manage all the tasks that you’ll need to accomplish before the big day arrives. 

To get started, use our moving checklist or create your own. However you decide to approach it, it’s better to have some sort of a list to guide you through the process. As new tasks come, add them to the list. Staying organized will reduce the anxiety of moving. 

Plan the logistics

Just thinking about everything you’ll need to accomplish to pull off a successful move might send you into a tailspin, but we suggest that you start by thinking about whether you are going to hire a moving company or rent a truck. Do you think you need professional help or can you do a DIY move?

If you’re using movers, check out the moving company’s online reviews to assure that the moving company is professional and reliable.

Start packing early

Allow yourself more time to pack than you think you’ll need. The amount of time it takes depends on how many belongings you have. But most people don’t realize just how long it takes to properly pack everything. 

We recommend that you order all of the moving supplies at least six weeks before the move and start packing four weeks in advance. Put on some tunes, tackle one room at a time, and treat yourself to a takeout once you call it a day.

Declutter and organize ahead of time

Getting started with the moving process can seem like a daunting task, but don’t procrastinate. Taking the time to go through your belongings can make the move easier for your future self. Starting ahead of time and sticking to a routine means that your moving day will be less overwhelming.  Get a head start on decluttering at least five weeks before the moving day. Here are some of our tips on how to begin decluttering and organizing:

  • Go through your belongings room by room. Closets, cabinets, drawers – survey all of your belongings and note which items can go. Whether you make a list on your phone, write down what you’re keeping versus what you’re tossing or donating, or take pictures of the items you no longer want to keep, documenting goes a long way. Most importantly, think about what furniture isn’t worth moving.
  • Do a closet purge. Account for all of your closets and pull out anything that is damaged, is out of style, or doesn’t fit anymore, and consider parting ways with said item(s).
  • Make donation pickup arrangements. Donate useful items that you don’t need anymore. Anything from a relatively new and functioning computer to kitchenware – these are all items that you can donate to a local charity to help those in need.
  • Rent a storage unit. If you have many items that you want to keep but don’t want to move to your new home, consider renting a storage unit. You can rent a storage unit for long-term or short-term and you can access the storage unit whenever you want to retrieve your belongings from your storage unit, based on the storage facility’s hours of operation, of course. At U-Lock Mini Storage, we offer a wide selection of storage unit sizes such as 5’x5’, 5’x10’, 10’x10’, 10’x15’ and 10’x20’ storage units. To see which storage unit size best serves your needs, feel free to contact us and we’ll be more than happy to help.

Our facilities include storage units Victoria, storage units Parksville, storage units Nanaimo, storage units Burnaby, storage units White Rock and Surrey and storage units Chilliwack.

A Guide for Selecting the Right Moving Supplies and Packing Supplies

Whether you’re hiring full-service movers or DIY’ing to save money on your upcoming move, getting at least some moving supplies is non-negotiable. So, unless you completely outsource packing (which will be expensive but will eliminate the need to get moving supplies yourself), you’ll need certain items to protect and transport your belongings. Even if you do pay someone to pack your home, you’ll still need to pack personal essentials for moving day.

Using the right packing material and moving supplies will keep you organized and your belongings safe so your move is streamlined and stress-free. Some are essential, some are just great to have. Here’s our complete list of moving supplies, packing tips, advice on how to save money on packing supplies, how to choose the right packing and moving supplies, and FAQs.

Here are some steps you can take when it’s time to choose your packing and moving supplies.

Figure out your moving budget

The best way to pack for moving is to start earlier, rather than later. Our moving checklist suggests that you figure out your moving budget two months before the move. Before hiring a moving company or committing to a DIY move, figure out your overall relocation budget. Those looking to hire a moving company for a long-distance move should budget around $5,000. A local move, on the other hand, may only cost around $1,000. If moving for a job, be sure to also check with your employer about whether or not they’ll be covering expenses. The budget amount might fluctuate as you adjust, but it’s helpful to start with the ballpark figure at least. Please take advantage of our online moving cost calculator to figure out how much you can expect to spend.

Create an inventory

If you hire professionals, they will do an inventory too (in person or via a virtual survey), but you need to create your own inventory. This is a necessary step for several reasons, including figuring out what moving supplies you’ll need and in what quantities. Go through all your belongings, room by room and closet by closet. Include all cabinets and drawers. Get an idea of how much you’ve got and make notes of what can go. Take inventory of what furniture isn’t worth moving, and also do a closet purge. If it doesn’t fit, is out of style, and/or you haven’t worn it in a year, get rid of it. The same goes for your children’s closets, linen closets and bathroom shelves. Toss, recycle or donate what you don’t need. Sell your better yet still unwanted items. It’s an undertaking, but it’s the only way to get an idea of how much you’ve got to move and to lighten your load. If there are some items you want to keep but don’t want to bring them to the new home, consider storing the items in a storage unit. You can rent a storage unit (big or small) according to the number and size of the items you want to store. At U-Lock Mini Storage, we have storage facilities and storage unit sizes across Greater Vancouver and Vancouver Island. Our self-storage facilities include storage units Victoria, storage units Parksville, storage units Nanaimo, storage units Burnaby, storage units White Rock and Surrey and storage units Chilliwack and our team is thrilled to help you with your storage needs! Please feel free to contact us if you have any questions.

Strategize your packing process

About five weeks before the move and boxing up your things, figure out a timeline for the packing process. Plan to pack all non-essentials first. These include items you won’t need in the weeks leading up to the move, including books, home decor items and electronics. Packing essentials should be last. These include kitchen items, dinnerware, clothing, toiletries, and any other items you’ll need in the days leading up to the move.

Plan out your packing supplies

Use our packing calculator to get a good idea of just how much you’ll need in terms of packing supplies. This way, you can be sure to get what you need on the first run to the store. To use the calculator, simply plug in the number of bedrooms in your home, the number of adults moving, your packing style (basic, average, professional), and your lifestyle (minimalist, modest, pack rat). The calculator will also give you the rundown of exactly what kind of boxes you’ll need by size and/or type, and the estimated total cost of your moving supplies. Take it with a grain of salt, as you might need fewer or more supplies as you go. You also don’t have to buy all the supplies. Some you can source for free (more on that below).

A Guide to Renting a Storage Unit

If this is your first time renting a storage unit, we can help. Whether you need to temporarily store your belongings while moving or store them long term after downsizing, renting a storage unit provides an excellent, space-saving solution. Storage facilities are a secure, convenient and easy-to-find option for those in need of storage. The majority of short term storage and long term storage facilities also offer a wide range of unit sizes and services to meet your needs. Use this first-timer’s guide to renting a storage unit to learn more about storage types, how storage works, and more.

How does self storage work?

Most storage units work similarly. Once you find a storage unit near you, you sign a contract with a storage company for a specified amount of time to secure a rental on a storage unit of your choice. A storage unit is a space in a storage facility where you store your belongings. Although some companies require a three-month minimum, most offer storage rentals on a month-to-month basis.

Rules and regulations differ among storage companies depending on the services they offer, but you only pay for the time you need the unit for (unless you break the contract, but that’s another matter). Also, it might seem obvious, but it’s illegal to live in your storage unit per state and federal housing laws. It’s also illegal to conduct business in your storage unit. Some storage facilities allow band practice, but there are restrictions like noise ordinances and no access to electricity.

Why You Should Rent a Storage Unit

People rent self-storage for more reasons than moving or decluttering. Some common reasons people rent self-storage include:

  • Seasonal storage. Holiday decorations, costumes, seasonal gear clothing, and lawn equipment can all go into storage during the off-season.
  • If your new home isn’t ready. New home not complete, but you need to move out of your old home? A rental storage unit can house your stuff till the move can be completed.
  • Needing more space in their home. Say, you’re downsizing and decluttering but not ready to part with some of your stuff. Or a family member moves in with you and needs a guest bedroom that you were using for storage. There are many reasons people would need more space in their homes. If you’re not ready to toss, sell or donate your stuff, store it.
  • House renovation. Renovating take time and create a lot of chaos and mess. To protect your belongings and clear space, you can store furniture and other belongings in storage until the renovation is completed.
  • College storage. Students who don’t want to lug their dorm room belongings back home during summer break might want to rent a storage unit near campus.
  • Military service. The members of the military can use this option during deployment.
  • To store vehicles. If you don’t have room where you live, you can store your boat, RV, car or motorcycle at a storage facility.

How to rent a storage unit

Storage companies have their own protocols but the process of renting a storage unit has similarities. To rent storage near you:

  • Determine what you need to store
  • Decide what type of storage you want (full-service vs. self-storage, outdoor vs. indoor)
  • Determine what size unit you’ll need based on what you need to store
  • Set your budget
  • Consider purchasing insurance
  • Search for the storage you want to rent (see above)
  • Reserve a storage unit online or in person by signing a storage unit agreement or contract (read it carefully before you sign)
  • Get a move-in day date
  • Invest in a good lock

What Size Storage Unit Should You Rent?

Most residential renters rent storage unit sizes such as 5’x5′, 5’x10’, 10’x10’, 10’x15’ and 10’x20’ storage units. The storage unit depends on the type and number of items you want to store. If you have any questions about storage unit sizes, please contact us and we’ll be happy to help.

How Long Can You Rent a Storage Unit For?

You can rent a storage unit for as long as you like. Some people even rent storage units indefinitely as an extra space for personal or work-related items. At U-Lock Mini Storage, we offer monthly contracts so you don’t have long-term commitments.

Ready to book your first storage unit? Visit or contact any of our self-storage facilities and we’ll be happy to help. Our facilities include storage units Victoria, storage units Parksville, storage units Nanaimo, storage units Burnaby, storage units White Rock and Surrey and storage units Chilliwack.

5 Simple Clothes Storage Ideas When You Have No Closet

What do very old homes and small, ultramodern apartments sometimes have in common? A troubling lack of closet space and clothes storage.

Don’t panic: In these situations, you may have to deconstruct how you think about clothing storage. You’re going to literally live with your decisions, so home decor and design become part of the equation, too. It’s an interesting challenge, but one that can offer unique and colorful results.

Need some help getting started? We’ve compiled 5 simple clothing storage ideas to help you see your closet situation (or lack thereof) in a whole new light.

Add a Shelved Rack or Storage Bench for Shoes

Don’t have a hall closet near your garage to store shoes, coats, and other outdoor accessories and necessities? Depending on how much space you have to play around with, a shelved rack or storage bench could be a great option to add some additional storage compartments. 

You can also use the rack as a home for your socks. Assign each member of your family a bin and fill it with their socks, keeping those easy-to-misplace pairs together and ready to go whenever anyone heads out the door.

Use a Wardrobe Rack

If you simply want to mimic a traditional closet, a clothing rack is an economic option that could work in just about any space.

Sure, this means your clothing will be more on display than in a traditional closet, but with some creativity and organization skills, wardrobe racks can provide your room with an adorable boutique-style visual display. After all, fashion is one of the best ways to express yourself and your personality— so why not display it all in a way that feels fun and inspiring?

If your clothing rack is small, be strategic about how you fill it to get the most out of your space. 

You can also double your hanging space by using pop-can tabs. Slide your first hanger’s hook through the top of the tab and hand a second hanger from the bottom.

Use the Space Under Your Bed

The space under your bed may have been a little scary when you were a kid, but there’s no reason to be afraid: we’ve checked, and there are no monsters. The space beneath your bed is a great place to organize and protect your shoes and handbags when you’re not using them.

It’s also an excellent spot to store heavy sweaters since you’ll avoid those unwanted stretched-out shoulder marks often caused by hangers.

To take advantage of this under-bed space, we recommend using rolling storage drawers, short plastic bins, and other under-the-bed storage containers that fit nicely in this small space. All you need to do is neatly fold each piece of clothing you’re planning on storing and tuck them away until the next time you need them.

Hang Accessories on Wall Hooks

When storing your belongings and organizing your closet, it’s easy to let accessories like hats, scarves, and jewelry become an afterthought. And if you’ve accumulated a bunch of different accessories over the years, you already know that things can get really cluttered really quickly. 

Instead of tucking these items away, why not embrace your flair by making them a part of your room’s decor? 

You can easily use Command hooks, wall organizers, or even just a handful of thin nails to display and organize your jewelry— if you can situate it in an aesthetically pleasing way, even better! When it comes to trickier items, like tights and scarves, a simple clothes hanger will do the trick. Simply tie each item in a knot around the hanger and put it on display. The hanger also fits nicely on a detached clothes rack!

Rent a Storage Unit

If you simply don’t have enough space in your room to store your clothes, rent a storage unit. You can rent a storage unit that’s suitable for the amount of clothes you want to store. You can start small with 5’x5’ and go up to 5’x8’ if you have clothes plus some items you want to store!

At U-Lock Mini Storage, we have storage facilities across Greater Vancouver and Vancouver Island. Our self storage facilities include storage units Victoria, storage units Parksville, storage units Nanaimo, storage units Burnaby, storage units White Rock and Surrey and storage units Chilliwack. Please feel free to contact us if you have any questions about self storage and our team will be more than delighted to help.

5 RV Storage Tips For When You’re On The Road

Recreational vehicles are an attractive travel option and even provide a full-time home for some. Many say they prefer this lifestyle over staying at a hotel and enjoy the family memories of togetherness it brings. Traveling in an RV allows you to bring the comforts of home with you: your bed, kitchen and bathroom. It’s usually more economical than a hotel, too!

Whether you own a basic pop up tent trailer or a luxury bus, you will want to pack efficiently with minimal downtime. By organizing ahead of time, you allow more relaxation time while on the road. Today we are sharing a few simple RV storage ideas to efficiently pack and organize before a trip, as well as get the most out of your limited living space.

Use Baskets

You should measure all your shelves, drawers and empty spaces before going shopping for your new best friends. Baskets come in an array of sizes, colors and materials.

Organize your supplies by category in baskets, such as all the drink supplies (cups and straws) in one basket and all your eating supplies (plates and bowls) in another. The advantage to having such items in a basket is you can also bring all the supplies to the table in one round.

You can also find baskets to fit in those tight or underutilized areas such as these ones used on top of the kitchen cupboard. They are used for miscellaneous items that aren’t needed daily such as toys, games and outdoor supplies.

Leverage Pantry Space

Plan your shopping trip before your travels based on some quick meal planning. You should be able to stock the pantry with staples such as cereal, canned goods and of course fun camping snacks.

Baskets, such as the wire ones shown in the pantry here (which came from the dollar section of a popular store), contain snacks perfectly and prevent shifting while the vehicle is in motion.

Place your tall boxes, such as cereal, in the back extra space, if available. Lighter items that cannot be contained, such as crackers and other boxed goods, can be stored on the top shelf. Heavy items like bottles of water should be placed on the bottom shelf.

Use Line Drawers with Shelf Liners

One of the first items we would recommend when you set up your RV is shelf liners. Line all your shelves – kitchen, bathroom and bedroom – to give a fresh, clean surface to your shelves and drawers.

Lining drawers and shelves in your RV will also prevent spills and ease the cleanup of if an item should happen to fall or break. The liners provide an anti-slip layer so things do not move around.

Maximize Space in the Bedroom

Storage tubs work well for the space under the bed. Use them to store bathroom supplies, bedding and blankets, cleaning supplies, outdoor gear or perhaps to store shoes. Your clothing can be rolled tightly to save some space for more use of those drawers and baskets.

Use Personalized Labels

Take your organization one step further and label your bins and baskets with tags to identify what each tub contains. Identifying your clothing items help if you do not have a dresser or simply want to take advantage of the extra space in the closet. By labeling items, you make cleanup easier. There will be no question what item goes where.

7 Tip For Organizing Your Kitchen Countertops

Organizing your kitchen countertops can be a daunting task, but it’s one that can make a significant difference in the functionality and appearance of your kitchen. A cluttered and disorganized kitchen can make meal prep stressful and time-consuming, and it can also be a source of frustration when you can’t find what you need. By following these seven tips, you can transform your kitchen countertops into a functional and organized space.

Evaluate your current setup

Before you begin organizing your countertops, take a step back and evaluate your current setup. Ask yourself what’s working and what’s not, and think about how you use your kitchen on a daily basis. This will help you identify problem areas and create a plan for organizing your countertops in a way that works for you.

Clear off the countertops

The first step in organizing your kitchen countertops is to clear everything off of them. This will give you a blank slate to work with and allow you to see exactly how much space you have to work with. Once everything is off the countertops, take the time to clean them thoroughly. This will make your kitchen feel fresh and new and help you start your organizing project with a clean slate.

Group like items together

One of the keys to organizing your kitchen countertops is to group items together. For example, keep all of your cooking utensils in one container, all of your spices in another, and all of your oils and vinegars in a third. This will make it easy to find what you need when you need it and will also help you keep your countertops clutter-free.

Use vertical space

When organizing your countertops, don’t forget to use vertical space. This can be as simple as installing a magnetic knife holder on the wall or using a tiered fruit basket to store produce. By using vertical space, you can free up valuable counter space and keep your kitchen organized and functional.

Invest in storage units

Investing in storage units is key to keeping your kitchen countertops organized. This could include anything from a utensil holder to a spice rack to a set of stackable canisters for storing dry goods. Whatever your needs, there are plenty of storage solutions available to help you keep your countertops clutter-free.

At U-Lock Mini Storage, we have storage facilities across Greater Vancouver and Vancouver Island. Our facilities include storage units Victoria, storage units Parksville, storage units Nanaimo, storage units Burnaby, storage units White Rock and Surrey and storage units Chilliwack.

Keep it simple

When it comes to organizing your kitchen countertops, it’s important to keep it simple. Don’t try to cram too many items onto your countertops, as this can make them feel cluttered and overwhelming. Instead, choose a few key items to keep out, such as your most frequently used cooking utensils or a decorative piece that adds personality to your kitchen.

Maintain your organization

Finally, it’s important to maintain your organization once you’ve achieved it. This means taking the time to put things away in their designated spots, wiping down your countertops daily, and decluttering on a regular basis. By doing so, you can ensure that your kitchen stays organized and functional for years to come.

In conclusion, organizing your kitchen countertops can be a challenging task, but it’s one that’s well worth the effort. By following these seven tips, you can create a functional and clutter-free kitchen that’s a joy to cook and entertain in.

How to Keep Your Kids’ Stuff Organized

Is your child’s bedroom, art drawer, or craft closet always in a state of chaos? Don’t worry – you’re not alone. Many parents struggle to keep their kids’ spaces organized, only to see them revert back to their previous disarray within a matter of days. However, with the right approach, you can teach your child good habits and skills to help them maintain a tidy space. Here are some helpful tips to get you started:

Offer an incentive for your kids to put away their toys

Encourage your child to get involved in the organization process by offering incentives for completing small chores. For instance, you can reward them with coins or extra playtime if they put away their toys or tidy up their room.

Designate a basket for your child’s artwork

Children love to create artwork, but it can be challenging to find space to display it all. Keep a designated basket for all of their masterpieces, then go through it together every few weeks to decide which pieces to display or keep. This way, you can avoid clutter while still honoring their creativity.

Keep drawing supplies in mason jars

Keep all of your child’s drawing utensils organized and easily accessible by storing them in individual mason jars. This way, you won’t have to spend time searching for lost pencils or markers, and your child can quickly find what they need for their homework or art projects.

Rent a storage unit

If you have too much clutter in your home and struggle to keep it all organized, consider renting a storage unit. U-Lock Mini Storage offers various sized units across Greater Vancouver and Vancouver Island, ranging from 5×5 to 5×10. This is an excellent solution if you have items such as toys, bicycles, or kitchenware that you don’t use frequently but don’t want to throw away.

At U-Lock Mini Storage, we have storage facilities across Greater Vancouver and Vancouver Island. Our facilities include storage units Victoria, storage units Parksville, storage units Nanaimo, storage units Burnaby, storage units White Rock and Surrey and storage units Chilliwack. Contact us if you have any questions!

5 Kitchen Organization Tips to Make the Most of a Small Space

A small kitchen can be a challenge to organize, but with the right tools and mindset, you can make the most of the space you have. Here are 5 kitchen organization tips that will help you maximize your small kitchen space while keeping it tidy and functional.

Use Vertical Space

When it comes to small kitchen organization, utilizing vertical space is key. Invest in shelves or racks that you can attach to the walls or hang from the ceiling. This will give you more storage space for items like pots, pans, and utensils.

Another way to use vertical space is to install a pegboard. This is a great option for storing items like cutting boards, colanders, and measuring cups. Plus, it adds a decorative touch to your kitchen.

Maximize Cabinet Space

Cabinet space is precious in a small kitchen, so it’s important to make the most of it. One way to do this is by using risers inside your cabinets. This allows you to stack items like plates and bowls without taking up too much space.

Another option is to install pull-out shelves. This makes it easier to access items that are stored in the back of the cabinet without having to take everything out first.

Use Drawer Dividers

Drawers can quickly become a mess in a small kitchen. That’s why it’s important to use drawer dividers to keep everything in its place. This is especially useful for storing utensils, as it prevents them from getting tangled up.

You can also use drawer dividers to store other items like baking sheets, cutting boards, and even Tupperware lids. This will make it easier to find what you need and prevent clutter from accumulating.

Get Creative with Storage Units

If you still need more storage space in your small kitchen, consider renting a storage unit. This is a great option for storing items that you don’t use on a regular basis, like holiday dishes or small appliances.

At U-Lock Mini Storage, we offer a variety of storage unit sizes to fit your needs. Our facilities include storage units in Victoria, storage units in Parksville, storage units in Nanaimo, storage units in Burnaby, storage units in White Rock and Surrey, and storage units in Chilliwack.

In addition to renting a storage unit, you can also get creative with other types of storage units. For example, you can use a bookshelf to store dishes or a wine rack to store bottles and glasses. The possibilities are endless!

Use Multi-Purpose Items

When you’re working with a small kitchen, it’s important to make every item count. That’s why it’s a good idea to invest in multi-purpose items. For example, you can get a cutting board that also doubles as a serving tray.

You can also use a utensil holder as a vase for flowers or a Mason jar as a drinking glass. This not only saves space, but it also adds a personal touch to your kitchen.

In conclusion, a small kitchen doesn’t have to be a source of frustration. By using vertical space, maximizing cabinet space, using drawer dividers, getting creative with storage units, and using multi-purpose items, you can make the most of the space you have while keeping your kitchen organized and functional. And if you still need more storage space, consider renting a storage unit from U-Lock Mini Storage.