5 Tips for Keeping Your Kid’s Room Organized

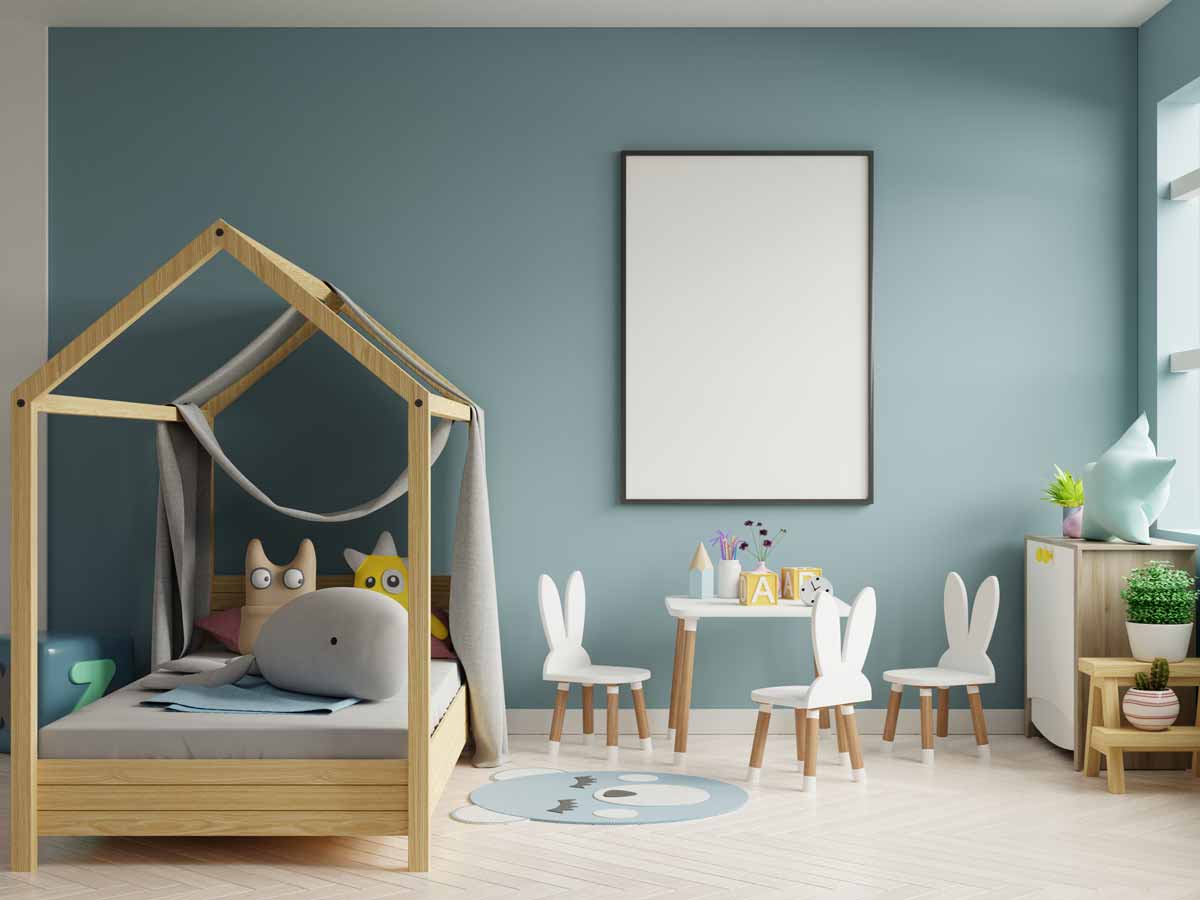
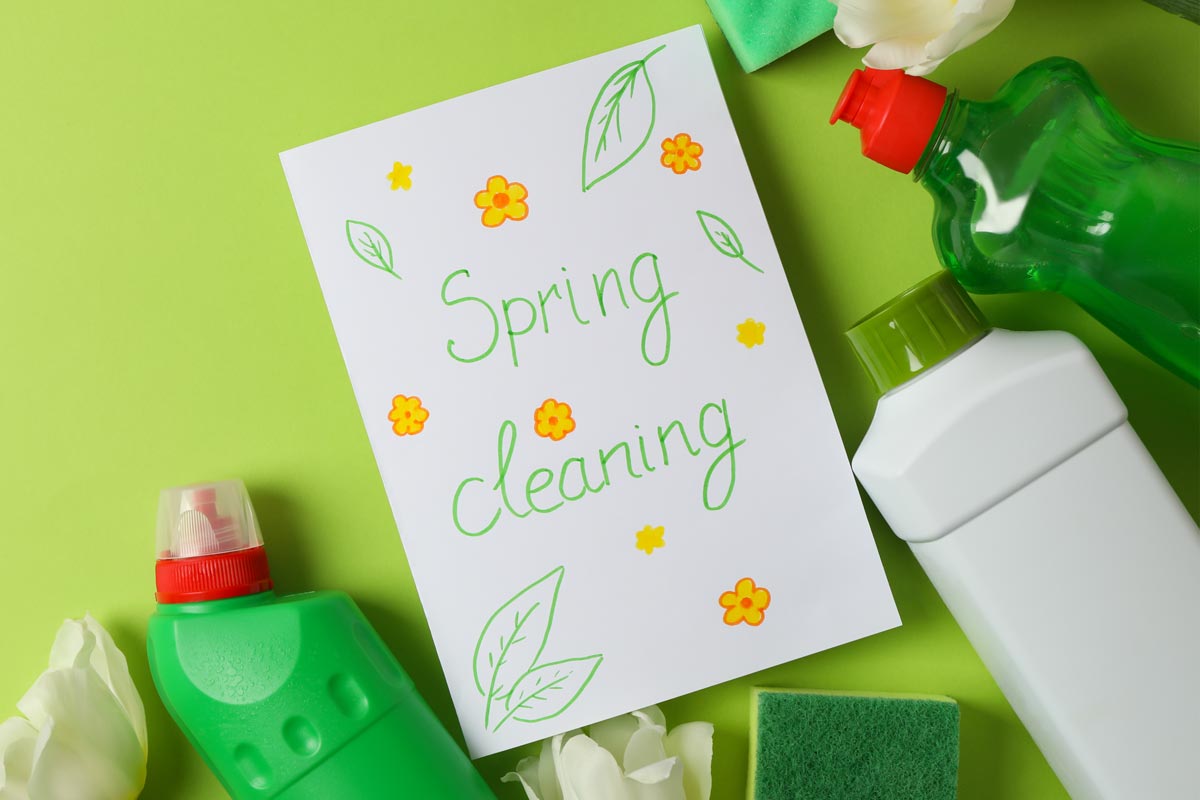
Picture this: a room with clothes and shoes strewn about, clippings of your kid’s last craft project, piles of school supplies and what seems to be an endless collection of toys. Sound familiar? How many times have we walked into this scene, spent what feels like ages tidying up, only to find the exact same scene a few minutes later? Between chores, school and bedtime activities, keeping our kids’ rooms organized can be a challenge.

Instead of spending your next weekend stacking toys and other belongings for the umpteenth time, check out these 5 tips to keep your kid’s room organized year round!
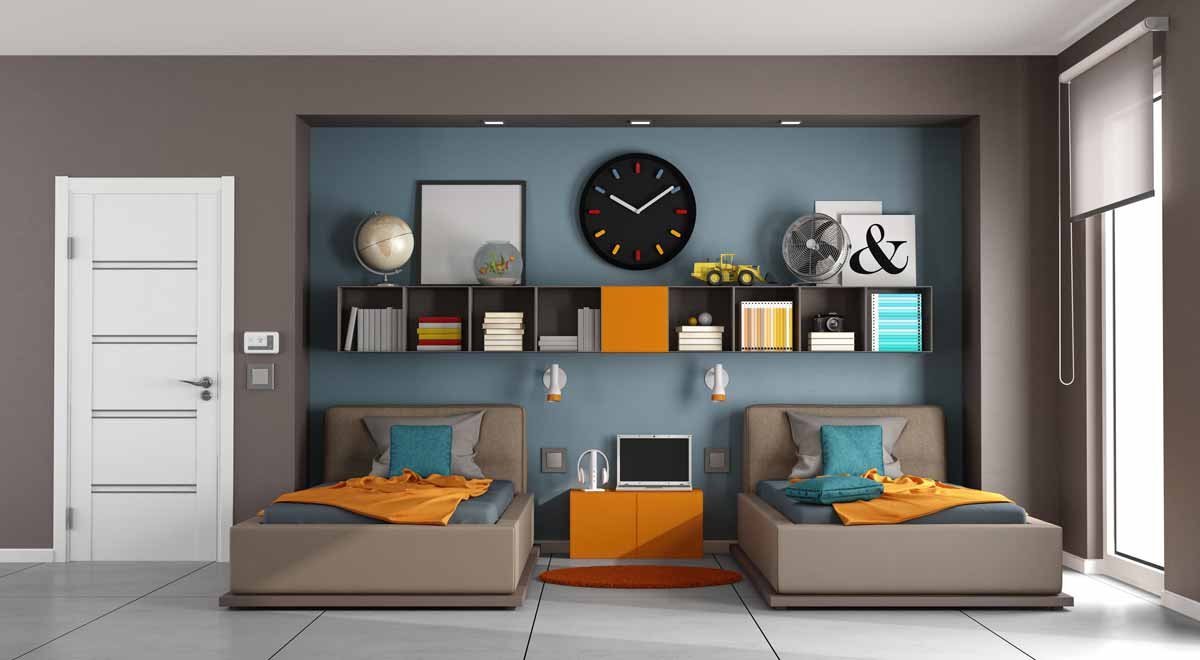
Use Your Wall Space

With most of the mess in your kid’s room taking up the floor, using the wall space can be a big help. Extra tip: consider using the wall behind the door!

To do so, you can install bookshelves that will be useful to store reading and colouring books, notebooks and other materials your kid might need for homework assignments. Organizing the bookshelves with your child at the start of the school year can help create a good habit to keep their materials tidy.

To install your bookshelves, you’ll need baseboard or moulding pieces, aluminum track and wall anchors, saw, drill, hammer and screws.

  • Measure and cut the aluminum track and baseboard to fit your wall space.
  • Insert the wall anchors and mount the track on the wall with screws.
  • Secure the baseboard pieces onto the aluminum track. You can use screws or construction glue for this.
  • Fill up with your child’s favourite books. Place those materials your kid uses the most at a height where they can easily be reached; place those books seldom used higher up.

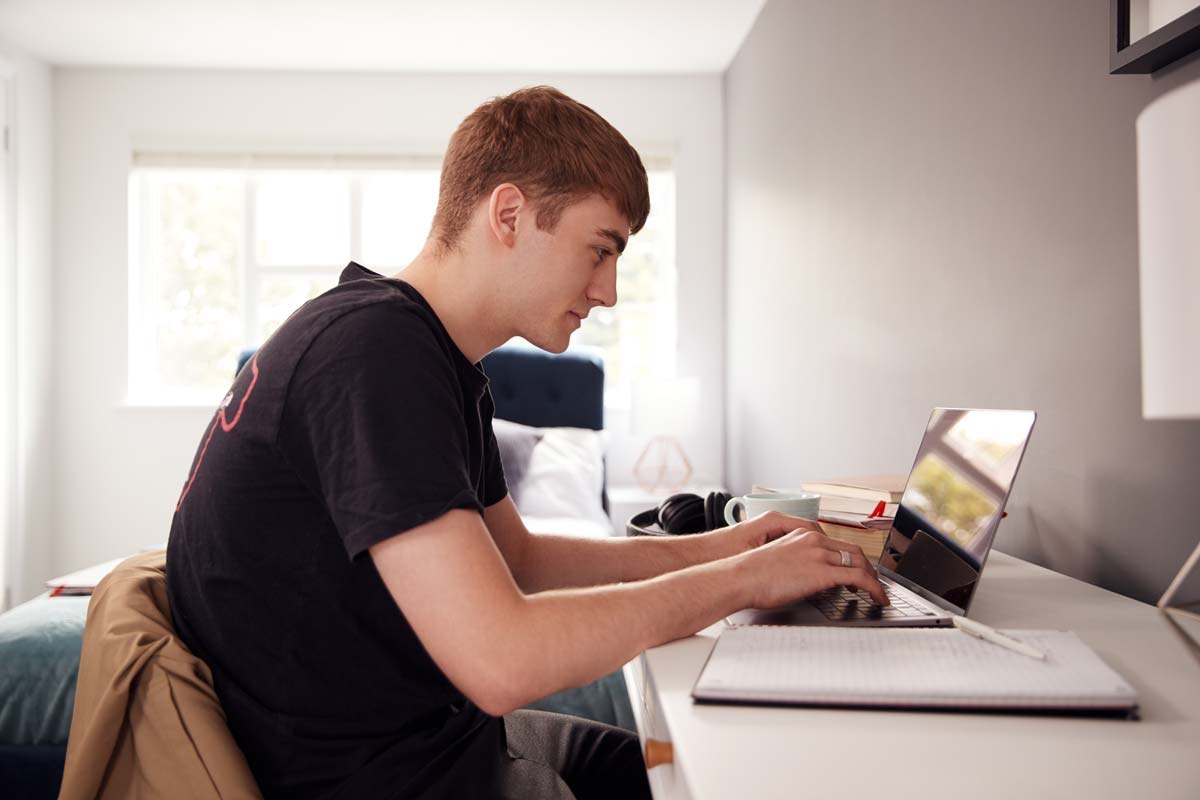
Designate and Set Up a Workstation

One of the keys to keep the mess away is to establish spaces for different activities and supplies. For example, setting up a workspace for your kid to do homework, colour or do crafts can help keep all the necessary supplies in one place.

You can set up a desk or worktable for your kid to have a surface of their own for their activities. If you have limited space, consider using a folding table or fold-up desk that can be attached to the wall and put away when not in use.

At this workstation, you can also set up a DIY organizer for all your kid’s supplies. You can keep it simple and use containers found in your own home. Here are a few storage solutions and ideas to consider:

  • Use muffin trays for smaller supplies like paper clips, sharpeners and erasers.
  • Clean and remove the label of soup or veggie cans. Glue Velcro or magnets to attach the cans to a board where they can be attached when not in use. These are perfect for supplies like pencils, scissors and crayons.
  • Install a magnetic bar and use metal tins you can detach.
  • For older kids, try repurposing glass jars where they can clearly see their supplies.
  • Find inexpensive baskets or caddies to store larger supplies like glue, scrap paper and ribbon.

Whichever DIY idea you use, make sure to clearly label each container to keep everything organized. Painting containers and labelling them with your kid can be a very fun activity!

Use Mobile Storage for Toys

Once playtime is over, you might find your kid’s room looking like a toy tornado just came right through. For a quick (and, honestly, kind of fun) way to clean up, you can create your own mobile containers that can fit under the bed or at the bottom of your closet, where your kid can easily reach them. You can have your kid roll the containers around and placing toys in them before bedtime!

To create your own mobile storage, you’ll need some containers (drawers, shallow bins, crates or even baskets), glue or a drill and screws, and some casters (wheels) to attach to the bottom.

  • Flip your container upside down and mark the 4 corners of your container where you’ll attach the casters.
  • If you’re using wooden containers, attach the casters using the drill and screws. If you’re using plastic bins or baskets, you can simply use glue to attach them to the bottom.
  • For a personalized look, you can paint your containers to match your kid’s room décor!

Set Up A Grab-and-go Station

Your kid’s backpack, jacket and lunchbox need a home within your home. To avoid finding a trail of belongings when returning home or running around in the morning in search of a lunchbox, set up a station where these can be stored.

You can create your own station using hanging hooks:

  • For lighter items, you can use contact glue hooks on a strip of corkboard.
  • For a sturdier station, you can use a wooden board and attach it to the wall, using a drill and screws. Then, attach hanging hooks onto the board using short screws.
  • Make sure to install these hooks at a height your child can easily reach.

For heavier items, you can add a few cubbies to store loaded backpacks, rainboots or any sports gear your kids need.
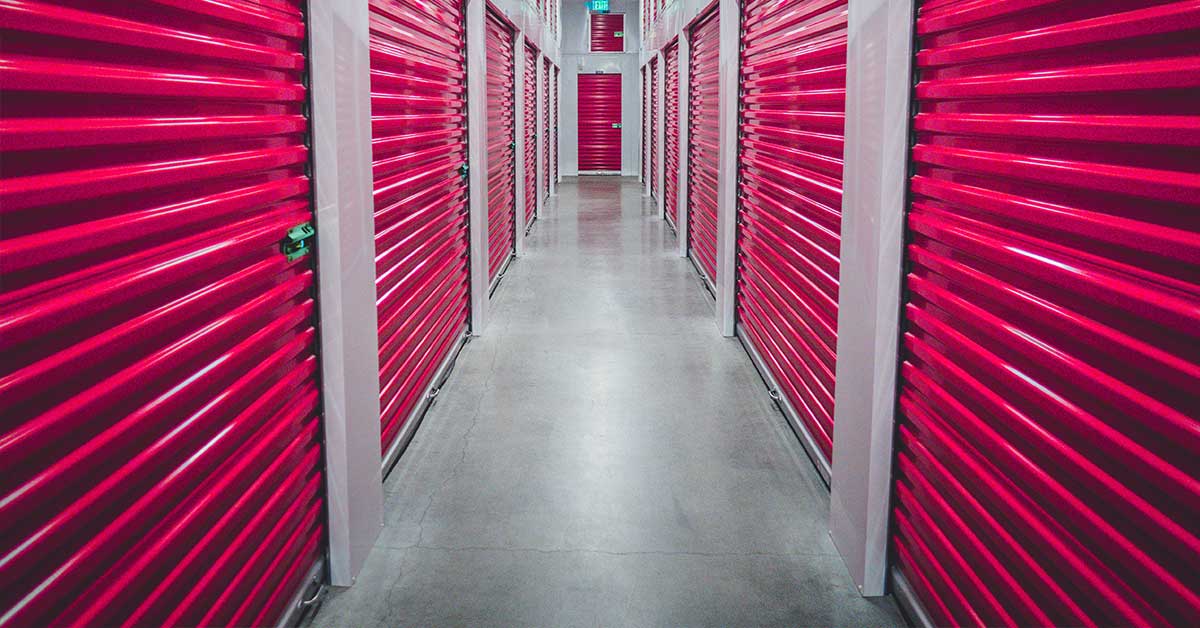
Rent A Storage Unit

Sometimes you might simply run out of space to store all your kid’s belongings, even after tidying up. In this case, you can rent a storage unit to get the necessary additional space for those extra items you might not need right away, but which you can still easily access whenever you need them. Many storage facilities, such as U-Lock Mini Storage offer a variety of size options and month-to-month rental so you can get the storage unit that best fits your needs, for however long you need it.

At U-Lock Mini Storage, we have storage facilities across Greater Vancouver and Vancouver Island. Our facilities include storage units Victoria, storage units Parksville, storage units Nanaimo, storage units Burnaby,storage units White Rock and Surrey, and storage units Chilliwack. Contact us if you have any questions!

Children love playtime, but they can easily lose interest when it’s clean-up time. Have fun! Turning cleaning into a game by using a timer or playing find & fetch games will make the job enjoyable.

By using these tips, you can be off to a good start to help your children keep their spaces tidy for longer and build good habits and organization skills that can last a lifetime.

How to Declutter and Keep Your Home Organized During the Holiday Season

When it comes to decluttering and organizing our homes, we might sometimes set the bar too high and end up ditching the task soon after. Between work, school, family duties and daily errands, the reality is that most of us don’t have the dedicated time to spend organizing and decluttering. This means we simply have to learn to organize on the go!

Decluttering doesn’t have to be the difficult and unachievable task we sometimes make it out to be. Instead of trying to tackle it in one go, taking a few conscious steps on your day-to-day will simplify organizing in the long run. As you prepare for the coming holiday season and start decorating your home, focus on making some conscious planning to save your time and energy – you’ll thank yourself in the seasons ahead!

Here are five tips to start decluttering and keep your home organized during the holiday season.

Organize While Packing and Unpacking Christmas Decorations

We all have found that broken bauble or an elf with a missing leg that have stayed around creating clutter. When you’re getting ready to decorate your home for Christmas and have taken out boxes with decorations, start by sorting out what you need and what you don’t as you go. Keep a bin nearby and fill it with things you don’t need or use anymore as you unpack, and either donate or throw it out right away.

When it’s time to put away your decorations, make sure to label each bin and box and note what items you’re putting in it. You can even number each container to identify it or label it with the room where you usually set up those decorations. Keep a list of containers and their contents in the garage or closet where you store them; that way you’ll know where everything is next year!

Clear up as You Wrap Christmas Presents

As you’re wrapping all your gifts, avoid keeping those bits and pieces you won’t use again. Immediately toss out old, wrinkled wrapping paper, short or mangled pieces of ribbon and damaged tags and cards.

Simplify your wrapping game by using an over-the-door organizer or a DIY wrapping station. You can streamline your wrapping by getting neutral wrapping paper like brown or white that you can use all year with seasonal or themed ribbon.

Declutter When You Entertain Guests

When you invite guests over for holiday get-togethers, make note of what you no longer need to prepare for entertaining. Donate any utensils or dishes you haven’t used in a while to cook or serve and get rid of broken items or sets with missing pieces you can’t use anymore.

Conversely, if you noticed you were missing a utensil or platter that would have made preparation easier for you, or if you need to replace a broken item, take note. Then, look out for end-of-year sales or new-year deals to find these missing items to be ready next year.

Reorganize Your Holiday Baking Supplies

Christmas cooking and baking often require special ingredients and utensils that you might not use the rest of the year; this can result in cabinets full of old spices, unused or expired baking ingredients and burnt or sticky items that were used once and forgotten after. As you start planning your baked goods for the season, throw out any items you don’t need or can’t use anymore, and make a list of what you’ll need for this year’s special meals.

As you shop for new ingredients and start your seasonal baking, plan ahead and store your fresh ingredients in air-tight glass or plastic containers to preserve them longer and keep them organized in your pantry or cabinet. When you are done with your holiday cooking and baking, throw out any ingredients you know will go stale before next year’s holiday season. 

Rent a Storage Unit

Sometimes you might run out of space for all those holiday items you only need once a year, especially if you live in a smaller space where every inch counts. Other times, it might be hard to let go of decorations and items with sentimental value. In these cases, you can rent a storage unit to safely store all your seasonal belongings until next year, with the ability to easily access them in case you need them before. Many storage facilities, such as U-Lock Mini Storage offer a variety of storage unit sizes to choose from for your storage needs. A month-to-month rental mode allows you to store your belongings for however long you need.

At U-Lock Mini Storage, we have storage facilities across Greater

Vancouver and Vancouver Island. Our facilities include storage units Victoria,storage units Parksville, storage units Nanaimo, storage units Burnaby, storage units White Rock and Surrey, and storage units Chilliwack. Contact us if you have any questions!

Above all, make reorganizing and decluttering an enjoyable activity that won’t take hours of your time; you can even get your family involved and make it a seasonal tradition! Taking these small steps as you go through the holidays will make a big difference in the long run.

How to Keep Your Dorm Organized

Whether you’re planning for your first term in college or looking for a better way to organize your current dorm room, it’s important to maximize your living space.

Any available space in a student’s dorm room gets quickly cut in half when boarding with a roommate. This means it is crucial to make the most of every inch and effectively use the space available. For this, check out these tips to organize your dorm and keep it that way!

Reclaim Your Floor Space

It’s simple – use bed risers. It’s surprising how much floor space can be made available under dorm room beds. Bed risers might only lift your bed a few inches, but this provides plenty of extra space for flat or smaller items that might not fit elsewhere. You can also use this space to store seasonal items or items you only need every so often.

Need more space? Use a loft bed. This solution provides way more under-the-bed space that can be used for a desk or work table, a couch or more storage like a tall boy dresser. For this, you’ll need to remove the bottom bunk to free up the space. You can choose to go for a DIY project and personalize this space for your needs.

However, if you’re looking for something simpler, a futon is a great, versatile option. It can help you save space during the day and transform into a full-sized bed at night.

Use Your Wall Space

When trying to maximize your dorm room space, making use of your walls is essential. You can choose from a variety of removable attachments to keep your desk and countertops clear. Here are a few options for your wall:

Magnetic board or strips. You can keep items organized above your desk by attaching a magnetic strip to the wall where you can attach metal containers for your supplies and other small items – you can even use it to keep your keys in a handy place. Alternatively, you can hang a magnetic white board on your wall where you can both make notes with erasable markers and use magnets to attach notes. Some boards even have a cork section attached where you can use thumbtacks to pin papers and notes.

Removable pods. Small things can quickly stack up and become a messy pile. For these trinkets, you can use stick-on pods or containers that you can attach to your wall or on the side of your desk,

Adhesive hooks. You might not be able to nail or drill anything to your dorm room walls, but you can still use adhesive hooks that you can remove when it’s time to leave. Adhesive hooks are a great temporary solution that can easily be installed. You can attach these to your walls, door, cabinets or the side of your desk to hold anything from your headphones next to your bed to your jacket behind the door.

Make The Most Out of Your Closet Space

You can maximize your closet space using your hangers and other attachments in effective ways. Check out a few tips to make the most out of your closet:

Stack your hangers with pop can tabs. You can collect a few pop tabs to slip through the hanger hook and you’ll be able to hang another hanger onto the tab. You can use two or three tabs as the height of your closet allows. That way, you will use more vertical space and save space on your rod.

Use a pocket organizer. You can use the inside of your closet door to hang a pocket organizer where you can store shoes, socks, totes and any other belongings that you can’t hang elsewhere.

Use tension rods. You can get extra hanging space at the bottom of your closet by attaching a tension rod below for shorter items. You can also use tension rods to create some shelving below for your shoes without having to nail anything! 

Use multi-purpose storage

There are additional multi-functional solutions that can add storage space within your limited dorm room space. Here are a few pieces to consider:

Storage tables or ottomans. In a reduced space, it’s beneficial to choose items that have more than one function. Ottomans and tables with storage are a perfect example that you can use to store extra accessories and stash blankets, shoes or clothing you don’t need immediately.

Organize with caddies. Not only are shower caddies a great item to repurpose anywhere in your room for extra wall storage, but they are also easy to find and easy to install and remove. You can also use some bed caddies to store your charger, books and phone instead of using a nightstand to save some space by your bed.

Door-handing organizers. Just like the closet pocket organizer, you can use door-hanging organizers behind your dorm room door. Here, you can keep your items ready to go out of the dorm room in the morning. Keep a few pairs of shoes, bags and other items that you’ll need for the day.

Use Dividers to Avoid Messy Drawers

Keeping your drawers tidy will save you tons of time in the long run. Instead of spending half your morning looking for a matching pair of socks, use drawer divider inserts to keep your clothes organized. This will also help you keep your drawers organized for longer, as you’ll know exactly where everything goes when it’s time to put the laundry away.

While you can purchase these divider inserts in your nearest hardware or homeware store, you can also create your own using cardboard or foam core to create your own compartments.

Rent A Storage Unit

Sometimes the space available to you in your dorm room might just not be enough for all your belongings. For those extra items and even furniture, you can rent a storage unit to safely store them. You can use the storage unit to store all your seasonal belongings, your sports gear while not in use and even use it to temporary store your things while you rearrange your dorm room Many storage facilities, such as U-Lock Mini Storage offer a variety of storage unit sizes and a month-to-month rental so you can find exactly what you need.

At U-Lock Mini Storage, we have storage facilities across Greater Vancouver and Vancouver Island. Our facilities include storage units Victoria, storage units Parksville, storage units Nanaimo, storage units Burnaby, storage units White Rock and Surrey, and storage units Chilliwack. Contact us if you have any questions!

Making the most of your dorm room space is important, especially since you will be spending

your time here for the next few years. As you go through college, you might make changes and upgrades to adapt to your different academic activities and needs. With these few tips, you can take some steps that will help you keep your space organized during your stay!

5 Tips for a Clutter-Free Kid Zone

It’s back-to-school season and many families are getting their children ready to return to their fall schedules and routines.

It’s back-to-school season and many families are getting their children ready to return to their fall schedules and routines. This is also a great time to start thinking about cleaning and decluttering kid zones at home. An organized playroom and effective clean-up routines can help children feel prepared to return to their school activities while relieving stress off parents.

To keep a clutter-free kid zone at home, we have put together five tips for you. 

Think Twice Before Buying More Items

One of the main reasons why children’s areas become cluttered and messy is an excess of toys and other belongings. To combat and prevent this, make a conscious effort to buy less and encourage creative and recreational activities more. Of course, new toys are always exciting, but too many too often might cause children to lose interest quickly and they might not value their toys as much. Instead, encourage your children to use what they have and use their imagination to come up with different ways of playing with what’s around. Buying less can help children be satisfied and more creative with less, rather than always wanting and expecting the newest and latest toys.

Encourage Good Habits

Make a habit of having a clean-up session every day with your kids. A great and easy goal would be to have them put away their toys every night before bed, or after playtime. Doing this consistently every day will help your kids develop organization habits that they can use at different stages of their lives. Having daily clean-up time also helps to keep clutter under control, rather than letting the clutter build up for weeks until it becomes a stressful factor at home.

Regift And Donate

Getting new toys also provides the perfect opportunity to donate to others. Include your children in this process by getting them excited about donating toys to children who need them, or regifting to someone who can give their toys a second round of love. Besides helping keep their space decluttered, this is a great way to teach kids about generosity and selflessness.

Designate Zones 

Whenever possible, divide and assign spaces in children’s rooms for different purposes. They can have a zone to play with costumes, a zone for all building block sets, a zone for arts and crafts supplies and a zone to keep all their sports gear, for example. Having clearly designated zones can help children know where to find their toys when it’s playtime and where to put them away at clean-up time.

Rent A Storage Unit

Sometimes there simply isn’t enough space to store all your children’s belongings. When this happens, you can rent a storage unit. With a storage unit you will get the additional space you need for those extra items while having ease of access whenever you need them. Many storage facilities, such as U-Lock Mini Storage, offer month-to-month rental so you can rent a storage unit for however long you need it! 

At U-Lock Mini Storage, we have storage facilities across Greater Vancouver and Vancouver Island. Our facilities include self storage Victoria, self storage Parksville, self storage Nanaimo, self storage Burnaby, self storage White Rock and Surrey, and self storage Chilliwack. Contact us if you have any questions!

6 Nursery Room Organization Tips to Save Space at Home

To help you make the most of your nursery space and stay organized, here are six organization tips for you!

A nursery can be the coziest, most charming room in the house, but it can also be the smallest. If you live in a smaller place, you might even be sharing some of the master bedroom space with the new baby, so effective storage solutions are essential.

You will want to have the perfect nursery ready to welcome the new family member. However, it’s no surprise that babies come with a lot of stuff and need a lot of supplies and, before you know it, your nursery may be full to the brim with items. 

To help you make the most of your nursery space and stay organized, here are six organization tips for you!

Store Excess Items in Bins under the Crib

When you are tight on space, it’s crucial to make the most of every square foot you have. The space beneath the crib is a great spot to store extra items that you might not need right away. Use bins to store extra diapers, wipes, out-of-season clothes and formula. Choosing clear plastic bins allows you to easily find what is stored in each bin. 

If these plastic bins are throwing the look of your nursery off, you can use a crib skirt to hide them underneath. Alternatively, you can use nice woven baskets or decorative cloth bins. 

Keep Supplies in A Shower Caddy

Diapers are an everyday essential and they need to be kept handy. If your changing station is lacking diaper storage, or additional space for other supplies, try using a shower caddy. You can hang the caddy on a wall nearby where you can easily reach for a fresh diaper or wipe when your baby needs a change. This way, you’ll add useful vertical storage to your space. You can even give the caddy a coat of paint to make it match your nursery’s colour scheme and decor!

Use A Tension Rod to Hang Baby Shoes

Baby shoes might well be the second cutest thing in your nursery, after your baby. However, the tiny shoes might get easily mixed up or lost if you have them stashed in a corner or drawer. To keep them organized, you can install a tension rod in the room (the closet is an ideal place) and add curtain clips to hold the shoes. Hang each pair with the clips and make it easier for you to choose a pair for your baby’s outfit.

Sort Baby Clothes by Size And Season

Babies grow fast! This means going through several items in their wardrobe as they outgrow smaller clothing. To keep up with their pace, sort clothes by size and place them in plastic bins or drawers in your closet. It’s best to keep clothes upright to easily see and reach for each outfit. This way, you can rotate through each size as your baby grows and move the smaller items into self storage. 

Use Bins Or Baskets for Accessible Toy Storage

Before your baby is even born, you’re going to deal with a growing toy collection. It’s important to keep them tidy and in one place to avoid hazards and clutter. To do so, you can use baskets, tubs or bins. 

Placing these containers on or near the ground will allow your baby to easily access them at the crawling and walking stages. Not only will your baby be able to reach these containers, but you can also use them to build good habits to put toys away and tidy up after playtime.

Rent A Storage Unit

Another great option for you to free up space in your nursery and home, is to rent a storage unit. If you have items sitting around that you don’t often need or use, you can store them in a storage unit for a short or long term, and access these items whenever you need to.

At U-Lock Mini Storage, we offer storage units across Greater Vancouver and Greater Vancouver Island. We offer self storage Burnaby, self storage South Surrey and White Rock, self storage Chilliwack, self storage Nanaimo, self storage Parksville, and self storage Victoria. Book a storage unit today! Contact us if you have any questions.

5 Basement Organization and Storage Tips

If you find yourself in the middle of a cluttered, dusty basement, you’re not alone. Messy basements are more common than we’d like to admit. We often dump unnecessary belongings into the basement with the idea that we’ll get to organizing later.

If you find yourself in the middle of a cluttered, dusty basement, you’re not alone. Messy basements are more common than we’d like to admit. We often dump unnecessary belongings into the basement with the idea that we’ll get to organizing later. However, between work and other activities in our lives, we often neglect this space in our house. 

To help you bring your basement back to life for your family to enjoy a space for entertainment and other activities, we have five basement organization tips for you.

Get Rid of Items You Don’t Need

The first step to organize your basement is purging and cleaning. It’s important to take note of what you have, what you need and what you don’t.

Spend a couple of days doing a thorough inventory of everything in your basement. As you go through your belongings, evaluate each item and decide whether to keep it and find a spot for it, or to get rid of it by donating, recycling or throwing it in the trash.

Making these decisions might be hard, so here are a few things to consider that might help you through the process:

Have you used it recently? Is it valuable to you? If not, it’s time to donate, recycle or chuck it.

Is this an item you seldom use and can borrow from someone should you need it? Give it to someone who might use it more often and lend it to you now and then.

Do you need a whole set, or can you keep just the essential? Pick what you need and get rid of the rest.

As you go, clean the areas that have cleared out after getting rid of items. This will make the cleaning process less challenging 

Create a Storage Layout

Now that your basement is clean, dry and hopefully smelling better, it’s time to create a storage plan. Think of all the things you decided to keep after the decluttering phase and create categories you can sort them into. Then, designate zones where you will store certain types of items. These zones can be split into seasons (spring, summer, fall, winter) or types (toys, Christmas, vacationing, etc.). Mark each zone with clear labels and start sorting your items into each of these zones.

Having these zones will help keep the clutter under control by making it easier to know where to find items you need, and where to put them away once you don’t need them. 

Install Sturdy Shelving and Use Air-tight Containers

Once you have sorted your items into their corresponding zones, you can decide the size and amount of containers you will need for each zone. It’s best to use clear plastic containers so you can see what’s stored inside. Additionally, containers should be air-tight to keep out pests like silverfish and other bugs. Add a few desiccant packets to control moisture and fill the containers with your items. 

Now that you know how many zones and containers you have, it’s time to get some sturdy and durable shelving and hardware. Open shelving is a great choice because it allows air circulation while providing ease of access to your items. You can also install a few hooks to hang bags and other lighter items. 

Do Yearly Inventory Checks

You have invested time and effort to clean up and organize your basement; now, keep it that way. Set a reminder to review the stored inventory once a year, and continue to get rid of items that you no longer need. Get into the habit of going through what you already have before adding new items to your basement. 

Rent A Storage Unit

If you have too many items in your basement or in your home that you want to keep, or if you want to free up more space for other activities, you can rent a storage unit to store your belongings. You can rent a storage unit size according to your needs. For example, if you only have a few items to store, you can choose a 5 x 5 feet storage unit. If you have more or bigger items to store, you can rent a 5 x 8 feet storage unit, or bigger. 

At U-Lock Mini Storage, we have storage facilities across Greater Vancouver and Vancouver Island. Our facilities include self storage Victoria, self storage Parksville, self storage Nanaimo, self storage Burnaby, self storage White Rock and Surrey, and self storage Chilliwack. Contact us if you have any questions!

11 Tips for Spring Cleaning 2022

his an annual ritual or you’re attempting to tackle the process of spring cleaning for the first time, we hope these tips inspire you to create a home you love.

When life gives you lemons, make lemonade. If you’ve been forced indoors by Coronavirus, you’ve been given the gift of time. Pair it with these spring cleaning tips, and you have what it takes to make home a place you’ll never want to leave, even after shelter-in-place orders have been lifted!

We’ve rounded up our favorite spring cleaning tips, plus a tried and true process to get you started. Whether you’re part of the 75% of people that make this an annual ritual or you’re attempting to tackle the process of spring cleaning for the first time, we hope these tips inspire you to create a home you love.

1. Start by breaking out the warm weather equipment

Isn’t it exciting to pull out these reminders of the fun to come this summer? Pull them out and hose them down.

  • Grills
  • Lawnmowers
  • Sports equipment
  • Patio furniture

2. Put away winter

Now that you’ve pulled out your warm weather equipment, you’ve made room to stow away cold weather items. Here are some things you can happily store away in a basement, attic or storage unit until next fall:

  • Heavy outerwear
  • Winter boots
  • Snowblowers
  • Shovels
  • Winter sports gear

3. Switch out linens with lighter fabrics and colors

Say hello to spring indoors, too. Put away the heavy bedding, fuzzy throws and velvet pillows to help rid your home of the winter feel. Change up your curtains in favor of a lighter, sheer material to let in more light. Add some plants, mirrors and lighter wall decor to create an open, airy feel for your family and your guests. You’ll immediately feel less cluttered.

4. Switch out your wardrobe

Did you know the average person only wears 20% of the clothes in their closet on a regular basis? If you come across clothing that you haven’t worn in the last 6-12 months, it’s time to get rid of it! Consider donating these clothes to a local Goodwill.

Besides downsizing your wardrobe to make outfit decisions easier, you can take this time to pack up your fuzzy sweaters and bring out the shorts. Here’s a guide to storing winter clothing in the warmer months.

5. Skip the sentimentals

If time is limited for your spring cleaning process, we recommend skipping sentimental items until you can dedicate time to really go through them. After surveying 2,000 Americans on the stuff they store and why, we learned that sentimental connections to our belongings make the decluttering process much more difficult.

6. Dust before vacuuming

In case your mother never taught you this nugget of wisdom, we thought we’d include it in here. You stir up dust as you try to remove it and it will most likely settle on the ground. You can take care of it after dusting by vacuuming (or sweeping).

Baseboards and ceiling fans are two areas that often get neglected when it comes to dusting. They are also areas that collect a disturbing amount of dust. So don’t forget to add them to your spring cleaning list!

7. Don’t forget the windows

Over the long winter months, debris like pollen, dirt and dust can build up along your window sills. Cleaning the interior and exterior on a routine basis will not only let more light into your home but ensure that your windows easily open and close. Fresh air will also reduce allergens and germs in mattresses, even if you can’t haul them outside.

8. Even furniture can use a spring refresh

Just because you don’t see stains doesn’t mean your couch is free of dust, crumbs, dirt, animal fur or allergens. Many hardware stores, including major chains like Lowe’s and Home Depot, rent upholstery cleaning machines, which can help clean your favorite room in a matter of minutes. At the very least, be sure to vacuum upholstered surfaces.

9. Extend the lifetime of your mattress by cleaning and flipping it

Despite linens and mattress pads, mattresses are still popular places for dead skin cells, sweat and dust. First, take a vacuum over both sides of your mattress to collect any dust or debris. If it’s nice enough outside, the best remedy for your mattress is some fresh air and sunlight.

To spot clean a mattress, mix the following ingredients in a spray bottle:

  • 16 oz. hydrogen peroxide
  • 2 tablespoons baking soda
  • 2 drops of dish soap
  • Soak the stained area with the mixture, and let it sit for 30-60 minutes before pressing it off with a clean towel. This solution has been magical for my children’s mattresses!

While you’re flipping your mattress, do yourself a favor and leave it on the opposite side. Over time, pressure leads to irregular wear. Flipping it twice a year can help keep it in tip-top shape while also making sure it’s clean.

10. Wipe down lightbulbs

It may seem like overkill, but it’s really so simple to do. Dirty light bulbs emit 20 percent less light than clean ones. Brighten up your home by giving your lightbulbs a wipe with a damp microfiber cloth. I bet it will take you only five minutes to wipe each bulb in your home. Need to keep a kid busy during quarantine? This is an easy job for any kid elementary-age and up!

11. Use salt and grapefruit to remove grime from showers and tubs

The grit of the salt plus the acid of the grapefruit cut down on elbow grease needed. It’ll also give your bathroom that extra boost of freshness that is usually only obtained with heavily scented candles and not-so-friendly cleaning products.

9 Tips for Organizing Your Kitchen To Maximize Space

Here are our top nine kitchen organization tips to try today.

“Everything in its place and a place for everything” isn’t just a saying Grandma cross-stitched on a pillow. It’s also the best of the kitchen organization tips you can apply. For most people, though, an organized kitchen is a dream to be achieved someday after retirement when the kids have moved out and life is less hectic. Reversing years of bad organization habits seems like too daunting a task to ever really tackle.

But it is possible to keep the heart of your home clear of clutter without spending weeks on boring cleaning projects. It’s time to stop procrastinating, be honest about what you really need, and reclaim the space you use to cook meals and enjoy time with family and friends. Here are our top nine kitchen organization tips to try today.

1. Start by reflecting on how your family uses the kitchen

Today’s kitchen isn’t just for food storage and cooking. It’s often part of your living area and is a multi-purpose space.

Consider all the functions your space serves. You might have a sitting area off the kitchen that comes in handy for entertaining. Does part of your kitchen end up being used as a workspace? Write down the ways that you use the area to ensure that your kitchen organization accommodates the needs of your family.

Here are some common uses for kitchens to think about:

  • Create a place to store items used when entertaining. From a bottle opener and wine glasses to coasters and serving trays, select an accessible spot for your things so it’s easy to welcome friends and family.
  • If your dining area is combined with your kitchen, keep placemats and napkins in an easy to reach spot so little hands can help set the table while you cook.
  • If your kitchen island is often turned into a game area or homework zone, keep favorite games in a nearby cabinet or have a bin with pencils, pens, and notebooks easy to grab.

2. Think like a minimalist

Your first step toward kitchen freedom is to give the whole space an objective assessment. Forget about any sentimentality attached to the items you’ve kept all these years, and give serious thought to what you actually use on a regular basis.

Take a cue from minimalists, people who do their best not to acquire more than they need and to get rid of anything lacking a clear purpose. Apply this logic to your kitchen by:

  • Setting aside your most-used tools and appliances.
  • Identifying duplicates.
  • Determining which single-function items can be replaced or tossed.
  • Throwing out old, broken, rusty, or hopelessly dirty items.
  • This gives you a starting point to work from as you create a plan of attack to organize your kitchen space.

3. Emphasize ease of use

Every kitchen has a few key items used to prepare and eat meals on a regular basis. Put the items you use most in easy-to-reach places to keep from tossing everything out of the way to get to that one bowl you need. Remember the old rule: “Like goes with like,” a key philosophy when it comes to storage units.

Make it as easy as possible to find your favorite items by storing dishes in one place and cups in another, and putting similar preparation tools together. This not only speeds up meal prep and table setting but also streamlines the appearance of your kitchen.

4. De-Clutter drawer space

As you’re rearranging the items you use most to keep the kitchen organized, you’ll inevitably run across clutter in drawers, including the ubiquitous “junk drawer.” Take the opportunity to clear out the messes you find as part of your overall cleaning strategy.

If you need to pop out to the store to grab some inexpensive drawer organizers, do it. These simple plastic or wooden inserts can turn even the messiest drawer into a neat and tidy space. Get one for silverware and another for everyday items such as tape, twist ties, and rubber bands.

Some utensils take up too much space when stored in drawers. Big items such as ladles and potato mashers are better kept on a mounted wall rack or simple suction hangers stuck to the side of a cabinet.

5. Categorize cabinets for better kitchen organization

Keeping with the “like goes with like” rule, move on from the drawers to the cabinets. Pick logical spots for plates, glasses, and mugs, and place all the similar items together. Organizing in this way will unearth some things you haven’t seen in years. If you find something you have little or no memory of using, ask yourself these questions:

  • Do you really need or even want promotional items from companies you rarely do business with?
  • Will you ever use “kiddie” dishes and cups again?
  • Is there any reason to keep lids with no matching pots?
  • Which items can be donated or given away to clear out more cabinet space?

This keeps you in the minimalist mindset and allows you to let go of items you have no reason to keep without the nagging feeling that you might use them at some unforeseeable time in the future.

6. Power up your shelving

Now that you’ve sorted through most of the overwhelming volume of stuff in the kitchen, you should have a good idea of what items you’re going to keep. It’s time to turn your attention to the shelves and see how best to organize this space in your kitchen.

Open shelving creates a sense of light and space and gives you a place to showcase your everyday dishes when not in use. Mix in decorative, functional items like cookbooks, gourmet olive oils, and flowers for an attractive display. Make sure you give these shelves a good wipe-down at least once a month to address dust, grease, and grime.

If you don’t have the space for an open shelf unit, make an effort to empty space on the shelves you do have. Use decorative plates, potted plants, or small appliances to break up larger groups of items and improve the appearance.

7. Make the most of your storage

If your kitchen has deep storage drawers, roll-out shelves, or a swing-out pantry, organizing your kitchen will be a breeze. But don’t panic if your kitchen is not outfitted with these great storage hacks. You can easily find perfect kitchen organization solutions that will help make life easier.

Shelf inserts can be used to create additional storage space, cookware organizers make it easy to grab the pan you need, and a tiered organizer helps keep things visible and organized.

8. Consider the countertops

Your countertop can make a big difference in the way you feel about your kitchen. Clutter-free counters make preparing food and cooking meals easier, and they reduce the possibility of accidents. They also improve the visual appeal of the space.

These kitchen organization tips can help you tidy your counter space:

  • Clean up the sink and counter as soon as possible after preparing food.
  • Store containers of flour, sugar, and other dry goods in cabinets or the pantry.
  • Consider moving knives out of large wooden blocks and into drawers.
  • Put away small appliances, such as the toaster, when not in use.
  • If you don’t have the option of putting everything out of sight, consider mounting as many things off the counter as you can. By mounting things off the counter, the area still appears less cluttered and gives you more space to work when cooking.

9. Make a seasonal storage plan

You don’t need the cookie jar you only use for one month around Christmas cluttering your in-home storage space all year long. Get it out of the kitchen along with those holiday dish towels and fancy serving platters and into a shed or self-storage unit. Keep an eye out for other holiday-specific items, such as cookie presses or candy molds, and store them somewhere else until you actually need them.

When the holidays roll around, get what you need out of storage and wash it thoroughly. Find a good temporary spot for it in the kitchen, and put it back into storage as soon as you no longer need it. Leaving seasonal items out for too long can start the cycle of clutter all over again.

6 Reasons Why You Shouldn’t Live in a Storage Unit

Have you ever wondered if living in a storage unit was legal or not? If you found yourself suddenly without a home due to financial hardship or natural disaster, where would you go? For some, that could mean living with family or friends. For others, that could be living in a storage unit where they keep their belongings. While a storage unit might seem like a viable option, it’s not sustainable or safe.

Have you ever wondered if living in a storage unit was legal or not? If you found yourself suddenly without a home due to financial hardship or natural disaster, where would you go? For some, that could mean living with family or friends. For others, that could be living in a storage unit where they keep their belongings. While a storage unit might seem like a viable option, it’s not sustainable or safe.

It’s illegal

Living in a storage unit is prohibited by various local and federal housing laws. Storage facilities must evict any person they find living on the premises to comply with the law and most insurance policies.

There are good reasons why this restriction is in place. For starters, living in a storage unit is unsafe.

The doors lock from the outside

Most storage unit doors are garage-style roll-up doors that lock from the outside. Also, in many storage facilities, management is tasked with doing multiple walkthroughs throughout their shift to ensure all the doors are closed and locked. This task is performed for the safety of renters’ belongings, but if you’re living inside a unit, there’s a chance you could get locked inside. At best, this could mean you feel slightly claustrophobic for the night. At worst, this could result in fatality.

There are no windows or natural light

Natural light is an essential component of psychological well-being. People living in a storage unit could find themselves depressed, lethargic, and claustrophobic due to their living conditions. This lack of space and light can be especially detrimental to children.

Storage units don’t have running water

If you opt to live in a storage unit, you’ll have to spend most of your day outside the unit or sit inside it quietly and discreetly since doing so is illegal. Either way, you’ll be limited on options for bathing and using the bathroom. Your personal hygiene and health can suffer  without access to fresh, running water.

Cooking inside a unit is a fire hazard

There are a variety of activities that could cause a fire inside a storage unit. One of the most probable is people attempting to use stoves or grills without proper ventilation. Unfortunately, people living in a storage unit are commonly to blame for fires breaking out.

You will get caught

The viral Youtube video above talks about the need to be invisible to be able to live in a storage unit. Most storage facilities are well equipped with cameras and security protocols, so it’s unlikely a person will get away with hiding out in a storage unit for long. Once caught, you can face civil charges and could lose access to your unit and your belongings.
We offer storage solutions to our clients across Greater Vancouver, Vancouver Island and the Fraser Valley with storage units in Chilliwack (Chilliwack U-Lock Mini Storage), South Surrey and White Rock (White Rock U-Lock Mini Storage), Burnaby and Vancouver (Burnaby U-Lock Mini Storage), Victoria (Victoria U-Lock Mini Storage), Nanaimo (Nanaimo U-Lock Mini Storage) and Parksville (Parksville U-Lock Mini Storage).

How to Rent Furniture for Staging

To stage your home, it is ideal to rent elegant, posh furniture. Here are step-by-step instructions you can follow to rent furniture for staging!

Staging a home involves adding beautiful and attractive furniture and accessories in order to accentuate the beauty and size of your home and thus attract potential buyers. To stage your home, it is ideal to rent elegant, posh furniture. Here are step-by-step instructions you can follow to rent furniture for staging!

1. Look Up Furniture Rental Companies in Your Area

Run a search for “furniture rentals” plus the name of your town, city or province. Furniture rental businesses are more common than you might expect, as they cater to businesses, realtors, individual homeowners and even members of the entertainment industry. This means that you are likely to find one near you. For example, you can search for “Burnaby furniture rentals” or “Vancouver furniture rentals”.

2. Visit a Company’s Website for More Information

Pick a rental company from your search results to take a closer look at what they have to offer. Viewing a company’s website will give you a better idea of the exact services they provide, as well as their signature decorating style and general price range. Additionally, look at their Google Reviews or Yelp reviews to gain a better understanding of their reputation and reliability. Finally, compare several different rental companies (assuming you have more than a couple to choose from) to find one that best suits your sensibilities and budget.

3. Call the Company to Enquire about the Furniture

If you like what you see on a furniture rental company’s website, call them and discuss the details of the rental process. A quick chat will give you a chance to learn about the company’s products and policies and ask whatever questions you might have. Some good questions to ask include “Where do you source your furniture?”, “Is it possible to pick out pieces individually?” and “How long does a standard rental agreement last?”

4. Assess How much Furniture You Need

If you are staging your whole house for walkthroughs, you will want to have enough pieces on display to tie each room together. This will call for large, coordinated items like beds, tables and seating areas. If you are only planning on listing 1 or 2 rooms, you can probably get away with renting a single set of furnishings in your preferred theme.

5. Pick out Furniture by Style

The pieces leased by furniture rental companies are typically grouped together as packages based on popular decorating themes such as modern, rustic, urban and townhouse. Browsing by style is probably the easiest way to find furniture that compliments your living space without having to select each item individually. When you shop by style, you will receive a complete set of furnishings that have been curated based on a common look.

Furniture packages are often categorized by room, which makes it possible to mix-and-match different styles between rooms. For example, you might fill your living room with contemporary minimalist pieces and select a rustic French chateau motif for the master bedroom.

6. Compare Items from the Company’s Inventory Individually

Online catalogues, showrooms and stores make it easy to shop for furniture one piece at a time. There, you will find items separated by type, such as beds, sofas, tables, chairs and lighting fixtures. Some companies even stock functional appliances and other accessories like wall art and miscellaneous decorations. Be sure to write down the name or item number of each piece along with its price to keep track of how much you can expect to spend. Picking out furniture individually can be useful when you are sprucing up a room that does not fall into one of the usual categories, or if you want to put your own personal touch on your living space. In some cases, it may be possible to add individual items to a pre-curated package for an additional charge.

7. Shop for Accessories to Provide the Finishing Touches

Before you check out, take a look at some of the decorative items the company has available, like rugs, mirrors, throw pillows, potted plants and eye-catching knickknacks. These items are perfect for giving homes a lived-in quality, especially in cozy, intimate quarters like bedrooms and bathrooms.

Consider spending a little extra on a few wall hangings, sculptures, and other pieces of artwork. The right selections can make any home feel more cultured.

Depending on how extensive a company’s inventory is, you might even be able to find small accessories like woven baskets, candles and flower arrangements for as little as a few dollars apiece.

8. Rent a Storage Unit to Store Existing Furniture

To make room for rental furniture, you can store your existing furniture in a storage unit. You can select a storage unit that suits the number of pieces of furniture you have. Our large storage units start from 8 feet by 13 feet to meet your space needs. If you want even more space, you can opt for our extra large storage units, which start from 10 feet by 21 feet. We are proud to serve clients across Greater Vancouver and Greater Vancouver Island by establishing self-storage facilities in the following areas:

  1. Chilliwack U-Lock Mini Storage
  2. Vancouver/Burnaby U-Lock Mini Storage
  3. South Surrey/White Rock U-Lock Mini Storage
  4. Parksville U-Lock Mini Storage
  5. Nanaimo U-Lock Mini Storage
  6. Victoria U-Lock Mini Storage